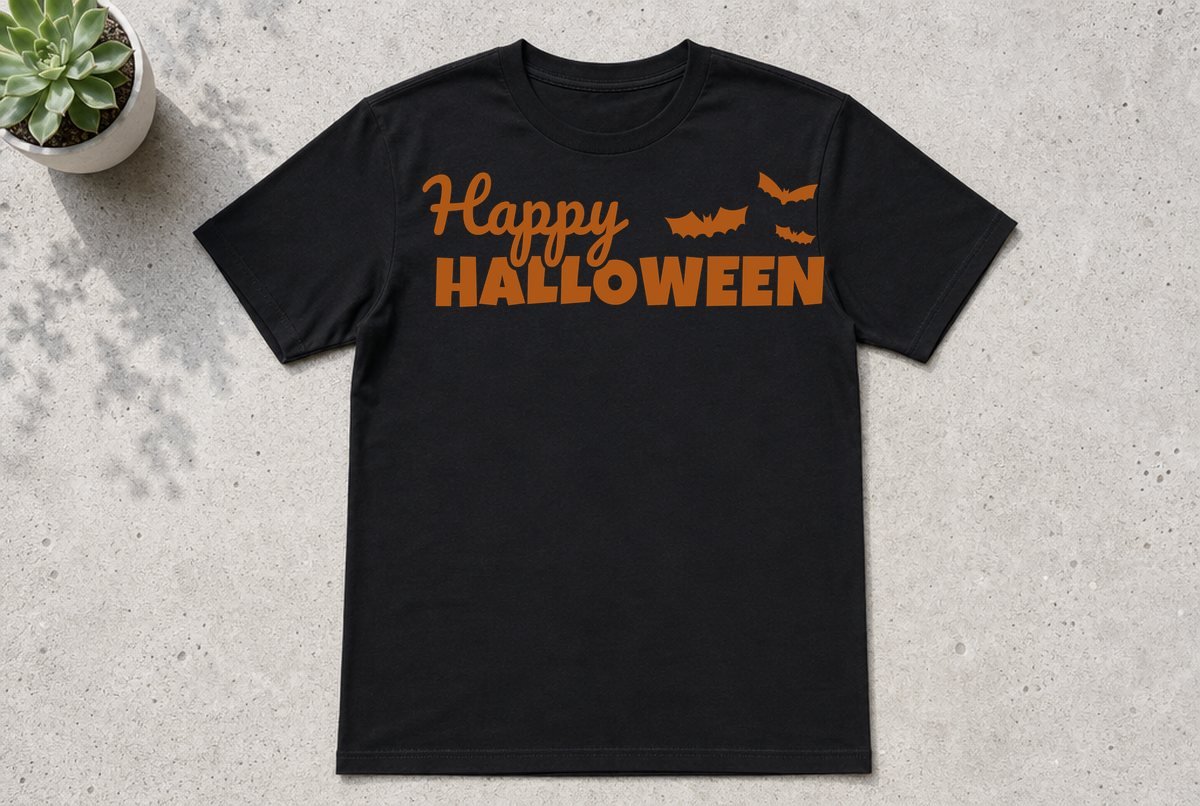
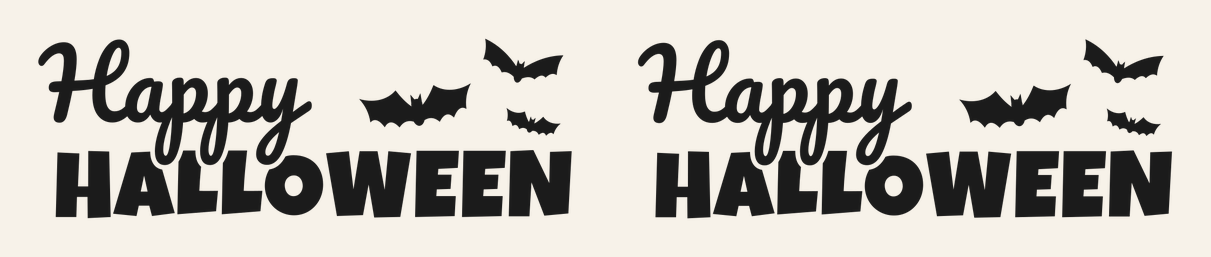
This is the Halloween phrase everyone looks for in October: a loopy script “Happy” stacked over a chunky, rounded “HALLOWEEN,” with three bats flying off to the right. The heavy bottom line carries the phrase, so it holds up on a porch sign as well as on a shirt.
The download has two versions of the same layout. One is 10.1 x 3.46 in, built for iron-on (HTV) on an adult shirt. The other is 11.1 x 3.8 in, built for adhesive vinyl on a sign, door or window. Both are a single color, so you only need one sheet of material.
| File | Size | Material | Layers | Check |
|---|---|---|---|---|
| Happy Halloween, adult shirt | 10.12 × 3.5 in | HTV (iron-on) | 1 layer | ✓ Cut-checked |
| Happy Halloween, sign | 11.12 × 3.88 in | Vinyl | 1 layer | ✓ Cut-checked |
How this file is built
Everything is on one layer, welded into closed outlines, so Design Space treats it as a single cut. Counting the letter holes and the three bats, that layer has 22 closed outlines, and none of them is a stray hairline stroke.
The two sizes share one layout, but each got its own check. Iron-on needs a wider minimum stroke than adhesive vinyl, so we checked the shirt version against the HTV limits at 10.1 in and the sign version against the vinyl limits at 11.1 in. Both passed: no strokes too thin to cut, no pieces too small to weed, no background slivers too narrow to pick out. (The file check page explains what those tests look for.)
The script is where a phrase like this usually goes wrong. Thin connecting strokes between cursive letters are the first thing to tear when you weed, so the “Happy” here uses a heavier script with thick joins between the letters. The bats sit apart from the text, so you can pull them off and use them somewhere else.
Also in the ZIP: DXF copies for Silhouette Studio Basic Edition, PNG previews, and a README listing each file’s size.
What you need
- For the shirt: iron-on (HTV), a shirt or sweatshirt, a heat press or iron, a pressing cloth or protective sheet
- For the sign: permanent adhesive vinyl (outdoor) or removable vinyl (indoor, seasonal), transfer tape, a painted board, door or window
- A standard grip mat
- A weeding hook and a scraper
How to make it
- Upload the SVG. In Design Space, click Upload in the panel on the left of the Canvas, pick the shirt or sign SVG from the unzipped folder, and add it to your Canvas. Our upload guide walks through desktop and the app.
- Check the size. Select the design and look at the width and height in the Edit toolbar. Keep the lock closed so it scales evenly. Leave the shirt file at 10.1 in wide or larger, and the sign file at 11.1 in or larger.
- Click Make and set up the mat. For iron-on, turn Mirror on for that mat. Design Space usually mirrors automatically once you pick an iron-on material, but look at the preview before you cut. Adhesive vinyl stays unmirrored.
- Pick your material and load it. Choose your exact material from the list (use Browse all materials if it isn’t under Popular). Iron-on goes on the mat with the shiny liner side down. Adhesive vinyl goes paper backing down.
- Weed. Pull the big background first, then the inside of the A and O, then the small loops in “Happy.” Leave the bats for last. How to weed vinyl has tricks for small holes.
- Apply. For the shirt, press using the settings for your iron-on and base material from Cricut’s Heat Guide (or your HTV maker’s instructions if you bought another brand). For the sign, lift the design with transfer tape, burnish it onto a clean, dry surface, and peel the tape back at a low angle.
On a shirt, the top of the design usually sits about three to four fingers below the collar. Fold the shirt in half to crease a center line, and match it to the middle of the full design, bats included. The bats push that midpoint a little right of where your eye expects it.
What size to cut it
| Project | File to use | Suggested width |
|---|---|---|
| Adult shirt (S to XL) | Shirt, HTV | 10.1 to 11 in |
| Adult sweatshirt or 2XL+ | Shirt, HTV | 11 to 11.5 in |
| Tote bag | Shirt, HTV | 10.1 to 11.5 in |
| Wood sign or porch board | Sign, vinyl | 11.1 in and up |
| Front door or window | Sign, vinyl | 11.1 in and up |
You’ll notice there’s no youth or mug row. At kid-shirt or mug widths, the loops in “Happy” and the wing tips on the smaller bats can drop below the widths we allow for cutting and weeding. We only checked it at the listed sizes, so we don’t recommend shrinking it. If you want a smaller Halloween shirt, the Hey Boo ghost SVG comes with an 8 in youth version, and a mug calls for a design built for mug size like the Spooky Season SVG.
Going bigger is fine for signs. Past about 11.5 in wide, though, it won’t fit on a 12 x 12 mat, so switch to a 12 x 24 mat or a longer roll of vinyl if your machine cuts without a mat.
Ways to change it up
Two colors on a sign. Duplicate the design on the Canvas and give the copies two colors, say black and orange. Select one copy, open Contour, and hide the three bats; on the other copy, hide everything except the bats. Line the copies up, and you get black lettering with orange bats. The bats don’t touch the text, so nothing overlaps and there’s no layering. (Cricut’s help page on using Contour shows the panel.)
Glitter or specialty HTV. The chunky HALLOWEEN letters can take glitter iron-on better than thin fonts can. Glitter HTV is thicker and more stubborn to weed, so give the “Happy” loops extra patience. Check the Heat Guide for that specific material, because specialty iron-on often presses differently from the everyday kind.
Just the bats. Hide the lettering with Contour and you have a small bat cluster for a pumpkin, a candy bowl or a treat bag. For bats on a window, the bat SVG for window clings has a full set built for that job.
If something goes wrong
If the loops in “Happy” come up with the weeded background, your blade probably didn’t cut all the way through at those tight curves. Lay the weeded piece back down, burnish it, and try a fresh or cleaner blade next time; Cricut not cutting through covers the other usual causes.
If the lettering reads backward once it’s off the liner, Mirror was off for the iron-on mat. That piece can’t be fixed, so recut it and glance at the mat preview before you cut next time.
Questions
Can I use this Happy Halloween SVG on a youth shirt?
We don’t recommend it. The file is checked at 10.1 in wide for iron-on, and shrinking it to youth widths can make the script loops too fine to cut and weed. The Hey Boo ghost SVG has a youth version checked at 8.1 in.
Should I use permanent or removable vinyl for a Halloween sign?
Removable vinyl is the easier pick for a sign you’ll reuse or change each year, especially indoors. Permanent vinyl holds up better outside. Our permanent vs removable vinyl guide covers the trade-offs.
Do I need to mirror this for vinyl?
Only for iron-on. Mirror the shirt file on the iron-on mat; leave adhesive vinyl unmirrored, unless you’re putting a decal on the inside of a window to be read from outside.
Can I sell shirts made with this file?
Yes, you can sell up to 500 finished handmade items per design. You can’t sell or share the digital file itself. The full terms are on our license page.