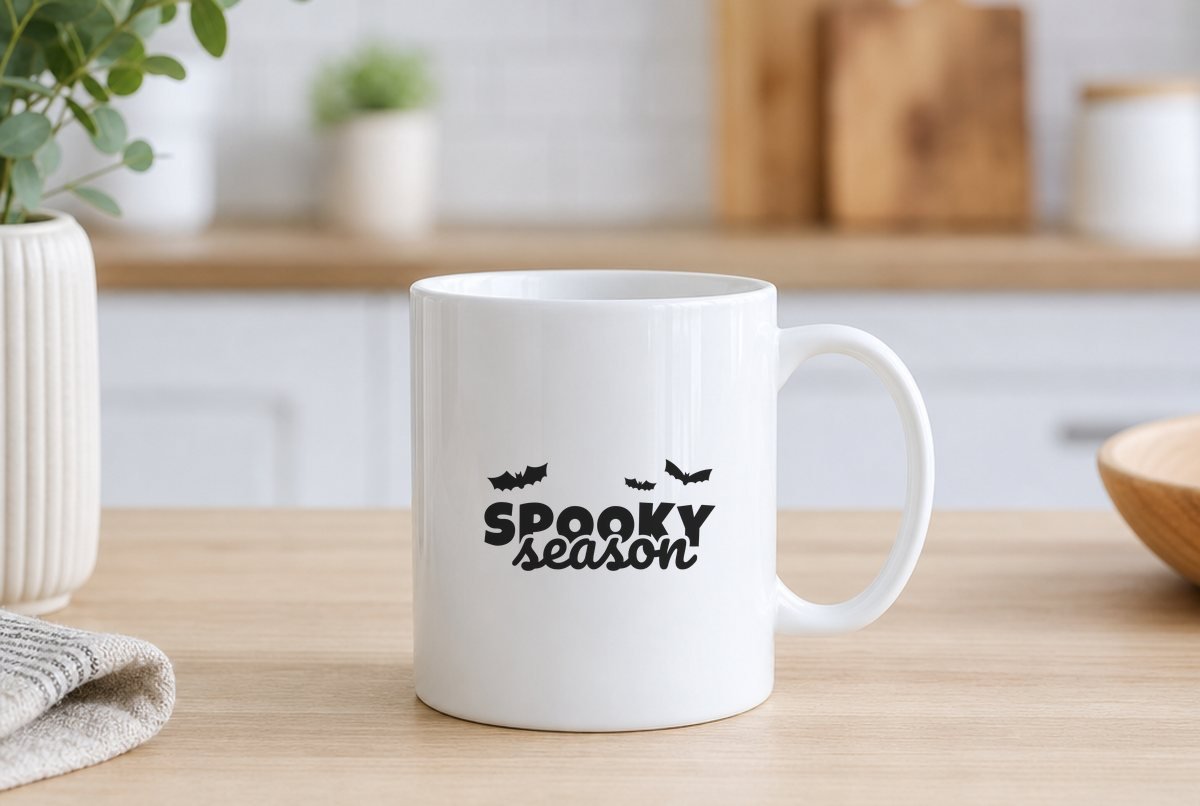
Short phrase, bold letters, three bats: that’s the whole brief for a Halloween mug, and it’s what this file does. “SPOOKY” sits in heavy rounded capitals, “season” swoops across the bottom in a thick brush script, and three small bats flap above the lettering.
It’s built for permanent adhesive vinyl on drinkware. The mug file is 3.35 x 1.68 inches, sized for the side of a standard 11 to 15 oz mug. The tumbler file is 2.85 x 1.44 inches, for skinny tumblers, glass cans and travel cups where the flat-ish area is narrower.

| File | Size | Material | Layers | Check |
|---|---|---|---|---|
| Spooky Season, 11-15 oz mug | 3.38 × 1.75 in | Vinyl | 1 layer | ✓ Cut-checked |
| Spooky Season, tumbler | 2.88 × 1.5 in | Vinyl | 1 layer | ✓ Cut-checked |
Why this design holds up at mug size
Mug decals are small, and small is where cut files usually fall apart. So we built this one around the size it’ll actually be used at, then checked it there.
The script “season” overlaps the bottom of “SPOOKY.” Instead of letting the two words run into one blob, the design cuts a thin gap around the script where it crosses the capitals, so both words stay readable. That gap is the tightest weeding in the file. Our cut check measures exactly this kind of sliver, and it passed at both listed sizes for adhesive vinyl.
The bats are each one closed shape, with the ears and wing points built into the outline. The smallest bat, in the middle, is the piece most likely to stick to your background vinyl while you weed, so peel slowly around it.
Both files are welded, one-color designs. What you see in the preview is what cuts.
What you need
- Permanent adhesive vinyl (black, or any color that contrasts with the mug)
- Ceramic mug or tumbler, washed and dried
- Rubbing alcohol and a lint-free cloth
- Standard grip cutting mat
- Transfer tape
- Weeding hook and scraper
- Small piece of masking tape for positioning
Putting it on a mug
- Upload. In Cricut Design Space, click Upload, then Browse, and choose the mug or tumbler SVG. Our upload guide goes through it step by step.
- Keep the size. The mug file opens at 3.35 inches wide. Don’t mirror it; adhesive vinyl goes on face up.
- Cut. Click Make It, pick the setting that matches your permanent vinyl, and cut. Two copies fit on a small scrap if you want both sides of the mug done.
- Weed. Remove the background first, then the counters in the O’s, P and “season.” Save the thin gap around the script for last and lift it out with the hook.
- Prep the mug. Wipe the area with rubbing alcohol and let it dry. Skin oil and dish soap residue are the usual reasons mug vinyl lifts at the edges.
- Apply from the center. Put transfer tape over the design and burnish. With the backing still on, tape it to the mug with a strip of masking tape across the top and check that it sits level with the rim. Flip it up on that tape hinge, peel off the backing, and lower the design back down, pressing the center first and then smoothing outward to each side. Burnish well and peel the transfer tape back slowly, flat against the mug.
Curved surfaces make vinyl want to wrinkle at the outer edges. At 3.35 inches wide this design is small enough to wrap a mug without much trouble, but if you scale it up, cut small slits in the transfer tape between the bats and between the words so each section can follow the curve on its own. We go deeper on this in how to put vinyl on a mug so it doesn’t bubble.
Sizes for other drinkware
| Item | File | Width |
|---|---|---|
| 11 oz or 15 oz mug | Mug | 3.35 in |
| 16 oz glass can | Mug | 3.35 in |
| Skinny tumbler, espresso cup | Tumbler | 2.85 in |
| Stemless wine glass | Tumbler | 2.85 in |
| Large tumbler, 30 oz and up | Mug, scaled up | 3.5 to 4 in |
| Canister, candle jar, pumpkin bucket | Mug, scaled up | 4 in or more |
Measure the flat or gently curved area of your piece before you commit. The one hard rule: don’t go smaller than 2.85 inches. That’s the smallest size we checked, and below it the gap around the script and the ears on the smallest bat get too fine to weed.
Care and changes
Permanent vinyl is water-resistant, but how it holds up to washing depends on the vinyl. Check the vinyl maker’s care instructions, including how long to wait before the first wash. Hand washing is the gentler choice either way.
Want a two-color version? Duplicate the design, then use Contour in the Layers panel to hide the bats on one copy and the lettering on the other. Cut the bats in orange or purple and the words in black. The bats don’t touch the letters, so the two colors sit side by side with no overlap to line up.
The same file also makes a quick treat-jar label, and it pairs with the bat SVG set if you want more bats trailing around the mug. For a hot drink theme, see But First, Coffee.
Questions
What size vinyl decal fits on a mug?
For a standard 11 to 15 oz mug, a design around 3 to 3.5 inches wide sits nicely on one side. This file’s mug version is 3.35 inches wide.
Do I mirror permanent vinyl for a mug?
No. Adhesive vinyl is applied face up, so cut it unmirrored. Mirroring is for iron-on and a few other transfer materials.
Is permanent vinyl dishwasher safe?
It depends on the vinyl. Check the maker’s care instructions; hand washing is the safer choice for most adhesive vinyl on mugs.