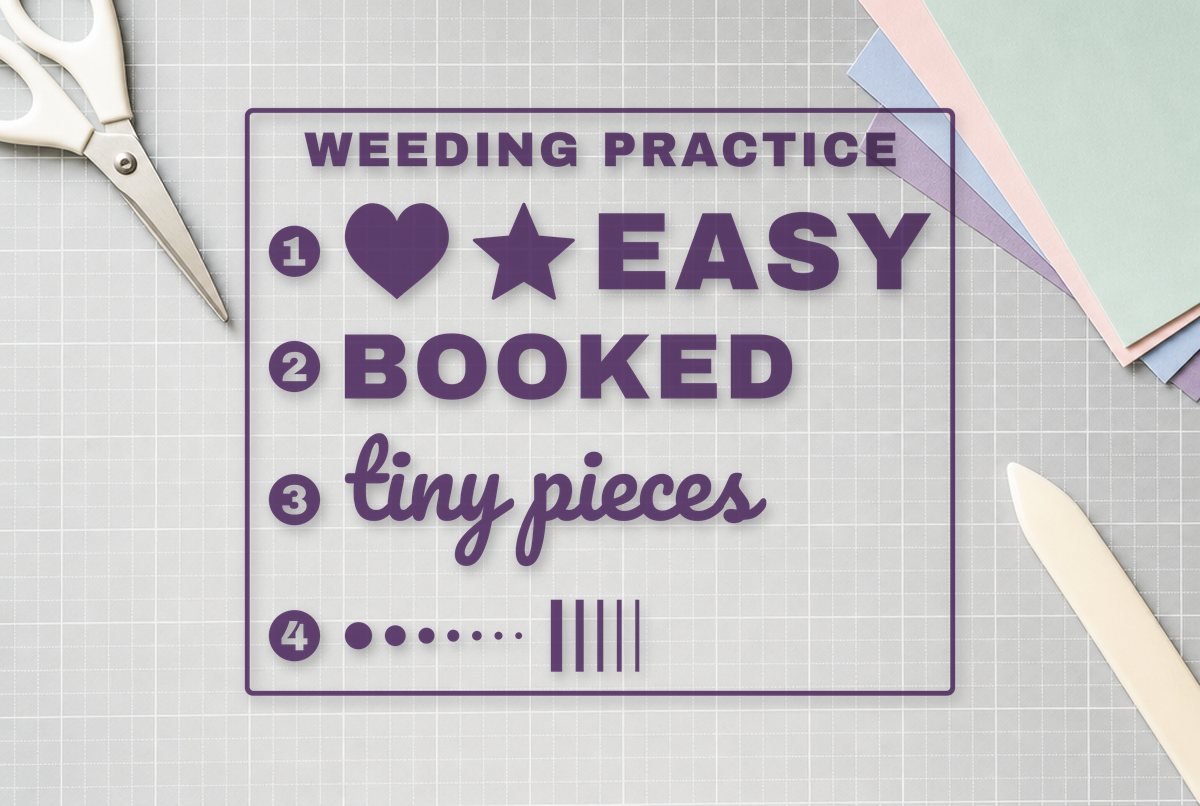
To weed vinyl, peel the big background away first, slowly and at a low angle, starting from a corner of a weeding box. Then pick out the small inside pieces with a hook. When a tiny piece of the design tries to lift with the background, stop, press it back down, and peel from a different direction.
For designs full of dots and thin lines, there’s a second method called reverse weeding, where transfer tape holds the design while you remove the waste. Both are easier to learn on a file built for practice than on a project you care about, so we made one with four levels that get harder as you go.
| File | Size | Material | Layers | Check |
|---|---|---|---|---|
| Weeding practice — four levels | 9 × 7.5 in | Vinyl | 1 layer | ✓ Cut-checked |
What’s on the practice sheet
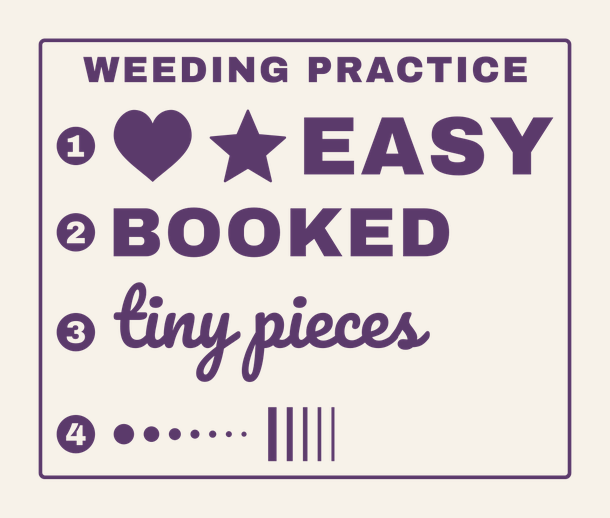
The file is 8.98 x 7.45 in, built for adhesive vinyl, and cuts as one layer. A thin frame runs around the whole thing as a weeding box. Inside it, under a “WEEDING PRACTICE” title, are four numbered rows:
- Level 1: a heart, a star and the word EASY in heavy block letters. Big shapes, wide gaps, one inside piece (the A).
- Level 2: BOOKED in the same block letters. Five inside pieces, called counters, sit in the B, the two Os and the D, and they all need to come out without taking the letters with them.
- Level 3: “tiny pieces” in a joined script. Now you’re dealing with narrow loops, curves that change direction, and two i-dots that are separate pieces of the design and have to stay behind.
- Level 4: a row of seven dots shrinking from 0.34 in across down to 0.085 in, then five stripes 0.9 in tall that narrow from 0.14 in wide down to 0.05 in.
Level 4 is deliberately close to the limit. The smallest dot and the thinnest stripe passed our automated check for adhesive vinyl at this size, but they sit near the smallest sizes vinyl will hold, so they behave the way small details in real designs do: they lift, curl and cling to the background. The number badges are practice too, since each number is cut out of a solid circle.
Please cut this file at its full size. Shrinking it pushes level 4 below what vinyl can hold, and then you’re practicing on a file that can’t work.
What you need
- Adhesive vinyl, a piece at least 9.5 x 8 in (any color; darker colors show cut lines more clearly)
- Standard grip mat
- Weeding hook
- Fine-point tweezers
- Transfer tape, for the reverse weeding test
- Scissors
- Good light: a daylight lamp, a bright window or a light pad
Before you weed: get a clean cut
Most weeding trouble starts at the cutting stage. If the blade didn’t cut all the way through the vinyl, no hook will save you, and pieces tear instead of lifting. If it cut too deep into the liner, small pieces come loose and wander.
So upload the file (our upload guide shows how), check that it reads about 9 x 7.5 in, pick your exact vinyl in the material list, and cut. Cricut’s material instructions recommend a small test cut to verify the setting, and it’s worth doing here too. If the test piece doesn’t release cleanly, this list of cutting fixes works through blade, mat and pressure.
After cutting, look at the sheet at an angle under a lamp. You should see every cut line. Cricut’s tips for its BrightPad light pad note that thick materials such as glitter iron-on often block light, and bending the material a little lets the light show through the cut paths. That bend trick helps under an ordinary lamp as well.
How to weed, level by level
- Trim the excess. Cut the sheet down with scissors, leaving a little vinyl outside the frame. A smaller sheet is easier to turn as you work.
- Clear the frame. Peel off any vinyl outside the frame. Then use the hook to lift an inside corner of the frame, where the frame meets the big background, and get a grip on the background with your fingers.
- Peel the background slowly and low. Pull it back over itself, close to the table, not straight up. Go slower than feels necessary. Keep your eyes on the edge where the background is leaving the liner, because that’s where problems show up first.
- Watch for lifting pieces. The moment any part of the design starts to rise with the background, stop. Lay the background back down, press the piece flat with the side of your hook, and continue from another angle, often from the opposite side of that piece.
- Finish level 1 and 2 counters. With the background gone, poke the hook into the middle of the counter in the A, lift it and drag it away. Then do the five counters in BOOKED. Aim for the center of each counter, never its edge, or you’ll dent the letter.
- Work through the script. In “tiny pieces”, clear the small loops one at a time. As you pass the two i-dots, hold each one down with the tip of the tweezers while the background pulls away from it.
- Try level 4 last. Peel the background toward the dots, not away from them, so each dot is pushed against the liner as the edge passes. For the stripes, peel along their length, top to bottom, rather than across them.
- Clear the number badges. Each number is a hole cut in a solid circle. Lift each number out with the hook; the circles stay.
Keep a scrap of the waste vinyl stuck to the back of your non-writing hand or the edge of the table. When you pull a tiny counter out, wipe the hook on it instead of flicking it, and it won’t end up stuck in the middle of your design.
Reverse weeding for tiny details
Regular weeding asks the liner to hold the small pieces while you pull the waste away. Reverse weeding flips that job to transfer tape, which usually grips small pieces better than the liner does. It’s the method to use when level 4, a fine script or confetti-style details keep lifting.
- Weed only the big background, the part outside the design. Leave the insides, the counters and the gaps between small pieces in place.
- Put transfer tape over the whole thing and burnish it firmly. See our guide to using transfer tape if you haven’t done this before.
- Turn it over, tape side down, and peel the liner away. Everything, design and remaining waste, is now on the tape with its sticky side facing you.
- Pick out the waste pieces from the back with the hook. The design stays stuck to the tape because it’s held by its whole surface.
- Apply the design the usual way.
Try it on level 4. Cut the sheet twice if you can spare the vinyl: weed one normally and reverse weed the other, then compare how many dots made it.
Reverse weeding exposes the sticky side of the vinyl while you work, so it grabs dust, hair and fingerprints. Work on a clean table, and don’t let the tape fold back on itself.
Normal vs reverse weeding
| Normal weeding | Reverse weeding | |
|---|---|---|
| What holds the design | The vinyl’s liner | Transfer tape |
| Best for | Bold shapes, block letters, most signs and decals | Small dots, thin script, lots of separate small pieces |
| Downside | Tiny pieces lift with the waste | Sticky side is exposed while you weed; uses tape |
| Works for iron-on? | Yes, the usual method | No; iron-on has its own sticky carrier sheet and needs no transfer tape |
Weeding iron-on is a little different
Iron-on (HTV) is cut shiny side down with the design mirrored, and it sits on a clear carrier sheet that’s slightly tacky. That tack helps hold small pieces in place while you weed. Two things catch people out. The design reads backward while you weed, so it’s easy to lose track of which bits are waste. And since the cut lines are on the dull side, they can be harder to see on light colors; tilt the sheet under a lamp. Our first Cricut shirt guide covers the rest of the iron-on process.
What went wrong, and the fix
| Problem | Likely cause | Fix |
|---|---|---|
| The background tears instead of peeling | Not cut all the way through | Test cut, adjust the setting or pressure, check the blade |
| Small pieces lift with the background | Peeling too fast or too steep, or peeling away from the piece | Peel slowly and low, toward the small piece; or reverse weed |
| Pieces wander on the liner | Cut went into the liner | Use a lighter setting on your next cut |
| Stripes or dots curl up | Close to the size limit for the material | Burnish them flat before peeling past; enlarge the design if it’s your own file |
| Can’t tell design from waste | Poor light, busy design | Keep the preview open on your screen and weed with it next to you |
Common mistakes
Weeding the wrong piece
This happens most with script and knockout designs. Before you start, pull up the design on your phone and keep it beside the vinyl. If you’ve already pulled a piece that belonged to the design, lay it back into its spot with tweezers right away; it will usually stay put until transfer tape picks it up.
Starting in the middle
Peeling from a random edge of a design means the first thing to lift is part of the design. A weeding box gives you a clean corner to start from. To add one to your own designs in Design Space, click Shapes on the left side of the Canvas, add a square, unlock its proportions, size it just bigger than your design, then select both and Attach them so the box cuts around the design instead of somewhere else on the mat.
Designs sized too small
Some designs are just too small for the material, and no technique fixes that. Our guide on how small vinyl text can go covers where the limits sit. Every file on Clean Cut SVG lists the size it was checked at; stay at or above it.
Questions
What does it mean to weed vinyl?
Weeding is removing the vinyl you don’t want after a cut, the background and the insides of letters, so only the design is left on the liner, ready for transfer tape or pressing.
How do I keep tiny pieces from lifting when I weed?
Peel the background slowly at a low angle and toward the small piece, and hold it down with tweezers as the edge passes. If it still lifts, reverse weed: put transfer tape on first, peel off the liner and remove the waste from the back.
What is reverse weeding?
Reverse weeding means covering the partly weeded vinyl with transfer tape, removing the liner, and then picking out the waste pieces from the sticky side. The tape holds the small pieces instead of the liner.
What is a weeding box?
A rectangle cut around a design. It gives you a clean corner to start peeling the background, and it keeps the waste from tearing into the design. Our practice file has one built in as a thin frame.