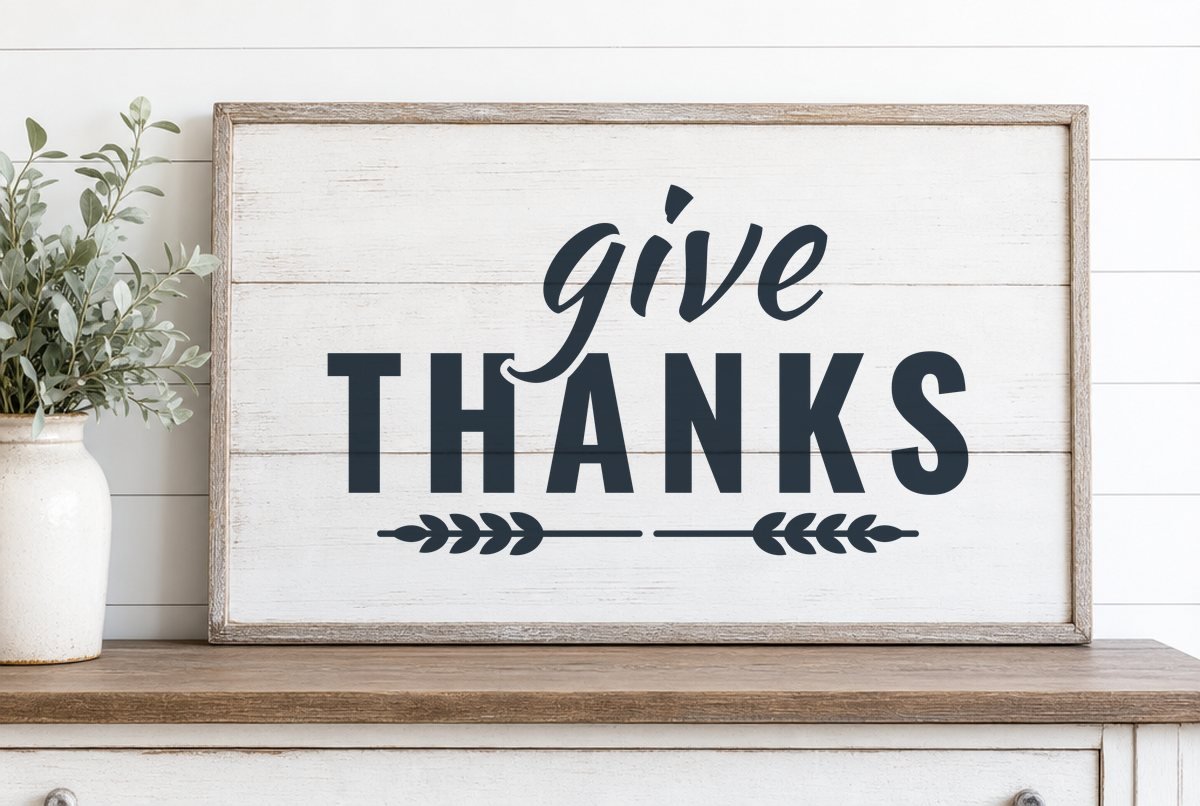
A slanted brush-script “give” sits on top of tall, narrow block capitals that spell “THANKS.” That’s the farmhouse look people want on a Thanksgiving mantel or entry table, and it’s built to be painted onto wood through a vinyl stencil rather than stuck on as a decal.
The download has two layouts. The horizontal one is 11.1 x 6.47 in, with a wheat sprig on each side of a thin rule underneath. The square one is 9.1 x 10.45 in, sized for a 12 in square board, with a tied bundle of three wheat stalks and two bare stems below the words. Both are one color and were checked at those sizes for stencil vinyl.
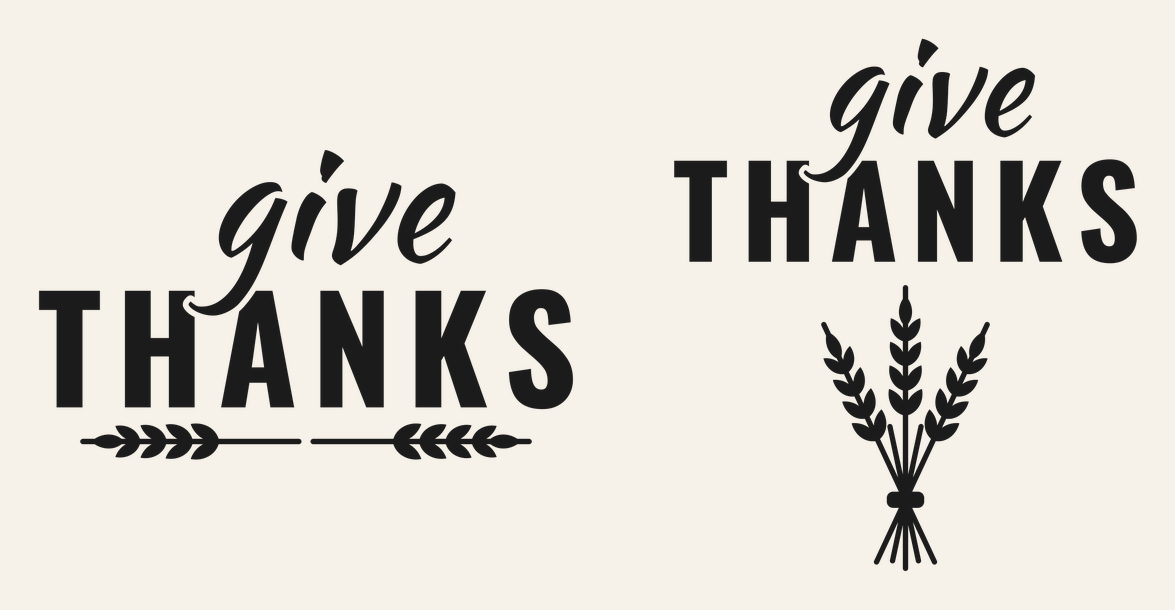
| File | Size | Material | Layers | Check |
|---|---|---|---|---|
| Give Thanks, horizontal wood sign | 11.12 × 6.5 in | Stencil | 1 layer | ✓ Cut-checked |
| Give Thanks, 12 in square sign | 9.12 × 10.5 in | Stencil | 1 layer | ✓ Cut-checked |
Why this one works as a stencil
A stencil turns the usual vinyl job inside out. You peel away the letters, paint fills the holes, and whatever stays stuck to the board keeps the paint off. So the pieces that matter most are the small bits of vinyl that have to stay put: the centers of both A’s in THANKS, the loop of the “e,” and the bowl of the “g.”
With stencil vinyl, those centers aren’t a problem. They’re cut from adhesive material, so the transfer tape carries them over in position and they stick where they land. Cut the same letters from cardstock or plastic and those centers would simply fall out, which is why old-style stencil fonts break each letter with bridges. Stencil vinyl lets this file keep the letters whole.
Each layout is a single welded layer with closed outlines: 15 in the horizontal version and 14 in the square one. We ran both through our check with stencil settings. They passed with no strokes too thin to cut, no pieces too small to weed and no gaps too narrow to pick out, which matters most on the wheat. Every wheat head has four pairs of pointed kernels plus one at the tip, spaced apart so each kernel reads on its own and the paint gaps between them stay open. The bundle’s stalks are thin, yet both layouts clear the minimums at their listed sizes.
The ZIP also includes DXF files for Silhouette Studio Basic Edition, PNG previews and a README with each file’s size.
What you need
- Stencil vinyl (adhesive, removable)
- Transfer tape
- A wood board or plaque, sanded, with any base paint or stain fully dry
- Acrylic craft paint and a stencil brush or foam dauber
- A standard grip mat, weeding hook and scraper
- A ruler or tape measure for centering
How to make the sign
- Pick your layout. The horizontal file suits a wide board; the square file suits a 12 x 12 in board. Upload it in Design Space with Upload on the left of the Canvas (full upload walkthrough).
- Keep the size. Check the width in the Edit toolbar with the lock closed. Start at 11.1 in for the horizontal file or 9.1 in wide for the square one. Bigger is fine if your board has room; smaller isn’t, since the wheat grains and stalks can drop below the cutting minimums.
- Cut. Click Make, leave Mirror off (stencil vinyl goes on face up, like adhesive vinyl), and choose your stencil material from the list. Load it on the mat with the liner down.
- Weed the design, not the background. Pull out the letters, the dot of the “i,” the rule lines and all the wheat shapes. Leave the big background on the liner, and leave the centers of the A’s, the “e” and the “g” in place. See how to weed vinyl if the tiny wheat grains fight you.
- Transfer to the board. Lay transfer tape over the whole stencil, burnish from the center out, then peel the liner away and position the stencil on the board. Burnish again, paying extra attention to every letter edge and each wheat grain, then peel the tape off at a low angle.
- Paint. Dab thin coats straight down with a mostly dry brush or dauber rather than brushing sideways, which can push paint under the edges. Add coats until the color is even.
- Peel. Cricut’s stencil instructions say to let the paint dry fully, then slowly peel the stencil away. Use your weeding hook to lift the small centers and any wheat bits left behind.
To keep edges crisp on a painted board, some crafters dab one thin coat of the board’s own base color over the stencil first. Any paint that creeps under the vinyl is then the same color as the board, and the lettering coats go on after it dries.
Board sizes
| Board | File | Design width |
|---|---|---|
| 12 x 12 in square | Square | 9.1 in (as supplied) |
| 14 x 14 in or 16 x 16 in square | Square | 9.1 to about 11 in |
| About 14 x 9 in or larger, wide | Horizontal | 11.1 in (as supplied) |
| Long board, 16 in wide or more | Horizontal | 11.1 to about 13 in |
Both files fit a 12 x 12 mat as supplied, since neither goes past 11.1 in on its longest side. If you enlarge either one past about 11.5 in on any side, move to a 12 x 24 mat.
Leave at least an inch between the design and the edge of the board. Farmhouse signs usually look better with more breathing room than you’d think, and a frame or routed edge eats into the space too. Don’t shrink either file to fit a smaller board. Below the listed sizes, the wheat grains and the thin rules can get too fine to cut and weed.
Variations
Stain instead of paint. On bare, sanded wood you can stencil with a dark stain or a paint wash. Stain wicks into the grain more readily than acrylic, so test on the back of the board or a scrap first and keep the brush dry.
Two colors. Paint “give” and the wheat in a warm gold or rust and “THANKS” in black or white. Paint one color, let it dry, then do the second, dabbing carefully around the tail of the “g,” which dips close to THANKS.
A decal instead of a stencil. You can cut the same file from adhesive vinyl and keep the letters instead of the background. We checked it with stencil settings, so do a small test cut of the wheat first if you switch materials. Permanent vs removable vinyl helps you choose.
Planning a whole fall table? The Thankful script SVG and the Gather SVG suit the same kind of board, and the Thanksgiving place cards cover the place settings. For a tall porch board, see the Happy Fall Y’all porch sign SVG.
When paint bleeds
Fuzzy letter edges almost always mean the stencil wasn’t pressed down tight or the brush was too wet. Rough or unsanded wood makes it worse, because the vinyl can’t seal into the low spots of the grain. Sand smooth, burnish every edge, and keep the coats thin. If you’ve already got a little bleed, a small artist’s brush and the background color will tidy it once everything is dry.
Questions
Do I weed the letters or the background on a stencil?
The letters. Everything you weed out is where the paint goes. Leave the background on the liner, and keep the centers of the A’s, “e” and “g” in place.
What size board fits this Give Thanks SVG?
The square file is 9.1 x 10.45 in and made for a 12 x 12 in board. The horizontal file is 11.1 x 6.47 in, so give it a board around 14 x 9 in or larger.
Can I use regular vinyl as a stencil?
Stencil vinyl is made to peel off cleanly after painting, so it’s the safer choice. Removable adhesive vinyl is sometimes used, but test it on a scrap of your painted board first.
Can I sell signs made with this file?
Yes, up to 500 finished handmade signs per design. You can’t sell or share the SVG itself. The details are on our license page.