Sunflowers show up on everything from late August through Thanksgiving, so we made this one three ways. There’s a flat single-layer bloom for adhesive vinyl, a long-stemmed version for iron-on, and a four-layer paper sunflower you stack and glue into something with real depth.
The vinyl bloom is 5.1 in across, which suits a tumbler, a planter or a small sign. The stemmed version stands 8.1 in tall for a shirt or tote. The layered paper flower is 6.1 in across and made for cardstock.
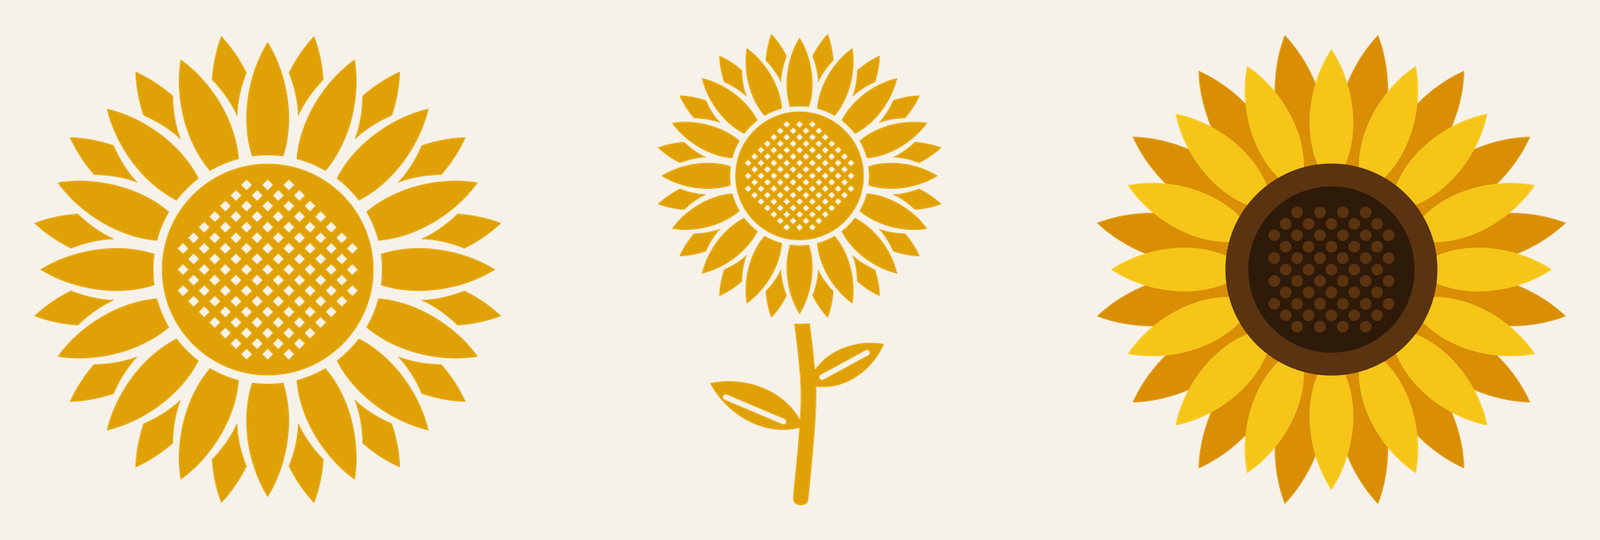
| File | Size | Material | Layers | Check |
|---|---|---|---|---|
| Sunflower, single layer | 5.12 × 5.12 in | Vinyl | 1 layer | ✓ Cut-checked |
| Sunflower with stem, single layer | 5 × 8.12 in | HTV (iron-on) | 1 layer | ✓ Cut-checked |
| Sunflower, 4-layer paper | 6.12 × 6.12 in | Cardstock | 4 layers | ✓ Cut-checked |
Three files, three builds
Single layer (5.1 x 5.1 in, adhesive vinyl)
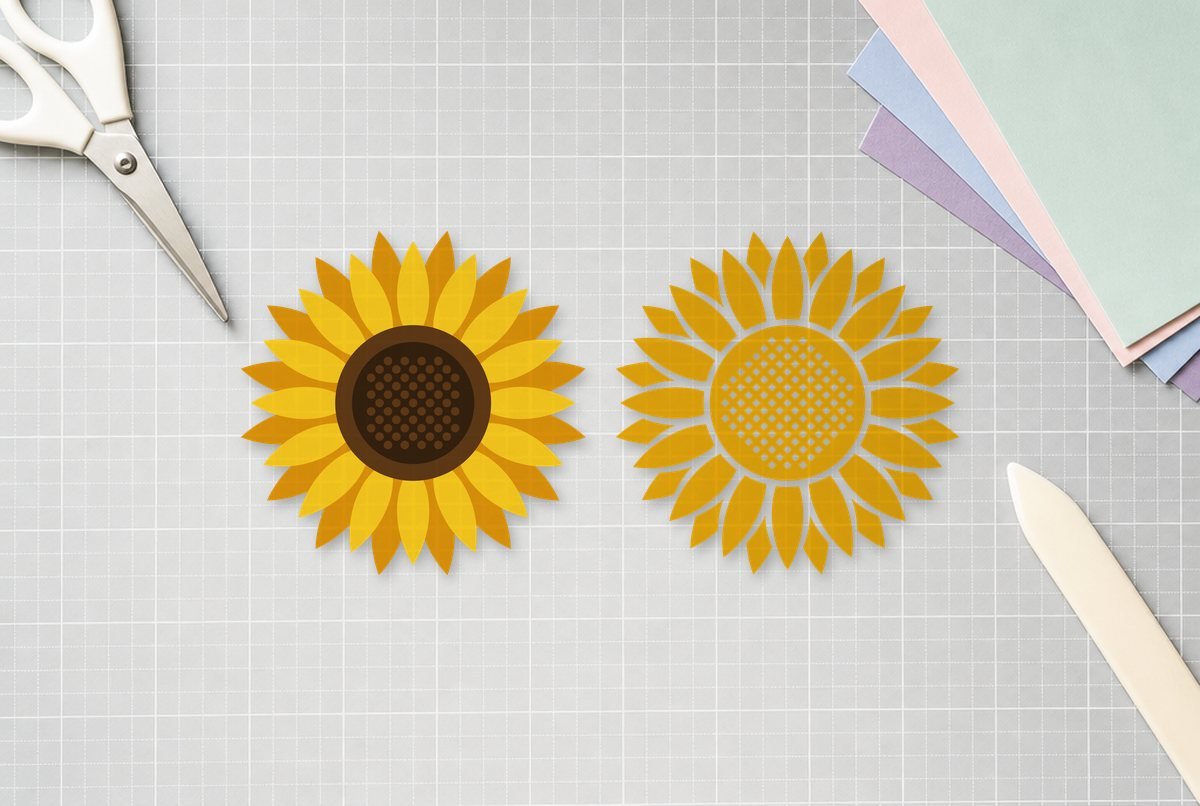
Two rows of petals surround a round center with a grid of small diamond cutouts, which reads as the seed head. A thin gap separates the petals from the center, so this isn’t one connected piece: you lift the whole thing on transfer tape and it goes down in position. It’s one color.
That seed grid is the busiest part of the file, with roughly a hundred little diamonds to weed. We checked it at 5.1 in against our adhesive vinyl minimums (nothing thinner than 0.035 in, no loose piece under 0.07 in), so every diamond is big enough to pick out, but plan on a few minutes with the hook.
With stem (4.92 x 8.1 in, iron-on)
A smaller bloom with the same diamond seed head sits on a gently curved stem with two leaves, each with a single vein cut into it. Iron-on gets a wider minimum than adhesive vinyl in our check, and this file passed at its 8.1 in height.
Four-layer paper (6.1 x 6.1 in, cardstock)
This one comes apart into separate pieces by color:
- Back petals: 16 dark gold petals, each about 2 in long.
- Front petals: 16 bright yellow petals, a little shorter, meant to sit in the gaps between the back ones.
- Center: a brown circle about 2.7 in across.
- Seed detail: a smaller, darker circle (about 2.1 in) with 57 round holes, so the brown center shows through as seeds.
The petals are loose pieces rather than a connected ring. That makes each one cut cleanly with no thin joins to tear, and it means the center circle holds everything together once it’s glued.
What you need
- Cutting machine and a standard grip mat
- Permanent adhesive vinyl and transfer tape (single-layer bloom)
- Iron-on (HTV), a heat press or iron, and a pressing sheet (stemmed version)
- Cardstock in dark gold, bright yellow, brown and dark brown (layered flower)
- Craft glue or a glue pen; foam adhesive dots if you want lift
- Weeding hook and tweezers
Cutting and weeding the vinyl bloom
- Upload the single-layer SVG. In Design Space: Upload, then Upload Image and Browse. Silhouette Studio needs Designer Edition or higher to open SVGs; the ZIP has a DXF as well. Our upload guide walks through each step.
- Confirm the size. It should read 5.1 in wide. Go bigger freely; don’t go smaller (more on that below).
- Cut. Select your vinyl in the Make screen. Adhesive vinyl goes on the mat liner side down, and it doesn’t need mirroring.
- Weed the outside first, then the petals, then the diamonds. Pull the background, pick out the ring between petals and center, then work the diamonds row by row. See our weeding guide if the small pieces fight you.
- Transfer. Use standard-grip transfer tape and burnish well over the seed head, where the pieces are smallest.
For the stemmed iron-on version the flow is the same, with two changes: mirror the design (Design Space turns on Mirror automatically when you pick an iron-on material, and you can check the toggle on the Prepare screen), and load the HTV shiny side down. Press with the settings for your exact material from the Cricut Heat Guide or the HTV maker’s instructions. The first shirt guide covers placement and peeling.
Assembling the layered paper sunflower
Design Space separates the four layers onto their own mats by color after upload. Cut all four, then build the flower face down so the petals end up tucked under the center:
- Lay the brown center face down. This circle is your base. Every petal glues to its back.
- Glue the front petals first. Because you’re working from the back, the layer that shows on top goes down first. Put a dab of glue on the pointed inner tip of a bright yellow petal and press it onto the back of the circle, with about 0.3 in of the tip overlapping the edge. Do the top, bottom, left and right first, then fill in between until all 16 are about evenly spaced.
- Add the back petals. Glue the dark gold petals over the yellow ones the same way, each one lined up with a gap between two yellow petals. From the front, the longer gold tips will peek out behind the yellow.
- Flip it over and add the seed layer. Center the dark seed circle on the brown center and glue it down. The holes let the brown show through as seeds.
- Let it dry flat under a book for a few minutes so the petals don’t lift.
Want more depth? Put small foam adhesive dots under the seed circle instead of glue, and curl each yellow petal gently over a pencil before gluing. The layers then cast small shadows, which looks good in a shadow box or on a gift. Foam dots are optional; flat glue works fine.
If you’re new to layered paper, our five-layer paper flower and paper mandala use the same stack-and-glue approach.
Sizes for different projects
| Project | File | Suggested size |
|---|---|---|
| Tumbler or water bottle | Single layer | 5.1 in wide (as supplied) on a straight-sided tumbler |
| Round sign or planter | Single layer | 6 to 12 in wide |
| Adult shirt or tote | With stem | 8.1 to 11 in tall |
| Gift box topper or 8 x 8 shadow box | Layered paper | 6.1 in (as supplied) |
| Wall piece or wreath center | Layered paper | 8 to 11 in |
The seed diamonds and the seed-detail holes are the smallest features in the set. Shrinking any file below its listed size can make those too small to cut or weed, so for a coffee mug, where designs usually top out around 3 to 3.5 in tall, pick a different design rather than squeezing this one down.
Color ideas
The single-layer bloom looks classic in mustard on a black tumbler, and white vinyl on a terracotta pot is a quieter option. For the paper flower, swap the dark gold back petals for orange or rust and you’ve got a fall version that sits well next to our fall leaves.
Troubleshooting
If diamonds in the seed head pull up with the background, weed that area last and slower, or use the reverse method: put transfer tape over the whole cut design before weeding, flip it over, and peel the paper liner away so the vinyl stays on the tape. Then pick the background and diamonds off the sticky side.
Questions
How do you layer a paper sunflower?
Work face down: glue the 16 yellow front petals to the back of the brown center, then the 16 gold back petals over the gaps, then flip it and glue the seed circle on top.
What size is the layered sunflower?
It’s 6.1 in across as supplied, with a center about 2.7 in wide. You can scale it up for a wall piece; don’t scale it down.
Can I put the sunflower on a mug?
The single-layer bloom is 5.1 in tall, which is too tall for most mugs. It suits a tumbler or planter better, and we don’t recommend shrinking it because the seed diamonds get too small.
Do I need foam dots for the layered version?
No. Craft glue holds it flat. Foam dots under the seed circle just add a little lift and shadow.