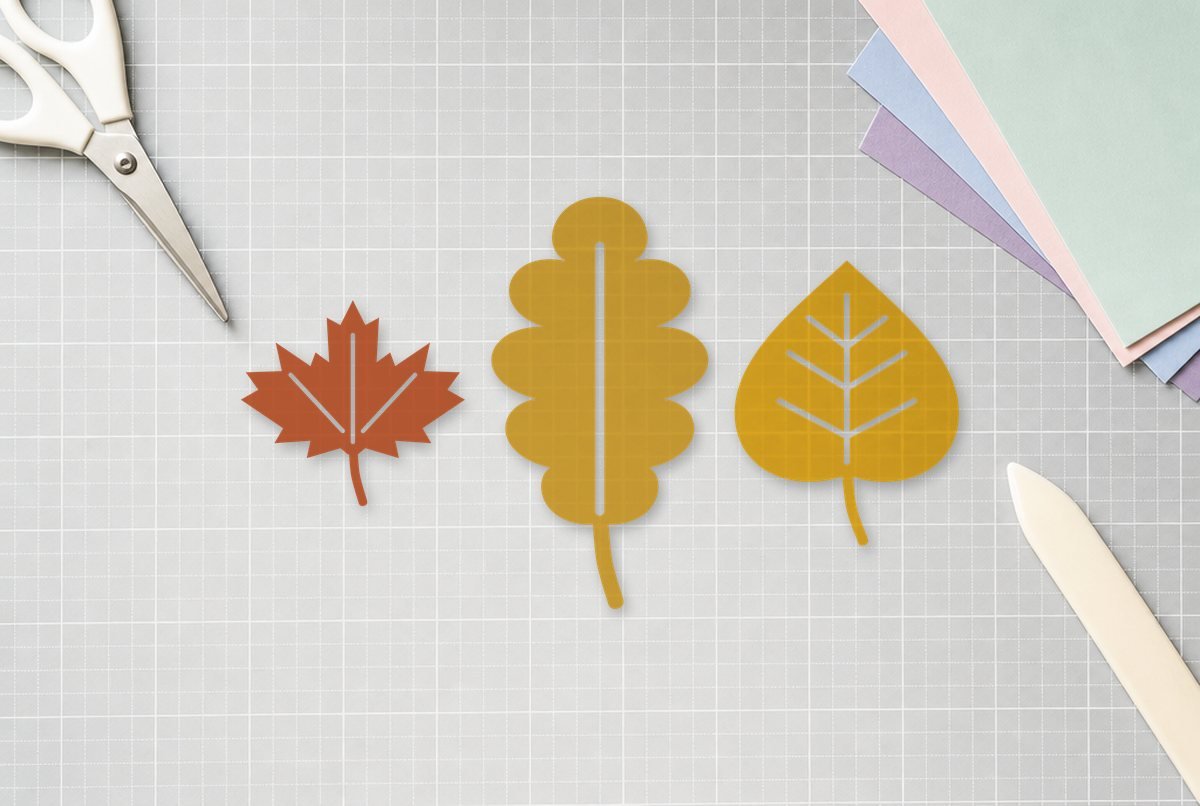
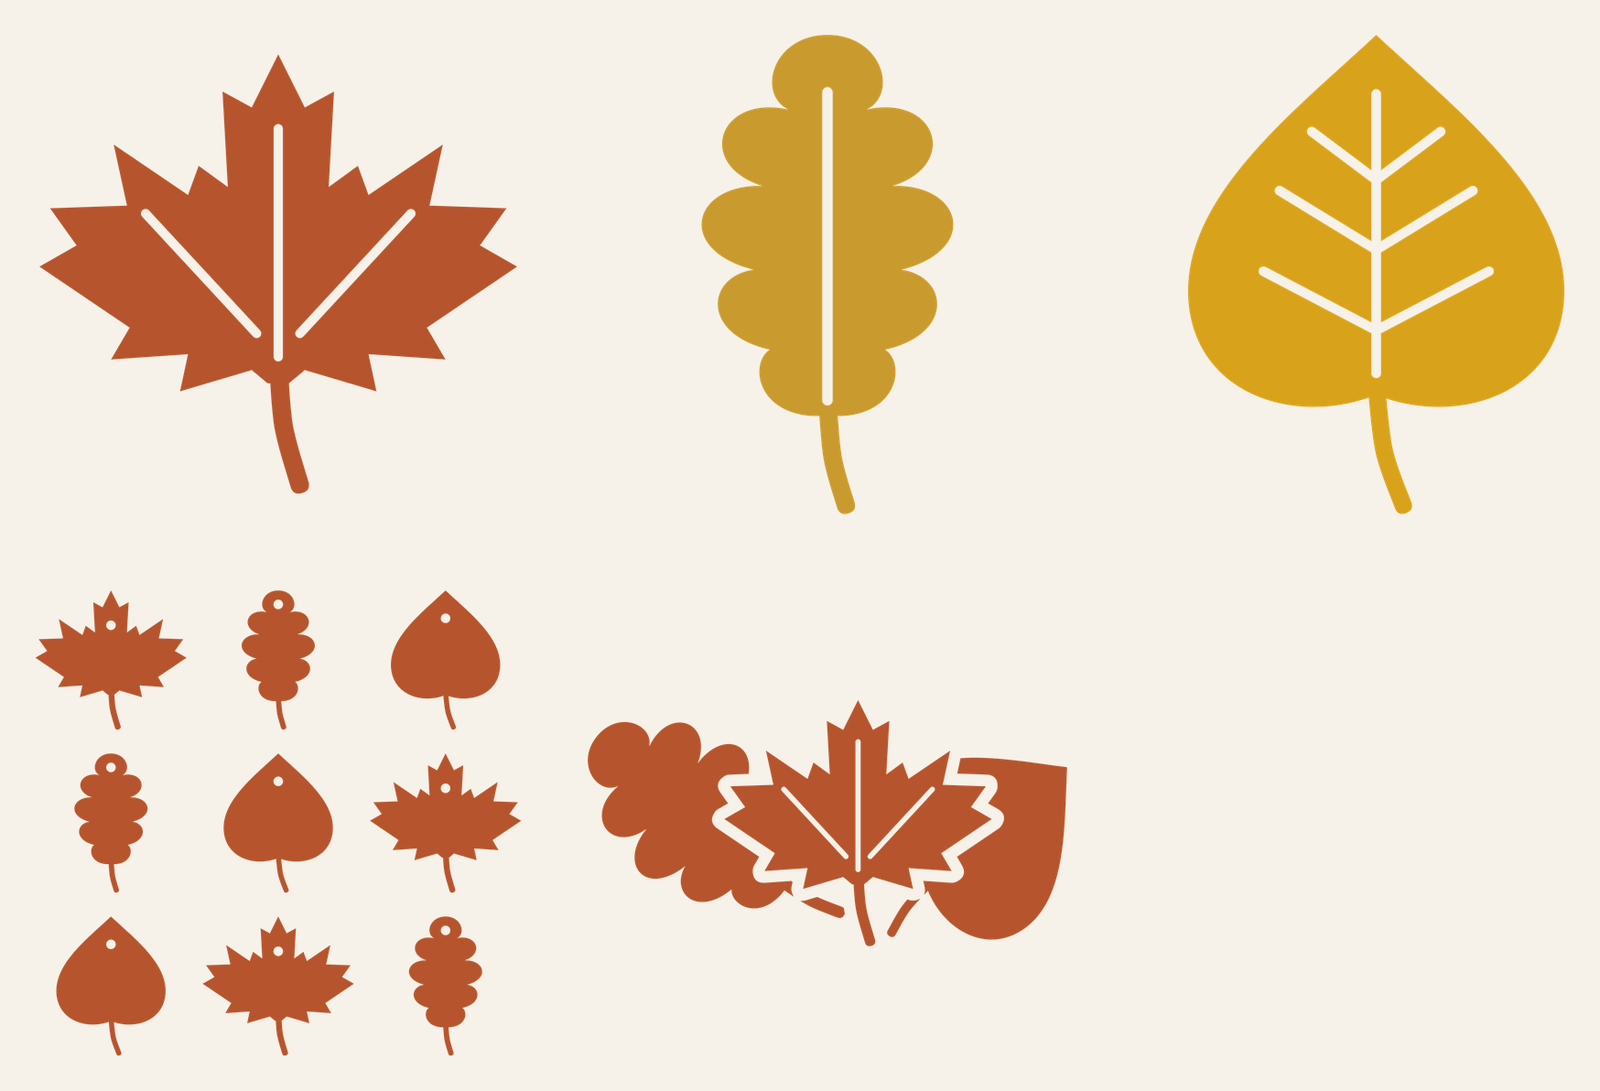
Three leaf shapes most people can name on sight: a pointy maple, a lobed oak and a round-bottomed aspen. Each one has its veins cut out as thin slots, so a single sheet of cardstock still looks like a leaf and not a flat blob.
The set comes as five files. The three single leaves are 4.1 in tall and built for cardstock. There’s also a full garland sheet with nine smaller leaves already punched for string, and a small overlapping leaf trio sized as an adhesive vinyl decal for a mug, jar or window.
| File | Size | Material | Layers | Check |
|---|---|---|---|---|
| Maple leaf | 4.5 × 4.12 in | Cardstock | 1 layer | ✓ Cut-checked |
| Oak leaf | 2.25 × 4.12 in | Cardstock | 1 layer | ✓ Cut-checked |
| Aspen leaf | 3.25 × 4.12 in | Cardstock | 1 layer | ✓ Cut-checked |
| Leaf garland sheet (9 leaves, 3.2 in) | 11.38 × 10.88 in | Cardstock | 1 layer | ✓ Cut-checked |
| Leaf trio decal | 4.12 × 2.25 in | Vinyl | 1 layer | ✓ Cut-checked |
What’s in the ZIP
| File | Size (W x H) | Material | Use it for |
|---|---|---|---|
| Maple leaf | 4.45 x 4.1 in | Cardstock | Card fronts, table scatter, gift tags |
| Oak leaf | 2.2 x 4.1 in | Cardstock | Narrow spaces, napkin rings, bookmarks |
| Aspen leaf | 3.24 x 4.1 in | Cardstock | Tags, place settings, layered cards |
| Garland sheet | 11.28 x 10.8 in | Cardstock | Nine 3.2 in leaves with string holes |
| Leaf trio decal | 4.1 x 2.15 in | Adhesive vinyl | Mugs, jars, tumblers, windows |
How the leaves are built
Each single leaf is one closed outline with the stem welded on, so the blade goes around it once. The veins are separate slots cut out of the middle. The maple has three (a center vein and two angled side veins), the oak has one long center slot, and the aspen’s center vein and six side veins are joined into a single branching cutout.
Those slots are the part most likely to go wrong in a leaf file. Too thin and cardstock tears between them; too close to the edge and the leaf rips when you lift it. We checked all three at 4.1 in tall against our cardstock minimums: no stroke under 0.045 in, no loose piece under 0.1 in, and no background sliver too narrow to clear. The rounded ends on the slots help too, since a square slot end in cardstock is where tearing starts.
The garland leaves are a simpler build. At 3.2 in tall we dropped the veins entirely and gave each leaf a single round hole near the top, 0.22 in across. That’s the only interior cut, so they go fast and hang cleanly. The sheet holds three of each shape arranged in a 3 x 3 grid, and it’s 11.28 in wide, so it needs a 12 x 12 mat and 12 x 12 cardstock. It won’t fit a letter-size sheet.
The trio decal overlaps an oak, a maple and an aspen, with a thin outline gap around the maple so it reads as sitting on top. It’s one color and checked at 4.1 in wide against our adhesive vinyl minimums.
What you need
- Cutting machine with a standard grip mat (light grip for thin paper)
- 65 lb or heavier cardstock in fall colors, 12 x 12 for the garland sheet
- Twine, embroidery floss or thin ribbon for the garland
- Permanent adhesive vinyl and transfer tape for the decal
- Weeding hook and a spatula or scraper tool
Cutting the cardstock leaves
- Upload the SVG. In Design Space, choose Upload on the left panel, then Upload Image and Browse. On Silhouette Studio, opening SVGs takes Designer Edition or higher, so free-edition users can use the DXF. New to uploading? Our upload guide walks through it.
- Check the size. Each single leaf should read 4.1 in tall on the canvas. For a handful of leaves in different colors, duplicate the leaf and change each copy’s color so Design Space puts them on separate mats.
- Pick your cardstock setting. Choose the setting that matches your paper’s weight in the Make screen. Heavy or textured cardstock may need a heavier setting, so cut one test leaf first.
- Unload and flip the mat. Peel the mat away from the paper rather than pulling the paper off the mat. The paper stays flat and the thin bridges between vein slots don’t curl.
- Clear the slots. Most vein pieces fall out on their own. Push any stragglers out from the back with the weeding hook.
For the garland sheet, flip the leaves over before stringing so any tiny burr from the cut faces the back. Then thread each leaf front to back through its hole and slide it along the string. A small knot on each side keeps a leaf from sliding once you’ve spaced them.
Applying the leaf trio decal
Cut it from permanent adhesive vinyl, weed away the background and the vein slots in the maple, then lift it with transfer tape. At 2.15 in tall it fits the side of a standard mug without wrapping into the curve much. Our mug guide covers smoothing on curved surfaces, and the transfer tape guide explains which grip to use.
The outline gap around the maple is the narrowest open area in the design. Weed it slowly from one end, or it can pull the maple’s tips up with it.
Sizes for different projects
| Project | File | Suggested size |
|---|---|---|
| A2 card front (4.25 x 5.5 in) | Oak or aspen | 4.1 in tall (as supplied) |
| Table scatter or place setting | Any single leaf | 4.1 to 5 in tall |
| Mantel or doorway garland | Garland sheet | 3.2 in leaves (as supplied) or scale the sheet up |
| Wall or window leaves | Any single leaf | 6 to 8 in tall |
| Mug or mason jar | Leaf trio decal | 4.1 in wide (as supplied) |
| Glass door or window decal | Leaf trio decal | 6 to 10 in wide |
Scaling up is always safe. Shrinking the single leaves below 4.1 in, or the decal below 4.1 in wide, can push the vein slots and the bridges between them under the minimum widths, and cardstock is the first to tear when that happens. If you need small leaves, use the garland shapes, which have no veins to worry about.
Ideas for the set
Cut the three single leaves in rust, mustard and gold, then glue a scrap of cream or brown paper behind each so the veins show a contrasting color. That turns a one-layer leaf into a two-tone one without a second file.
For a longer garland, cut the sheet two or three times in different colors and mix them on one string. You could also skip the string and punch the leaves onto kraft gift tags with a brad.
The oak leaf’s narrow shape suits a bookmark if you cut it from double-thick cardstock or glue two copies back to back. Pair the set with our pumpkin SVGs or the Hello Fall script for a matching fall table.
If a leaf tears
Torn bridges between vein slots almost always mean a dull blade, a cardstock setting too light for the paper, or a mat that’s lost its grip so the paper shifted mid-cut. Try a fresh area of the mat and a test leaf. Our troubleshooting guide goes through the usual causes.
Questions
What cardstock weight works best for paper leaves?
Standard 65 lb cardstock cuts easily and holds its shape for garlands and cards. Heavier 80 to 110 lb stock gives sturdier table leaves but may need a heavier setting.
Can I cut these leaves on a letter-size sheet?
The single leaves fit easily. The garland sheet is 11.28 x 10.8 in, so it needs 12 x 12 cardstock and a 12 x 12 mat; for letter paper, cut individual leaves instead.
How do I hang a paper leaf garland?
Each garland leaf has a 0.22 in hole near the top. Thread twine or floss through front to back and knot on each side to keep the spacing.
Can I use the leaves in vinyl too?
Yes. The leaf trio is built for adhesive vinyl at 4.1 in wide, and the single leaves cut in vinyl at their listed size or larger.