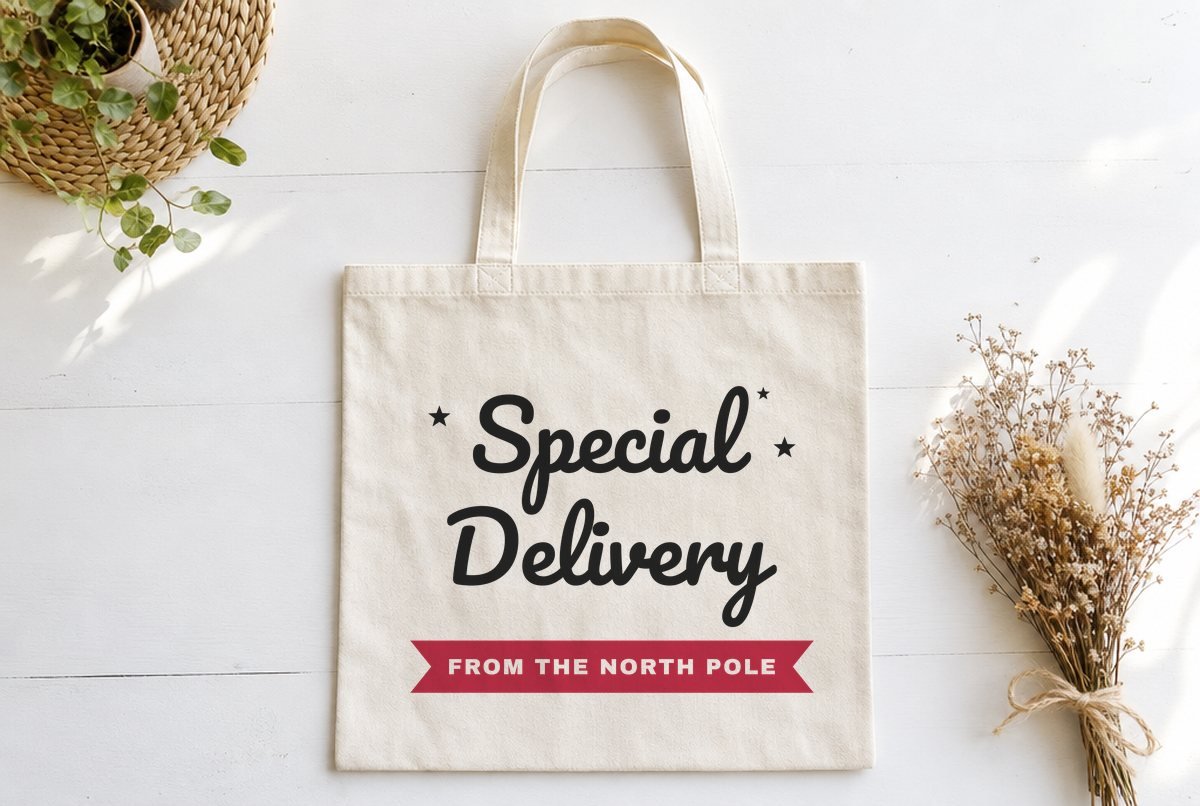
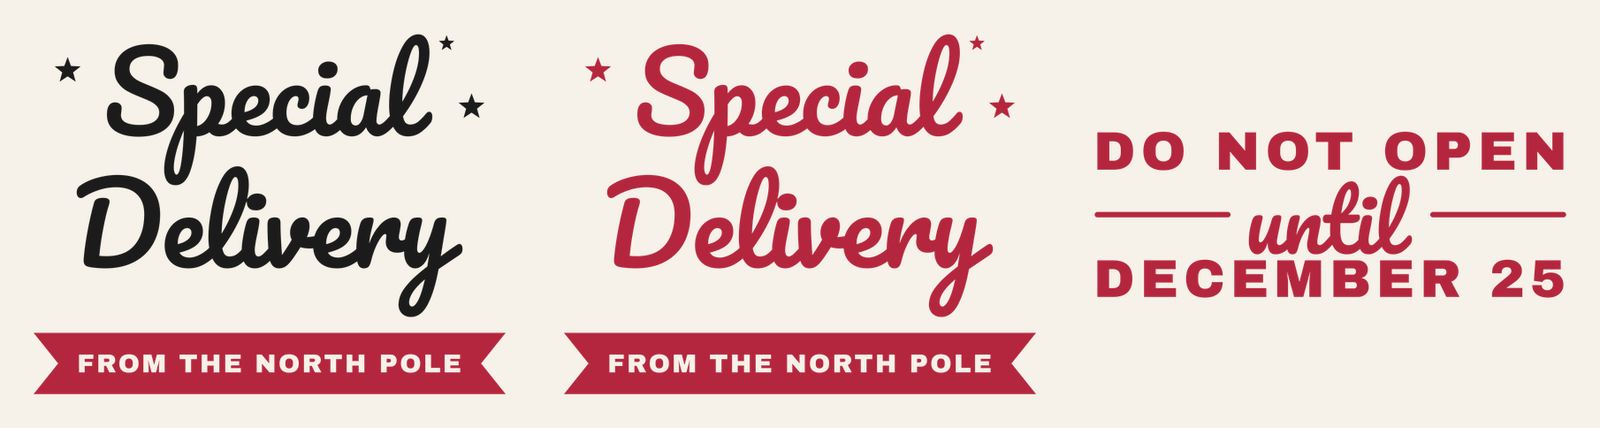
A Santa sack only needs to say one thing, and “Special Delivery From the North Pole” says it well. This design puts “Special Delivery” in a big two-line script with a few scattered stars, and cuts FROM THE NORTH POLE as capital letters knocked out of a red ribbon banner underneath.
It’s 11 in wide and 8.5 in tall, sized to fill the front of a large drawstring gift sack, and built for iron-on. You can cut it in one color or two. There’s also a bonus 10 in “Do Not Open Until December 25” design for a second sack, a pillowcase or a stocking-size bag.
| File | Size | Material | Layers | Check |
|---|---|---|---|---|
| Special Delivery From the North Pole, two-color (sack, 11 in) | 11.12 × 8.5 in | HTV (iron-on) | 2 layers | ✓ Cut-checked |
| Special Delivery From the North Pole, one color (sack, 11 in) | 11.12 × 8.5 in | HTV (iron-on) | 1 layer | ✓ Cut-checked |
| Do Not Open Until December 25 (sack, 10 in) | 10.12 × 3.62 in | HTV (iron-on) | 1 layer | ✓ Cut-checked |
What’s in the three files
Two-color. The script and its three stars are one layer (black in the preview). The banner is the second layer (red). The two layers sit apart and never overlap, so there’s no stacking one iron-on on top of another. You press each color in its own spot.
One-color. Exactly the same artwork merged into a single layer, for when you want the whole thing in red, white or gold.
Do Not Open Until December 25. DO NOT OPEN and DECEMBER 25 in wide, heavy capitals, with “until” in script between them and a thin rule on each side of it. One layer, one color.
The banner is the part to understand before you cut. Its letters aren’t separate pieces sitting on the ribbon; they’re holes knocked out of it, so the sack fabric shows through as the lettering. That means the insides of the O’s, R’s and P are little islands of iron-on that belong to the banner. Keep them. Everything was checked for iron-on at full size, including those islands, so none of them is small enough to disappear while you weed, and the gaps between banner letters are wide enough to clear.
What you need
- Cutting machine and a standard grip mat, 12 x 12 (the design is 11 in wide)
- Iron-on (HTV) in one or two colors
- A drawstring gift sack in canvas, cotton or another fabric your iron-on can be applied to
- Heat press or iron, plus a protective sheet and a pressing pillow or folded towel
- Weeding hook and a lint roller
Make the two-color sack
- Upload and size. Upload the two-color SVG (our upload guide walks through it) and check that it reads about 11 in wide. That’s already the smallest size we checked, so for a smaller sack switch to the Do Not Open file.
- Make It and mirror both mats. The two layers go on separate mats. On the Prepare screen, confirm Mirror is on for each one. Cricut notes that mirroring is set per mat, and Design Space normally switches it on when you choose an iron-on material.
- Cut. Load each color shiny side down.
- Weed the script. Clear the background and the small enclosed spaces inside the letters: the p, a, D, the e’s and the loops of the l’s and y. The capital S and D stand just clear of the rest of their words, and the dot on the i in Special and the three stars are loose too, so leave all of them on the carrier.
- Weed the banner. Pull out every letter shape from the ribbon, but leave the centers of the O’s, R’s and P in place. A bright light behind the sheet helps you see which bits are which.
- Press. Lint-roll the sack, then place the script and banner together and check the spacing. Press according to Cricut’s Heat Guide or your iron-on maker’s settings for the material and fabric. If the two carrier sheets overlap, follow your iron-on’s instructions for pressing multiple colors.
A sack has a back layer that soaks up heat and a seam that stops a press from sitting flat. Slide a pressing pillow or a folded towel inside the sack so the front panel is raised and even.
Mirroring and pressing are the same as for a shirt, and our first-shirt guide goes through them step by step. If you plan to put one color over another later, read how to layer HTV first.
Sizes
| Project | File | Width |
|---|---|---|
| Large Santa sack or laundry-style bag | Special Delivery | 11 to 12 in |
| Large tote bag | Special Delivery | 11 in |
| Pillowcase | Do Not Open | 10 to 11 in |
| Medium gift sack | Do Not Open | 10 in |
These files were checked at 11 in and 10 in. Scaling down is where the banner suffers first: the O, R and P islands shrink along with the gaps around the knocked-out letters. For a small bag, use the Do Not Open file at its full size rather than shrinking the big one. Going bigger is fine as long as it still fits your mat.
Other ways to use it
- Cut the one-color file in white glitter iron-on on a red or burlap-look sack.
- Use the Do Not Open file on the lid of a wooden gift box or a storage bin, cut from adhesive vinyl instead of iron-on and with Mirror off.
- Make matching gift tags with our Christmas gift tags, or add a North Pole sign by the tree.
When the banner lettering lifts
On a knockout banner, the narrow strips of ribbon between two letters are the most likely spots to lift, since they have the least iron-on holding them down. Open weaves and textured fabrics like real burlap give iron-on less to grip, so check that your material maker lists it for that fabric. On any fabric, press from the back of the sack as well if your iron-on’s instructions call for it, and let it cool before you fill the bag.
Questions
What size should a Santa sack design be?
About 11 in wide for a large drawstring sack. The Special Delivery file opens at 11 x 8.5 in, and the Do Not Open design is 10 in wide for smaller bags.
Do I need to layer the two colors?
No. The script and the banner sit side by side and never overlap, so each color presses directly onto the fabric.
Why are the banner letters holes instead of pieces?
The words are knocked out of the red ribbon so the sack fabric shows through as the lettering. When you weed, remove the letters but keep the centers of the O, R and P.