A thankful tree is a November tradition that needs almost nothing: a few bare branches in a jar, a stack of paper leaves and a pen left nearby. Each day (or all at once over Thanksgiving dinner) someone writes one thing they’re grateful for on a leaf and hangs it up. By the end of the month the branches are full.
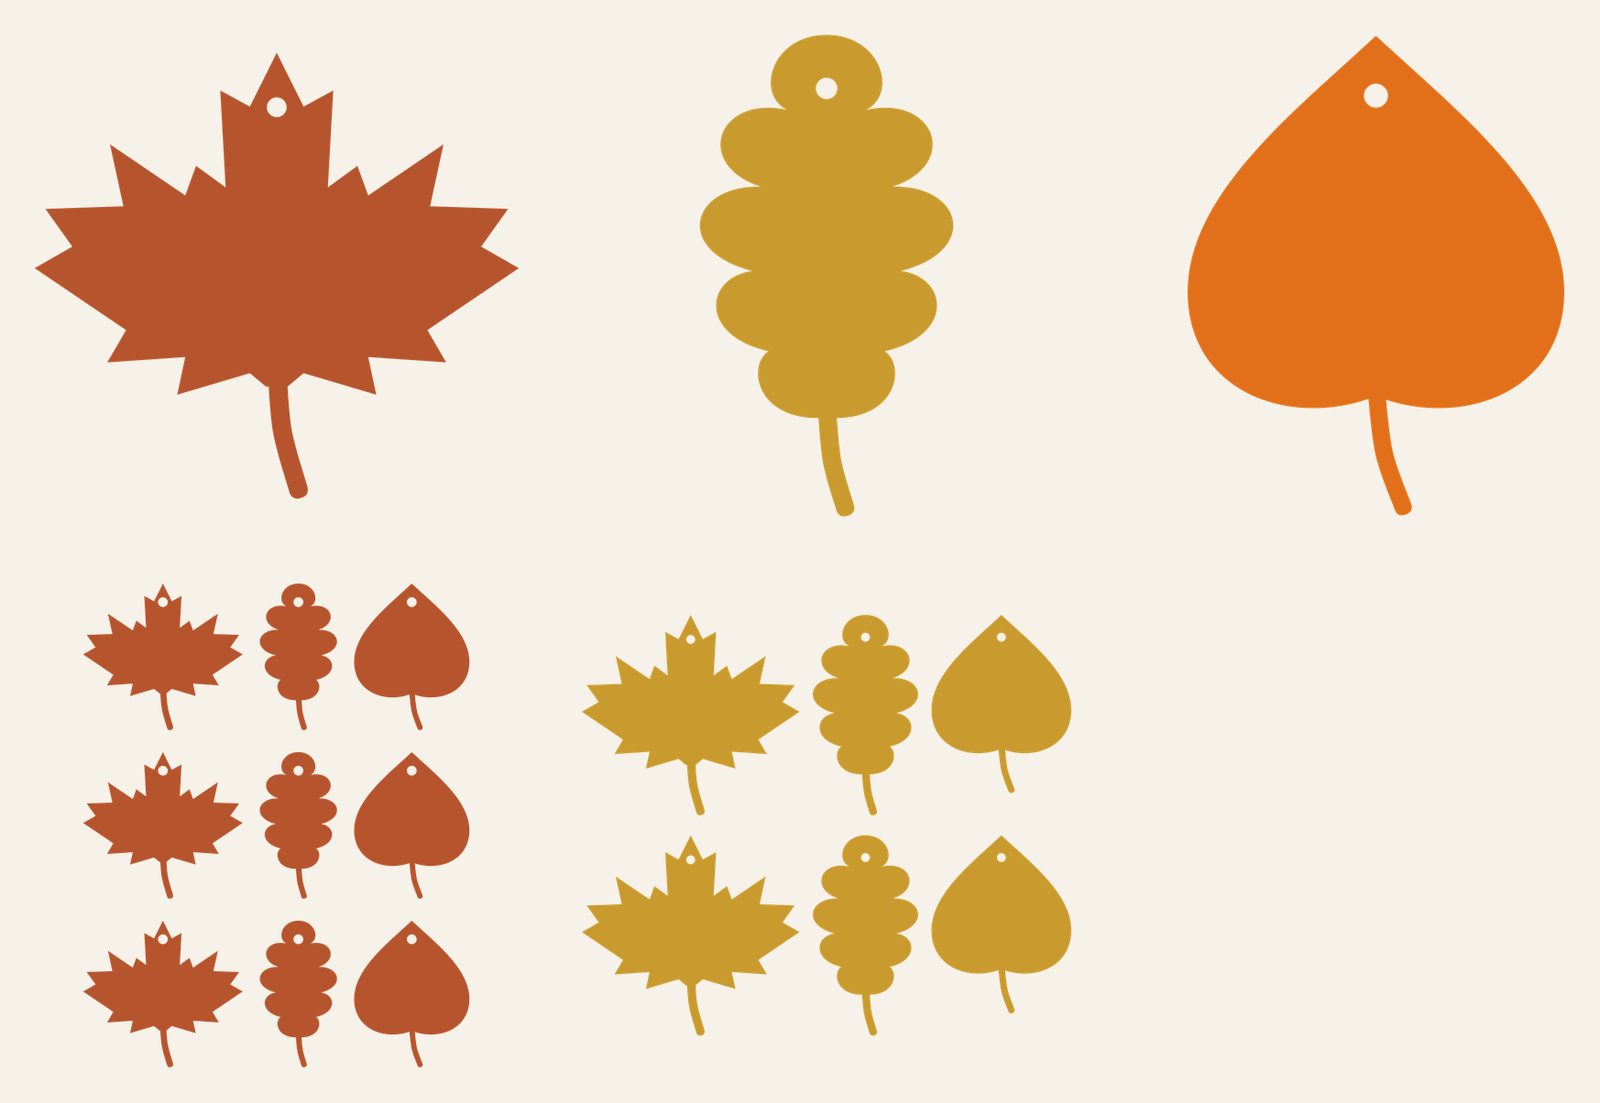
These leaves are built for writing. They’re plain silhouettes with no cut-out veins, so the whole leaf is open space for a sentence, and each one has a small hole near the tip for twine. You get a maple, an oak and an aspen at full size (4 to 4.5 in tall), a sheet of nine smaller 3 in leaves for kids and tabletop trees, and a sheet of six big leaves for a 12 x 12 mat.
| File | Size | Material | Layers | Check |
|---|---|---|---|---|
| Thankful leaf, maple (4.5 in tall) | 5 × 4.62 in | Cardstock | 1 layer | ✓ Cut-checked |
| Thankful leaf, oak (4.5 in tall) | 2.5 × 4.62 in | Cardstock | 1 layer | ✓ Cut-checked |
| Thankful leaf, aspen (4.0 in tall) | 3.25 × 4.12 in | Cardstock | 1 layer | ✓ Cut-checked |
| Nine 3 in leaves on one 12x12 mat | 8 × 10.12 in | Cardstock | 1 layer | ✓ Cut-checked |
| Six big leaves on one 12x12 mat | 11.12 × 9.62 in | Cardstock | 1 layer | ✓ Cut-checked |
What’s in the download
| File | Leaf size | Best for |
|---|---|---|
| Maple leaf | 4.5 in tall, 5 in across | The roomiest leaf for a full sentence |
| Oak leaf | 4.5 in tall, 2.5 in across | Short notes and single words written down the leaf |
| Aspen leaf | 4 in tall, 3.25 in across | A name plus a line or two |
| Nine-up sheet, 3 in leaves | 8 x 10.1 in sheet | Small hands, a tabletop tree, a classroom set; fits letter-size cardstock |
| Six-up sheet, big leaves | 11.1 x 9.6 in sheet | Two of each big leaf on a 12 x 12 sheet |
Every leaf is one solid shape with a 0.2 in hole punched near the top. The hole sits at the tip on purpose: hang a leaf from it and the stem points down, the way a real leaf falls from a branch. The stems are kept wide enough that they won’t tear off when someone grabs a leaf to write on it.
All five files passed our cardstock check at their listed sizes. Paper needs wider strips and gaps than vinyl does, and the narrowest spots on these leaves are the stems and the deep notches between the maple’s points. Both clear our minimums with room to spare, so the leaves come off the mat in one piece and the points don’t fold over.
What you need
- Cutting machine and a light or standard grip mat
- Cardstock, 65 lb or heavier, in fall colors (rust, gold, orange, kraft and a deep red all look good together)
- Twine, thin ribbon or embroidery floss, cut into 5 to 6 in lengths
- A few bare branches in a jar or vase (weigh it down with dried beans or rocks), or a paper tree on the wall
- Fine-tip markers or ballpoint pens
How to cut them
- Upload the files you want. In Design Space, click Upload, then Browse, and choose the SVGs. Our upload guide walks through each screen.
- Check the size. A sheet file should come in at the size in the table above. If you want more leaves, duplicate a single leaf rather than shrinking the sheet; the nine-up sheet is the smallest size we checked.
- Change the color if you like. Each file is one color, so a duplicate of the maple set to gold and another set to rust will land on separate mats when you click Make It. Load a different cardstock for each.
- Pick your cardstock setting. Choose the material that matches your paper weight in the Make screen and cut.
- Peel the mat, not the paper. Turn the mat face down and peel it away from the leaves. Pulling the leaves up off the mat curls the maple’s points.
- Clear the holes. Most of the little hole circles fall out on their own. Poke out any that stick with a weeding hook or a pencil tip.
Write on the leaves before you thread the twine. It’s much easier on a flat table, and you can see how much room you have. Kids do best with the maple: it’s the widest leaf and has the most space to write.
Setting up the tree
For a jar tree, gather three to five bare branches about 18 to 30 in long and stand them in a tall jar or vase with something heavy in the bottom. Thread a short loop of twine through each leaf’s hole, tie it off and slip the loop over a twig. Leave the leaves blank at first and keep a cup of pens beside the jar so anyone can add one as they walk by.
No branches? Cut a tree trunk and a few limbs from kraft paper, tape them to a wall or a door, and stick the leaves on with tape loops. It also works as a bulletin board, which is handy in a classroom.
Ways to use the set
Over Thanksgiving dinner. Leave a blank leaf at each seat and ask everyone to write one before dessert. Read a few out loud, then hang them all. Our Thanksgiving place cards use the same three leaf shapes, so the cards and the tree match.
A leaf a day in November. Cut 30 leaves at the start of the month. Three nine-up sheets plus a few big leaves covers it, with spares for days when someone has two things to write.
In a classroom. One nine-up sheet makes nine leaves, so three sheets give you 27, enough for most classes. The 3 in leaves are easier for younger kids to hold, though they leave less space to write, so a single word or a drawing works better than a sentence.
As a keepsake. Write the year on the back of every leaf. When you take the tree down, punch the leaves onto a ring or tuck them into an envelope, and they become a record of that year.
Size notes
You can enlarge any leaf as much as you like; a 7 or 8 in maple makes a good wall leaf. Shrinking is the part to watch. The 3 in leaves on the nine-up sheet are the smallest we checked. Below that, the maple’s points get thin and the twine hole starts to crowd the edge of the leaf.
If you want a different leaf mix, the shapes with cut-out veins in our fall leaves set look great hung among these. Keep in mind that the veined leaves are for decoration only, since the veins leave no room to write.
If something goes wrong
If the maple’s points tear or come off the mat ragged, the blade is usually dull or the mat has lost its grip and the paper is shifting. Try a fresh area of the mat and check that you picked the cardstock setting that matches your paper weight. If the twine holes come out as dents instead of holes, the cardstock is thicker than the setting expects; choose the next heavier setting.
Questions
What is a thankful tree?
It’s a set of bare branches, or a paper tree on a wall, where people hang leaves with something they’re grateful for written on each one. Many families add a leaf a day through November.
How big should thankful tree leaves be?
About 4 to 4.5 in tall gives an adult room for a sentence. For kids or a small tabletop tree, 3 in leaves are easier to handle. This set includes both sizes.
What paper works best for a thankful tree?
Cardstock, 65 lb or heavier. It takes marker without bleeding through and holds its shape when it hangs from twine. Thin paper curls and tears at the hole.
How do I hang the leaves?
Each leaf has a 0.2 in hole near the tip. Thread a short loop of twine or ribbon through it and slip the loop over a twig, so the leaf hangs stem-down.