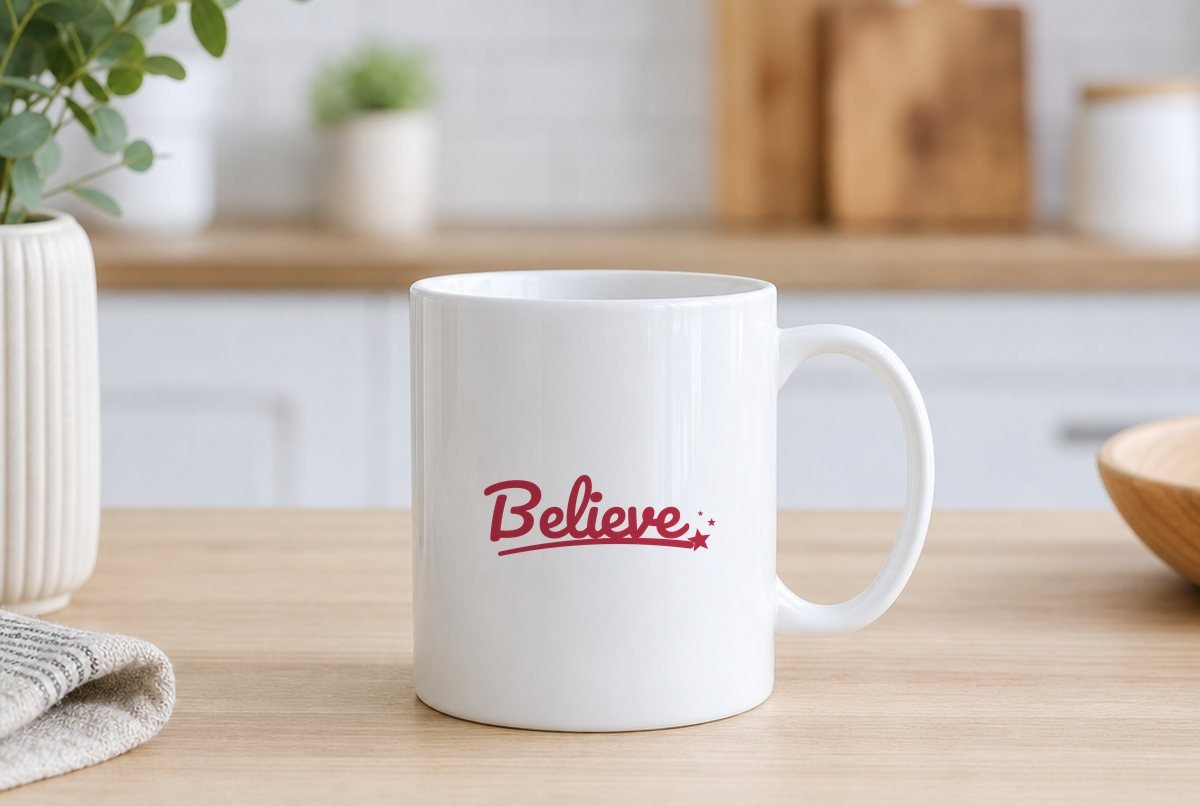
One word does a lot of work on a Christmas project. This free Believe SVG sets “Believe” in a bold, rounded script with a shooting star streaking underneath: a long swash that sweeps under the word and ends in a tilted star just past the last “e,” with two tiny stars trailing above it.
It comes in three files. The large one is 10.12 x 3.62 inches, built for iron-on on a shirt or sweatshirt and just as happy on a wood sign. The mug version and the ornament version are both 3.62 x 1.38 inches for adhesive vinyl; they’re the same design, one in red for a mug and one in gold for an ornament.

| File | Size | Material | Layers | Check |
|---|---|---|---|---|
| Believe with a shooting star (shirt/sign, 10 in) | 10.12 × 3.62 in | HTV (iron-on) | 1 layer | ✓ Cut-checked |
| Believe with a shooting star (mug, 3.5 in) | 3.62 × 1.38 in | Vinyl | 1 layer | ✓ Cut-checked |
| Believe with a shooting star (ornament, 3.5 in) | 3.62 × 1.38 in | Vinyl | 1 layer | ✓ Cut-checked |
How the shooting star is built
The swash is the part that decides whether a design like this cuts well. It’s drawn as a tapered stroke: thin at the left end under the “B,” gradually thicker as it runs right, and welded into the big star at the end. Its top edge meets the bottoms of the letters, so the swash, the big star and the lettering after the B come off the mat as one piece. Two small stars float above it on their own.
A thin taper is lovely at 10 inches and a problem at 3.5. If you simply shrank the large file down to mug size, the start of the tail would get too thin to cut and would tear the moment you weeded it. So the small files aren’t a scaled-down copy. We rebuilt the tail for them with a starting stroke that’s much thicker in proportion to the word, which is why the swash on the mug version looks a little heavier. Put the two side by side and you can see it.
The word itself is Pacifico, a free script font under the SIL Open Font License, welded so the letters join as one continuous shape. The capital B stands on its own, and the dot of the i sits against the top of the l, so it cuts with the rest of the word. That makes four pieces in every file: the B, the rest of the word with the swash and big star, and the two tiny stars.
All three files passed our cut check at their listed sizes: iron-on minimums for the large file, adhesive vinyl minimums for the small two. The narrowest spots are the thin left end of the tail and the two tiny stars, which are the pieces to watch when you weed.
What you need
- Iron-on (HTV) for shirts and sweatshirts
- Permanent adhesive vinyl for the mug; gold or glitter adhesive vinyl for an ornament
- Standard grip cutting mat
- Weeding hook, transfer tape and a scraper
- Heat press or iron for the shirt
- A mug, a flat ornament disc about 4 inches across, or a board for a sign
- Rubbing alcohol and a lint-free cloth
Making it
- Pick the right file for the job. The 10 inch file for shirts, sweatshirts, totes and signs. The mug or ornament file for anything about 3.5 inches wide. Upload it in Cricut Design Space with Upload, then Browse; our upload guide covers each step.
- Check the size. The files open at their listed size. Leave the small ones at 3.62 inches wide, and don’t bring the large one below 10.12 inches for iron-on.
- Set Mirror for iron-on only. Click Make It. For iron-on, Cricut’s help center says Design Space turns Mirror on automatically once you choose an iron-on material; confirm it on the Prepare screen. For adhesive vinyl on a mug or ornament, Mirror stays off.
- Cut and weed. Pull the background away from the tail’s thin end rather than toward it, so the taper stays down. Pick out the counters in the B and the e’s, and keep the B and the two tiny stars on the liner. The weeding guide has more on small pieces.
- Apply or press. For iron-on, follow Cricut’s Heat Guide for your material and fabric, or your HTV maker’s directions. For vinyl, clean the surface with rubbing alcohol, cover the design with transfer tape, and apply it from the center out.
The tail slopes up to the right, so the design looks level when the baseline of the letters is level, not the swash. When you place it on a shirt or sign, line up the bottoms of the letters with your guide and let the tail do its own thing.
Where each version fits
| Project | File | Size |
|---|---|---|
| Adult shirt, sweatshirt, tote | Large (iron-on) | 10.12 x 3.62 in |
| Wood sign or canvas, 12 in or wider | Large, cut in adhesive vinyl | 10.12 in or larger |
| Standard coffee mug | Mug | 3.62 x 1.38 in |
| Flat ornament, about 4 in across | Ornament | 3.62 x 1.38 in |
| Wine glass, candle jar, small frame | Mug or ornament | 3.62 x 1.38 in |
Using the large file on a sign in adhesive vinyl is fine. Our checker holds iron-on to a wider minimum than adhesive vinyl, so a file that passes for iron-on at 10 inches clears the vinyl check at that size too. That logic doesn’t run the other way, so for iron-on stick with the large file, and never shrink the large file to mug size. Use the file made for that size.
On ornaments
A flat ornament is the easy option. Wood slices, acrylic discs and flat ceramic blanks all give the 3.62 inch design a flat surface. Center the word slightly above the middle, since the hanger hole takes up space at the top and the eye reads a design as centered when it sits a touch high.
Clear round ball ornaments are harder. A strip this wide has to bend in two directions around a sphere, and the ends tend to wrinkle. If you try one, choose the largest ball you can find and apply from the center outward in small sections. Our personalized ornament template is laid out for flat discs and pairs well with this one, a name on one side and Believe on the other.
Color ideas
Red on cream, as in the preview, is the classic. Gold glitter vinyl on a red or white ornament makes the star catch the tree lights. On a shirt, try white iron-on on red or forest green, or metallic gold on black. For a whole set of Christmas words in the same spirit, see the Joy SVG and the Merry Christmas SVG.
Questions
What size is the Believe SVG?
The large file is 10.12 x 3.62 inches for shirts and signs. The mug and ornament files are 3.62 x 1.38 inches.
Can I shrink the shirt file to put it on a mug?
Use the mug file instead. The tail on the large file gets too thin at mug size, so the small files were rebuilt with a thicker tail that cuts cleanly at 3.62 inches.
What’s the difference between the mug and ornament files?
The shape is identical. Only the preview color differs, red for the mug and gold for the ornament, so use either one for any small project.
Will this fit on a Christmas ornament?
Yes, on a flat ornament about 4 inches across. On a round ball ornament the strip has to bend around a curve, so use the largest ball you can and apply from the center out.