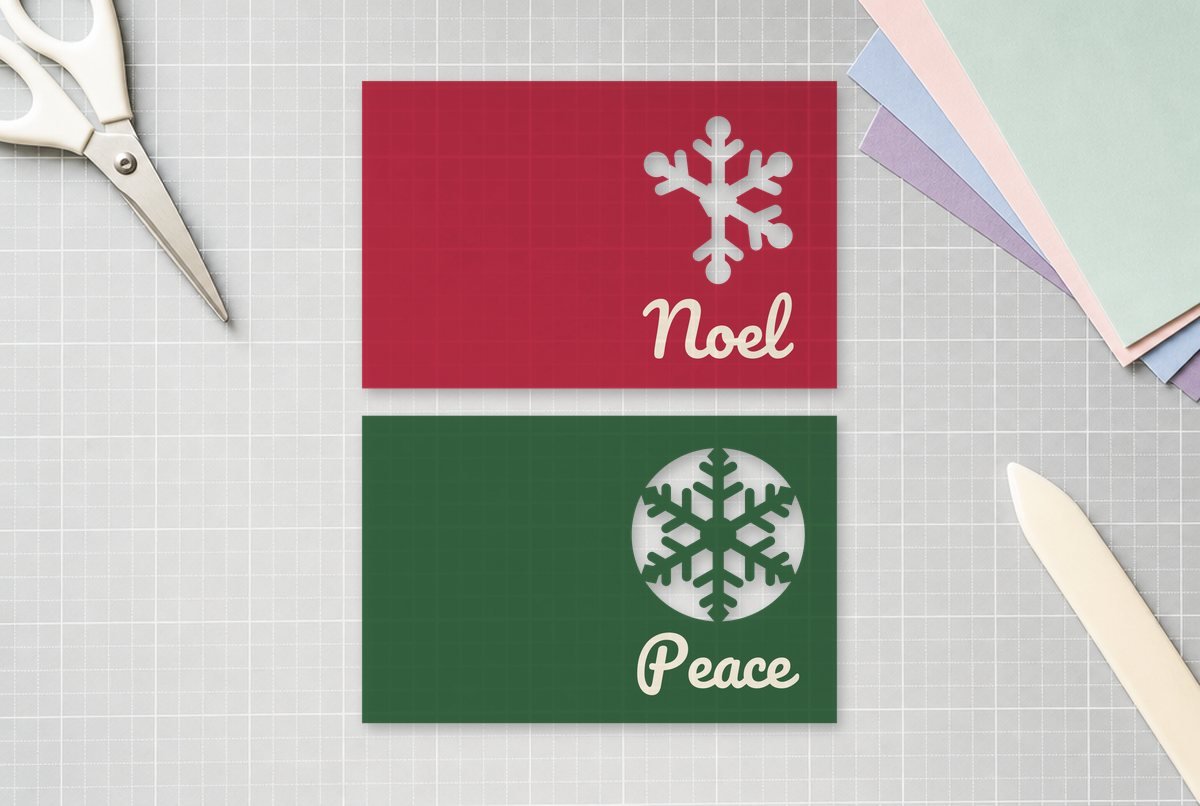
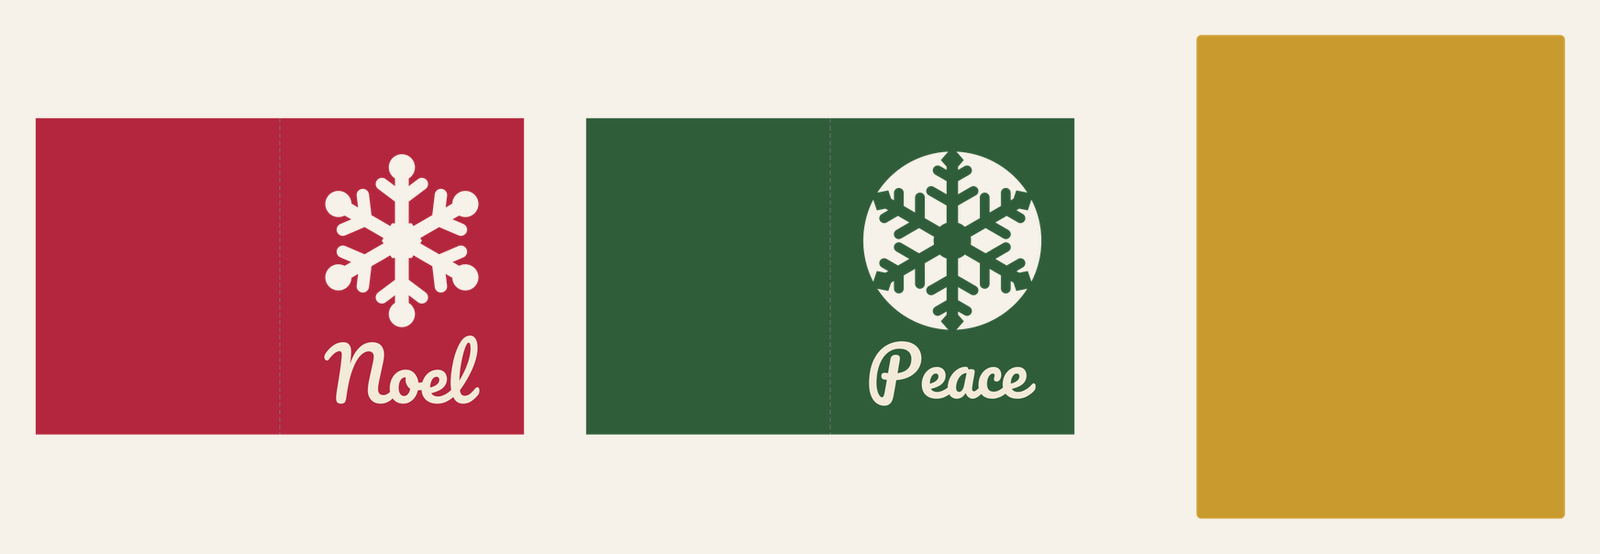
A window card is the easiest handmade Christmas card that still looks like you fussed over it. One sheet of cardstock gets a snowflake cut through the front, a contrast color shows through from inside, and a small script greeting sits underneath. This free Christmas card SVG comes in two versions: a red card with a snowflake-shaped window and “Noel,” and a green card with a round window that leaves a lacy snowflake standing in the paper, with “Peace.”
Both are A2 cards, the standard 4.25 x 5.5 inch size that fits an A2 envelope. Each file is the flat card at 8.5 x 5.5 inches (8.62 x 5.62 with its margin) with a score line down the middle, a separate greeting layer, and a matching 4 x 5.25 inch insert.
| File | Size | Material | Layers | Check |
|---|---|---|---|---|
| A2 card with snowflake window + greeting | 8.62 × 5.62 in | Cardstock | 2 layers + score lines | ✓ Cut-checked |
| A2 card with round lace-snowflake window + greeting | 8.62 × 5.62 in | Cardstock | 2 layers + score lines | ✓ Cut-checked |
| Window backing insert (4 x 5.25) | 4.12 × 5.38 in | Cardstock | 1 layer | ✓ Cut-checked |
The pieces, and how they go together
Each card file has two layers, and the ZIP has one extra file shared by both cards:
| Piece | Size | What it does |
|---|---|---|
| Card layer | 8.5 x 5.5 in flat | The card itself, with the window cut through the right-hand panel and one score line at 4.25 in |
| Greeting layer | About 2.7 in (Noel) or 2.9 in (Peace) wide | A script word you cut in a second color and glue on the front, below the window |
| Insert | 4 x 5.25 in | Glues inside the front panel so a contrast color fills the window |
The front of the card is the right panel of the flat layout. That’s where the window and greeting sit.
The two windows cut very differently. On the Noel card, the whole snowflake is the hole: six arms with round tips and little side branches, all joined at a solid center, so it pops out of the card in one piece. On the Peace card, the window is a circle and the snowflake stays behind as paper. Its six arms run slightly past the edge of the circle, which is what ties the snowflake to the card. You end up with six curved openings around a paper flake, and nothing in the middle is loose.
Both card layers and both greetings passed our cut check for cardstock at full size. Cardstock gets a wider minimum than vinyl in our checker, so the snowflake branches and the thin joins in the script are all chunky enough for paper. The spots to handle gently are the ends of the Peace snowflake’s arms, where they meet the card.
What you need
- Cardstock for the card: 12×12 sheets let you cut two cards per sheet
- Cardstock in a light color for the greeting (cream, white or gold)
- Cardstock in a contrast color for the insert
- Standard grip cutting mat (or light grip, if your cardstock setting calls for it)
- Scoring stylus or scoring wheel, or a ruler and bone folder
- Glue stick or double-sided tape; fine-tip liquid glue for the greeting
- A2 envelopes
Cutting the card
- Upload a card file. In Cricut Design Space, click Upload, then Browse, and pick a2-card-snowflake-window.svg or a2-card-lace-snowflake.svg. The upload guide walks through it. Upload a2-card-insert.svg too.
- Ungroup. Select the design and ungroup it so the card, the greeting and the fold line show as separate items in the Layers panel.
- Make the fold line a score. Select only the fold line, open the Operation dropdown in the toolbar, and choose Score. Cricut’s help page on selecting an Operation covers this.
- Attach it to the card. Select the score line and the card layer together and click Attach in the Layers panel. Cricut’s Attach instructions explain that this fastens a Score layer to its cut layer, so the fold lands in the middle. Leave the greeting unattached; it goes on its own mat in its own color. (Our weld vs attach vs group guide explains the difference.)
- Check the mat preview. Click Make It. You should see three mats, one each for the card color, the greeting color and the insert color, and the fold should show as a score line, not a cut. Pick your cardstock setting for each mat and load the scoring tool when Design Space asks.
- Take it off the mat face down. Flip the mat over and peel the mat away from the card instead of pulling the card up. On the Peace card this keeps the snowflake arms flat. Push any window scraps out from behind with a weeding hook.
If the fold line is still set to Cut when you press Go, your machine slices the card into two postcards. Look at the mat preview every time.
Assembling it
Fold on the score first, with the scored dent on the outside of the fold, and crease it with a bone folder. Then open the card and lay it face down.
Put glue around the edges of the insert only, keeping it clear of the area behind the window, and press it inside the front panel. It’s a little smaller than the panel on all sides, so you have room to center it by eye. On the Noel card, the insert fills the whole snowflake shape. On the Peace card, it shows through the six openings around the paper flake, which is the part that makes the lace effect read.
Last, flip the card over and glue the greeting on the front, centered below the window. Use a thin line of liquid glue or a glue pen on the back of the script; a glue stick smears on letters this size. The front panel is where your fingers go when someone opens the card, so let the glue dry before it goes in the envelope.
Color combinations that work
The preview shows red with a gold insert and a cream greeting, and deep green with the same. A few others to try:
- Navy card, white insert, silver greeting. Reads as snow at night.
- Kraft card with a red insert and a white greeting, for a rustic look.
- White card with a glitter cardstock insert. Glitter cardstock behind the Noel window catches light and needs no other decoration.
You can also skip the insert on the Peace card and glue vellum behind the window instead. The paper snowflake then sits over a frosted circle.
Want to write inside? The insert covers only the back of the front panel. The left panel stays blank for your message, or you can cut a second 4 x 5.25 insert in white and glue it on the inside right for a smoother writing surface.
Size notes
These are built at A2 on purpose, since A2 envelopes are easy to find. You can scale a card up to a larger card size with the lock closed, as long as the score, the card and the greeting scale together. Don’t shrink it. The side branches on the Noel snowflake and the arm tips on the Peace snowflake are the first parts that get too thin for cardstock.
For more paper projects in the same style, the Christmas gift tags use matching colors, and the free snowflake set has six more flakes if you want to design your own window. Our birthday card SVG uses the same A2 layout with a cut-out word instead.
Questions
What size is this Christmas card when folded?
It folds to 4.25 x 5.5 inches, the A2 size, and fits a standard A2 envelope. Flat, the card is 8.5 x 5.5 inches.
How do I stop Design Space from cutting the fold line?
Ungroup the design, select the fold line alone, change its Operation to Score, then attach it to the card layer. Check the mat preview before you cut.
Can I make the card without a scoring tool?
Yes. Hide or delete the fold line before cutting, then score by hand with a ruler and bone folder at 4.25 inches from either short edge.
Where does the greeting go?
Cut it from a light cardstock and glue it on the front panel, centered below the window. The insert goes inside, behind the window.