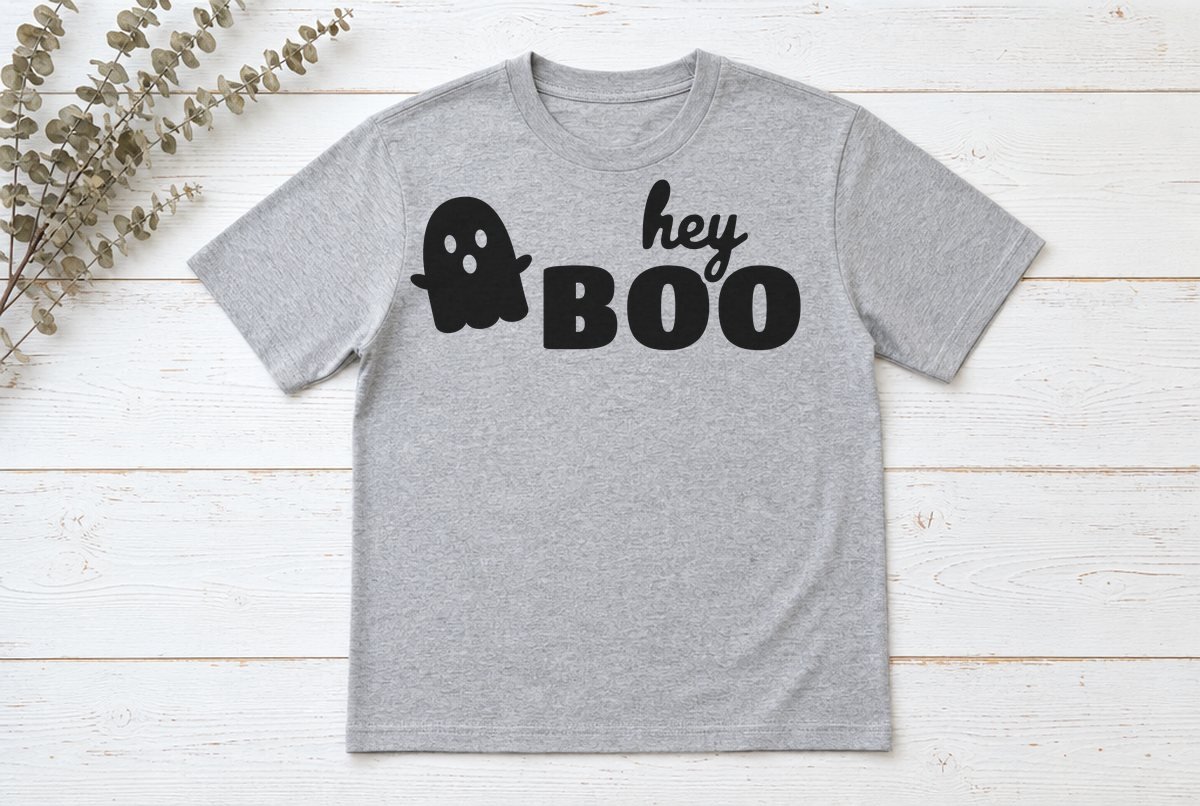
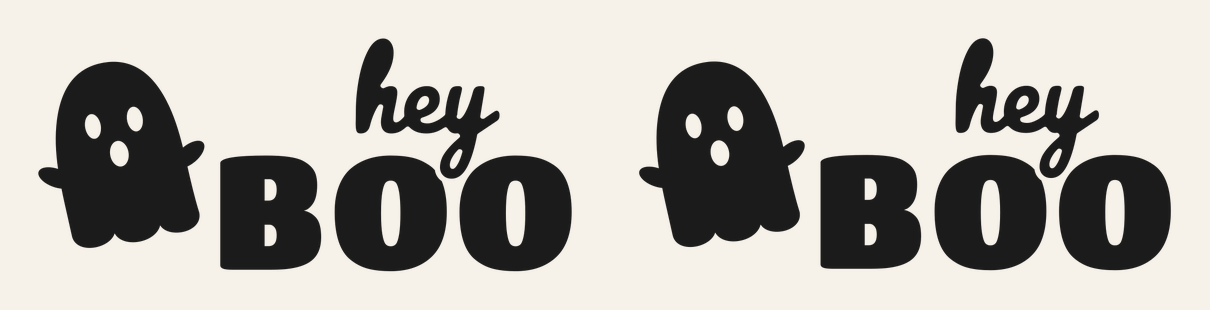
A round little ghost with two oval eyes, a surprised “o” of a mouth and stubby arms, standing next to a lowercase script “hey” and a heavy block “BOO.” It’s a friendly Halloween design rather than a scary one, which makes it an easy pick for kids’ shirts, a teacher’s tote or a candy bag.
You get two sizes, both built and checked for iron-on (HTV): 10.1 x 4.47 in for an adult shirt, and 8.1 x 3.59 in for a youth shirt or a tote bag. It’s one color, so a single sheet of iron-on covers it.
| File | Size | Material | Layers | Check |
|---|---|---|---|---|
| Hey Boo, adult shirt | 10.12 × 4.5 in | HTV (iron-on) | 1 layer | ✓ Cut-checked |
| Hey Boo, youth shirt / tote | 8.12 × 3.62 in | HTV (iron-on) | 1 layer | ✓ Cut-checked |
What’s in the file
Each SVG is one welded layer with 14 closed outlines. That count includes the ghost and its three face holes, the script “hey,” the block letters, and the holes inside the B and both O’s. The small loop in the “h” of “hey” is filled in on both sizes, so there’s no tiny counter to pick out there. There are no loose strokes and no overlapping shapes, so the blade traces each edge once.
Iron-on is less forgiving than adhesive vinyl about thin parts, so both files were checked against our wider HTV minimums at their listed sizes. We didn’t assume the youth version was safe because the adult one passed. It got its own check at 8.1 in and passed with no strokes too thin to cut, no pieces too small to weed and no slivers too narrow to pick out.
The ghost’s eyes and mouth are the parts to watch. They’re holes in the ghost, so you weed them out and the shirt color shows through as the face. On a white shirt with black HTV, that reads as a black ghost with white eyes, which is what the preview shows.
The ZIP also has DXF versions for Silhouette Studio Basic Edition, PNG previews and a README with each file’s size.
What you need
- Iron-on (HTV) in one color
- A cotton or cotton-blend shirt, sweatshirt or canvas tote
- A standard grip mat
- A weeding hook
- A heat press or household iron, plus a pressing cloth or protective sheet
- A ruler or a folded-shirt crease for centering
Making the shirt or tote
If this is your first iron-on project, how to make your first shirt with a Cricut covers the whole process in more detail. Here’s the short version for this file.
- Pick the right size file. Use the 10in file for adult shirts and the 8in file for youth shirts and most totes. Upload it with Upload in the Design Space panel on the left of the Canvas (step-by-step upload guide).
- Confirm the width. With the design selected, check the width in the Edit toolbar with the lock closed. It should read 10.1 in or 8.1 in. Don’t go under the size of the file you picked.
- Mirror it. Click Make. On the mat screen, turn Mirror on for the iron-on mat. Design Space usually mirrors automatically once you choose an iron-on material, so just make sure the “hey” reads backward in the preview.
- Load shiny side down. Put the iron-on on the mat with the shiny liner facing down and the dull side up, then pick your exact iron-on type in the material list and cut.
- Weed. Peel the background away, then pick out the holes in the B and O’s, and the ghost’s eyes and mouth. Check the loop of the “e” in “hey” before you move on; it’s one of the smallest holes in the design.
- Press. Look up your iron-on type and your shirt or tote fabric in Cricut’s Heat Guide and follow its temperature, time and peel directions. For another brand of HTV, use that maker’s instructions.
Canvas totes vary a lot in thickness and surface. Some heavier canvas needs different settings from a cotton tee, so choose your actual base material in the Heat Guide instead of reusing your shirt settings.
Where to place it
Fold the shirt in half lengthwise and press lightly to mark the center. The design is wider on the right because of the word stack, so center the full design’s width on that crease rather than centering the ghost. On adult shirts, a common starting point is around three to four fingers below the collar; on youth shirts, a little less.
For a tote, center it side to side and place it a bit above the middle of the bag, so the handles and whatever’s inside don’t pull it out of shape.
| Project | File | Suggested width |
|---|---|---|
| Youth shirt (XS to L) | 8in | 8.1 to 9 in |
| Tote bag | 8in or 10in | 8.1 to 11 in |
| Adult shirt (S to XL) | 10in | 10.1 to 11 in |
| Adult sweatshirt or 2XL+ | 10in | 11 to 11.5 in |
Anything smaller than 8.1 in, such as a toddler tee or a baby bodysuit, falls below the size we checked for iron-on. Shrinking it that far can make the ghost’s face holes and the “e” loop too small to weed cleanly. For a tiny shirt, the Little Pumpkin SVG is sized for a baby bodysuit.
Other ways to use it
Try white or glow-in-the-dark iron-on on a black or orange shirt. The ghost then reads as white with dark eyes, which may suit a ghost better. Want a second color? You can make an offset shadow layer behind the design yourself and press it underneath; how to layer HTV covers the pressing order. That extra layer isn’t in this download, and we haven’t checked it, so keep the offset generous.
The same file cuts fine in adhesive vinyl for a treat bucket, a lunch box or a trick-or-treat bowl. Just leave it unmirrored. Since it was checked against the stricter HTV limits, it clears the adhesive vinyl ones too at the same size.
If the face comes out wrong
When the eyes or mouth won’t lift out, the blade didn’t cut all the way through at those small ovals. Raise the pressure for that material on the Make screen, or check your blade, and run a small test cut of just the ghost first. Cricut not cutting through lists the other usual causes. If the ghost’s arms lift at the edges after pressing, that’s usually a pressure or time issue, so press again with the pressing cloth over the top and follow the Heat Guide’s steps.
Peeling the liner and seeing letters lift with it means the iron-on hasn’t bonded yet. Lay it back down and press again before you peel.
Questions
What size should Hey Boo be on a kid’s shirt?
Use the youth file at 8.1 in wide, or up to about 9 in for larger kids’ sizes. We checked it for iron-on at 8.1 in, so don’t go smaller.
Do I need to mirror the Hey Boo SVG?
Yes, for iron-on. Turn Mirror on for the iron-on mat before cutting. Design Space usually does it for you once you choose an iron-on material. Don’t mirror it for adhesive vinyl.
Can I put this on a tote bag?
Yes. Most totes suit the 8.1 in file, and bigger totes can take the 10.1 in one. Look up your tote’s fabric in the Heat Guide rather than reusing your shirt settings.
Can I sell Hey Boo shirts?
You can sell up to 500 finished handmade items per design, but not the SVG file itself. See the license page for the full terms.