Free Kids’ Paper Crafts with Printable Templates

14 paper crafts for kids about 5 to 12, each with a printable template you cut out with scissors. Every project has a materials list, numbered steps and a lesson link for teachers, librarians, parents and group leaders. Cutting machine users get SVG and DXF files of the same shapes.

  • No ads, no sign-up. No account, no email, nothing to buy.
  • Free to copy for classes and library programs
  • 15 templates, all drawn by us
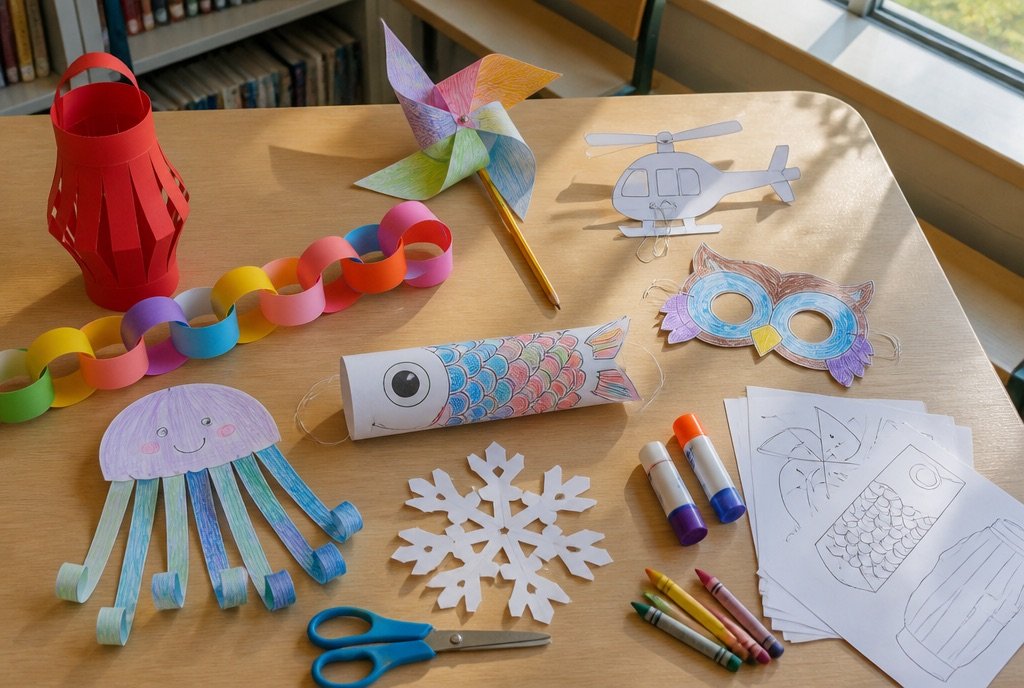
Finished paper crafts on a library table: a red paper lantern, a paper chain, a pinwheel, an owl mask, a paper jellyfish, a carp streamer and a paper snowflake, with scissors, glue sticks, crayons and printed templates

Looking for Hands On Crafts for Kids? Many library “Art & Music” pages link to crafts4kids.com, the companion site of the public television series Hands On Crafts for Kids, for “projects & lesson plans” for kids 7-12. That domain no longer loads (checked October 6, 2026). This page is our own collection in the same spirit: everyday, science, around-the-world and holiday projects, with steps a group leader can follow and templates you can print today.

read me first

Before you print

Print the PDFs at 100% or “actual size”, not “fit to page”, so the pieces come out the size the steps expect. Use the paper listed for each project: copy paper for anything you fold many times, cardstock (65-80 lb) for things that need to stand up or spin.

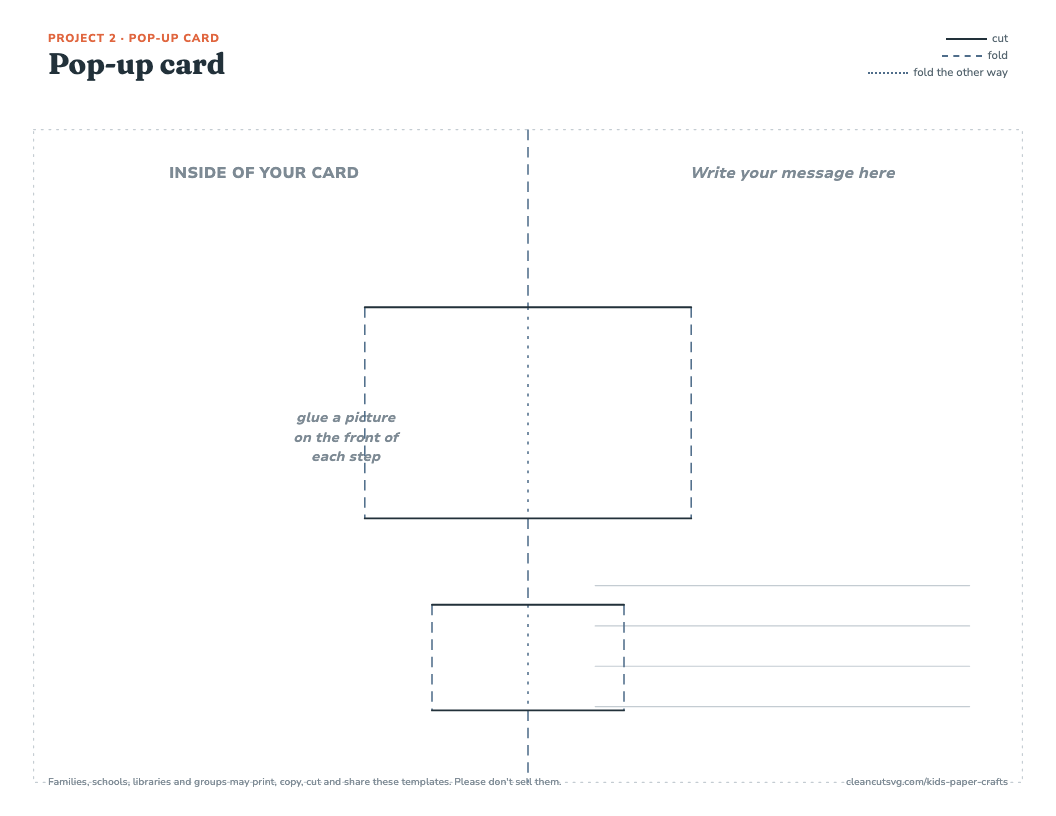
Solid line: cut
Dashed line: fold
Dotted line: fold the other way
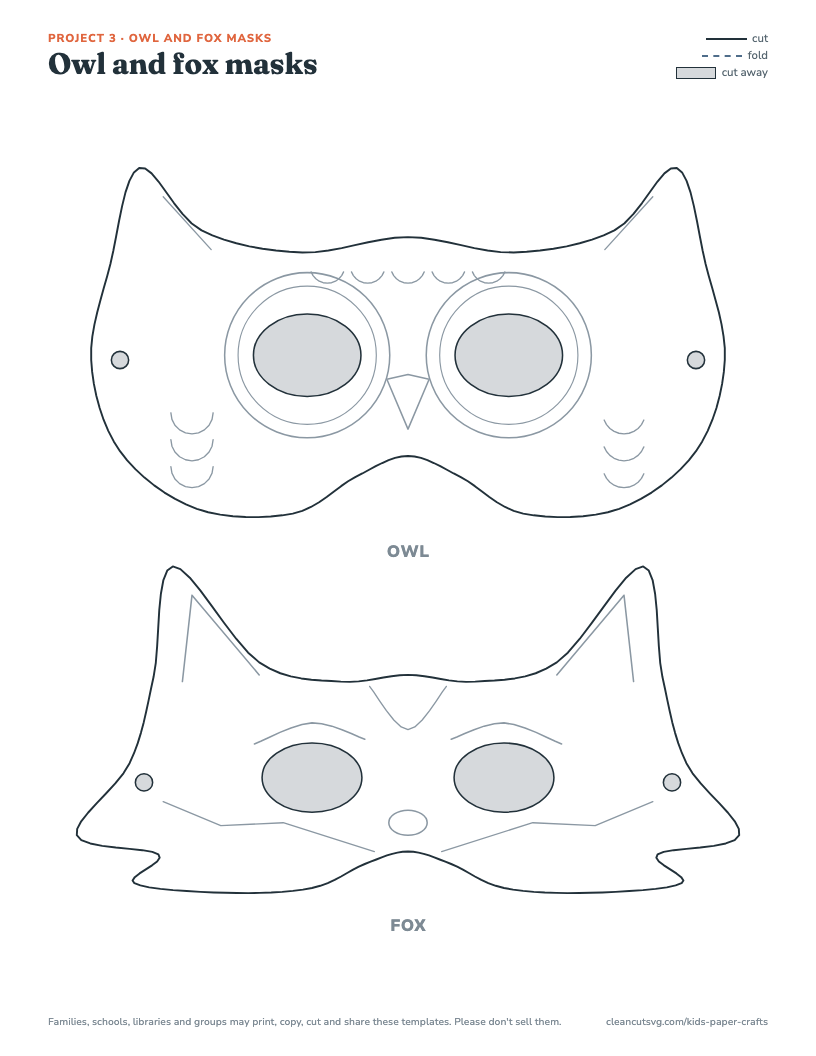
Gray: cut away

Each project PDF has the template and a second page of instructions, so you can hand a table of kids everything they need. The coloring lines print light so crayons cover them.

Have a cutting machine? The SVG files open in Cricut Design Space, Silhouette Studio (Designer Edition and up) and Inkscape. The DXF files work in Silhouette Studio Basic Edition. Fold lines come in as separate lines: set them to Score, or hide them and fold by hand. The machine files are the shapes only. The coloring art is on the PDFs. New to this? See what an SVG file is and how to upload one to Design Space.

pick a project

All 14 projects

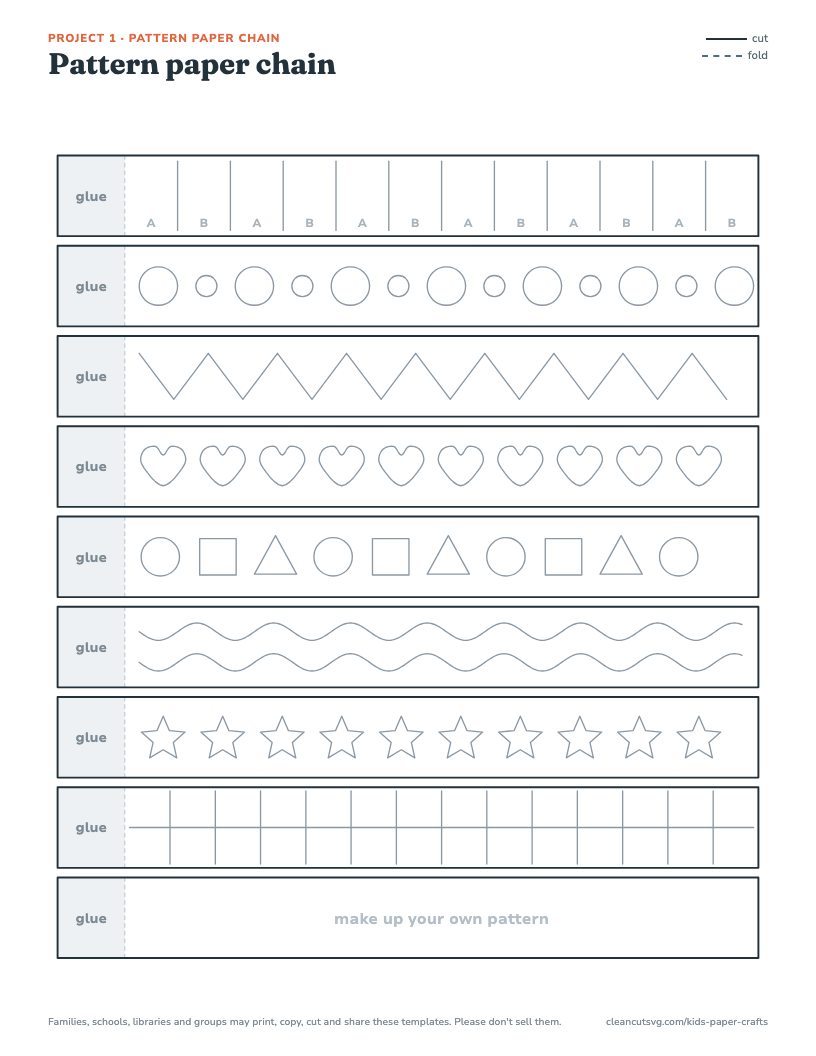
Pattern paper chain printable template
1. Everyday crafts

Pattern paper chain

Ages 5-9 · 20-30 min · Mess: low

Pop-up card printable template
2. Everyday crafts

Pop-up card

Ages 7-12 · 30-40 min · Mess: low

Owl and fox masks printable template
3. Everyday crafts

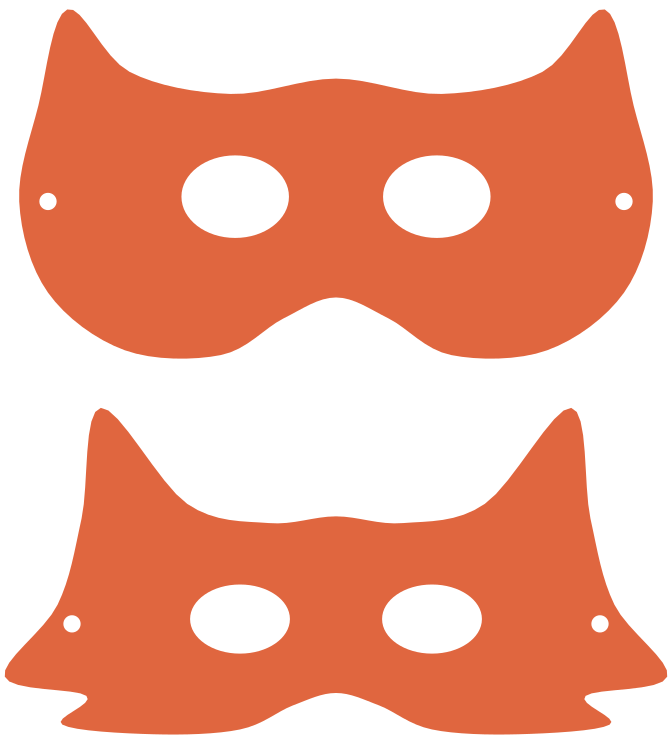
Owl and fox masks

Ages 4-10 · 20-30 min · Mess: low

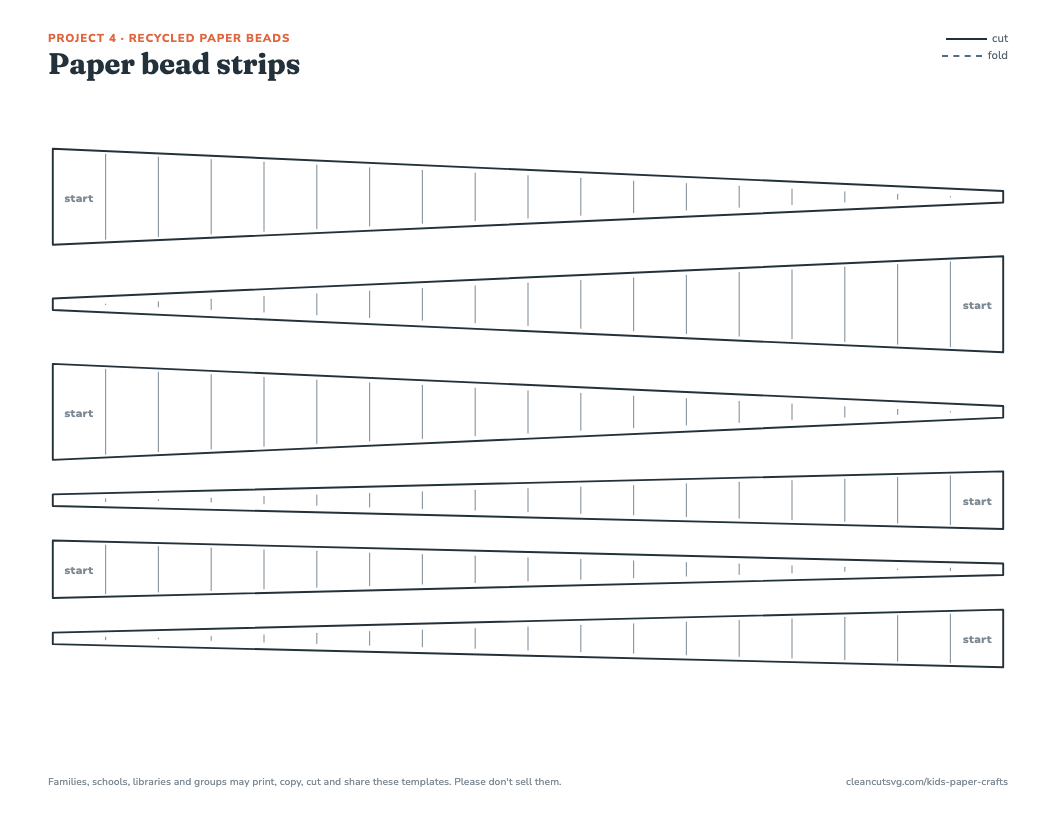
Recycled paper beads printable template
4. Everyday crafts

Recycled paper beads

Ages 8-12 · 30-45 min · Mess: medium

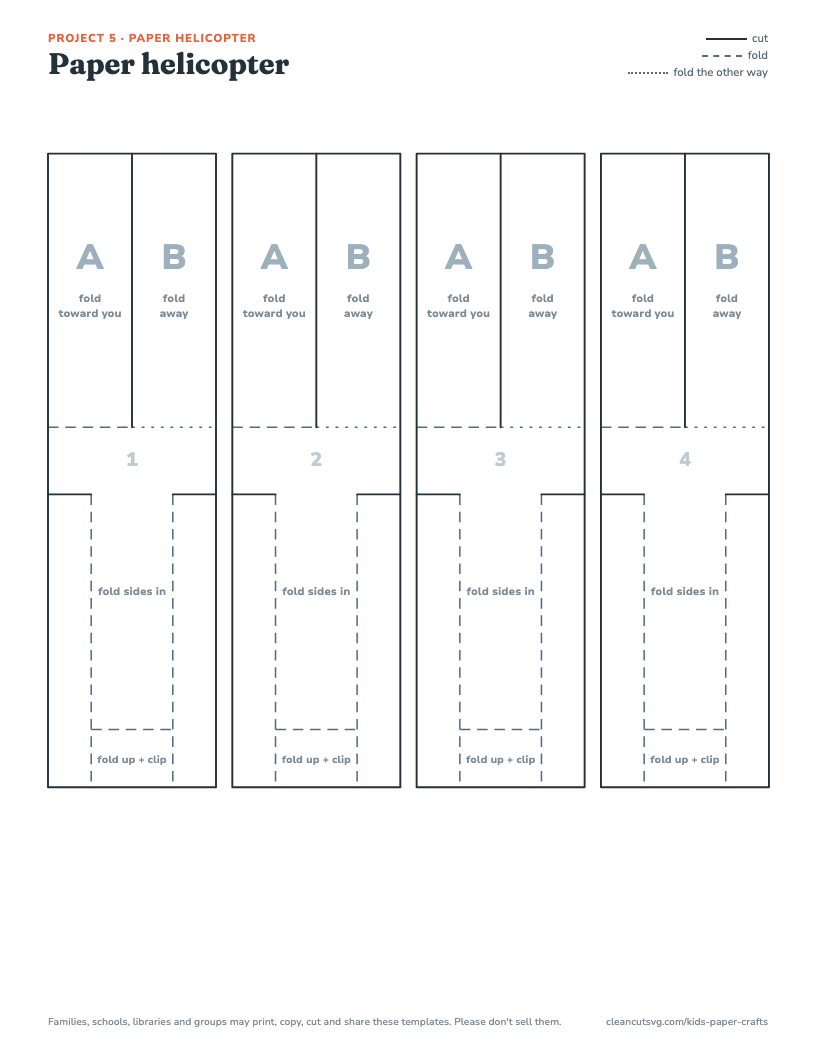
Paper helicopter printable template
5. Science and nature

Paper helicopter

Ages 6-12 · 15 min, plus testing · Mess: low

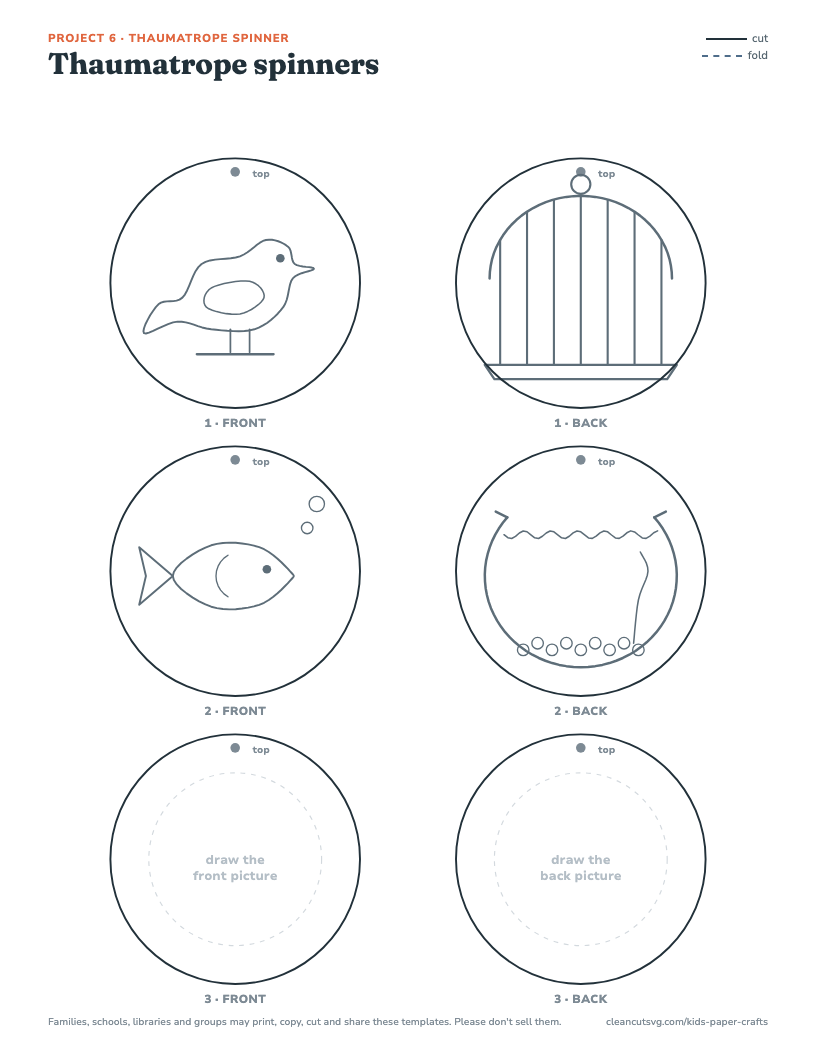
Thaumatrope spinner printable template
6. Science and nature

Thaumatrope spinner

Ages 6-12 · 20 min · Mess: low

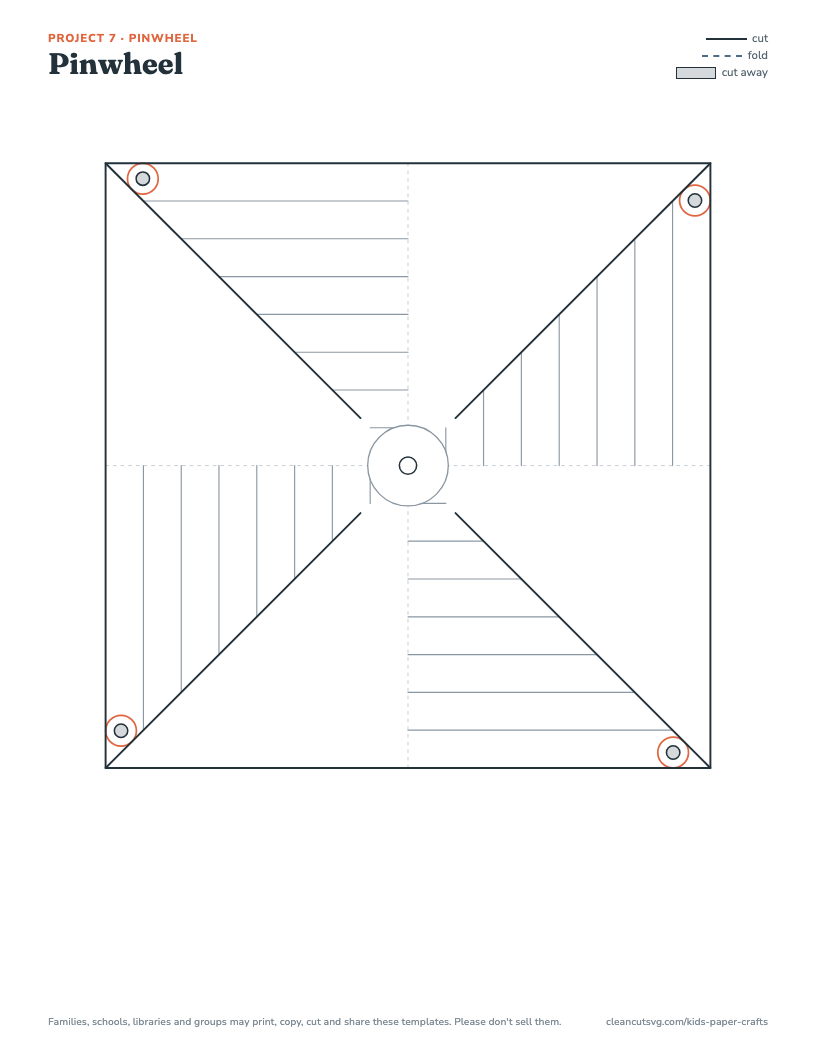
Pinwheel printable template
7. Science and nature

Pinwheel

Ages 6-12 (with help) · 25 min · Mess: low

Symmetry fold-and-cut printable template
8. Science and nature

Symmetry fold-and-cut

Ages 6-10 · 20 min · Mess: low

Paper jellyfish printable template
9. Science and nature

Paper jellyfish

Ages 5-10 · 30 min · Mess: medium

Six-point snowflake printable template
10. Holidays and seasons

Six-point snowflake

Ages 8-12 · 20 min · Mess: low

Paper lantern for the Lantern Festival printable template
11. Around the world

Paper lantern for the Lantern Festival

Ages 6-12 · 25 min · Mess: low

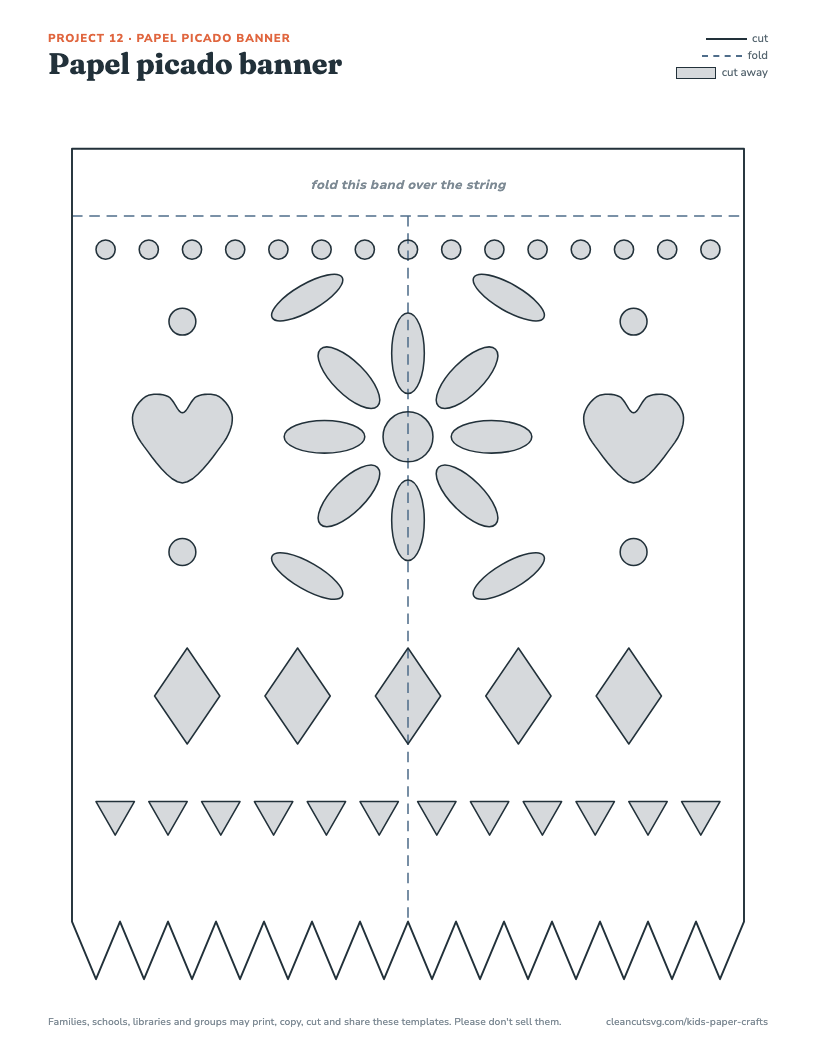
Papel picado banner printable template
12. Around the world

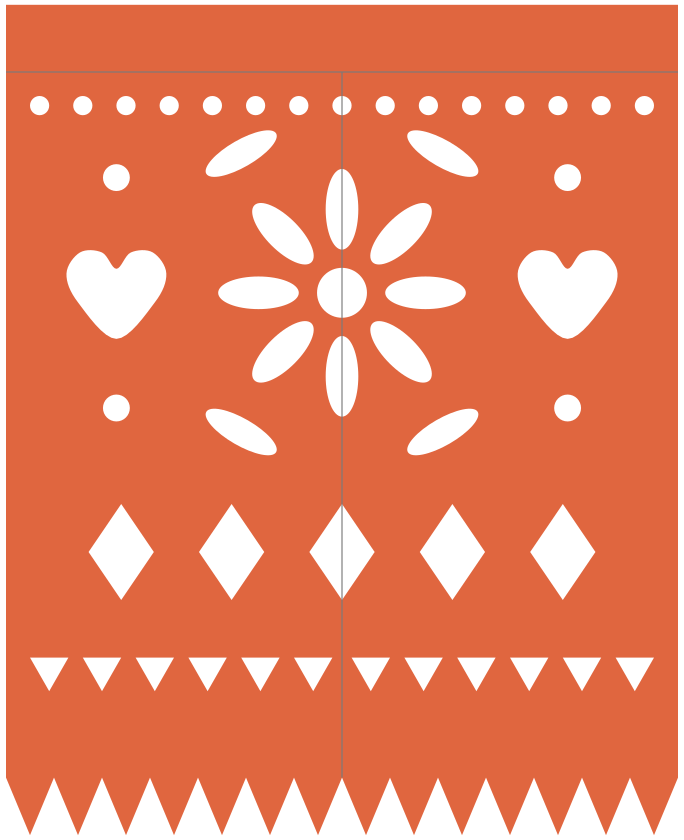
Papel picado banner

Ages 8-12 · 25 min · Mess: low

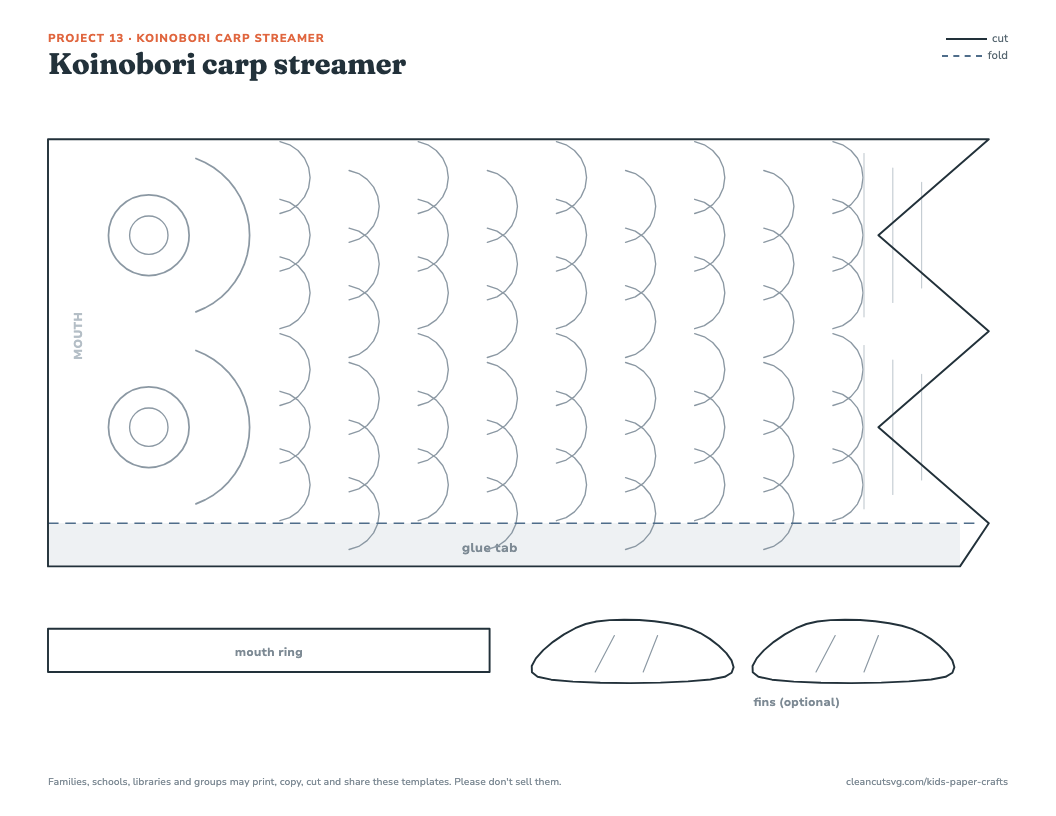
Koinobori carp streamer printable template
13. Around the world

Koinobori carp streamer

Ages 6-12 · 30 min · Mess: medium

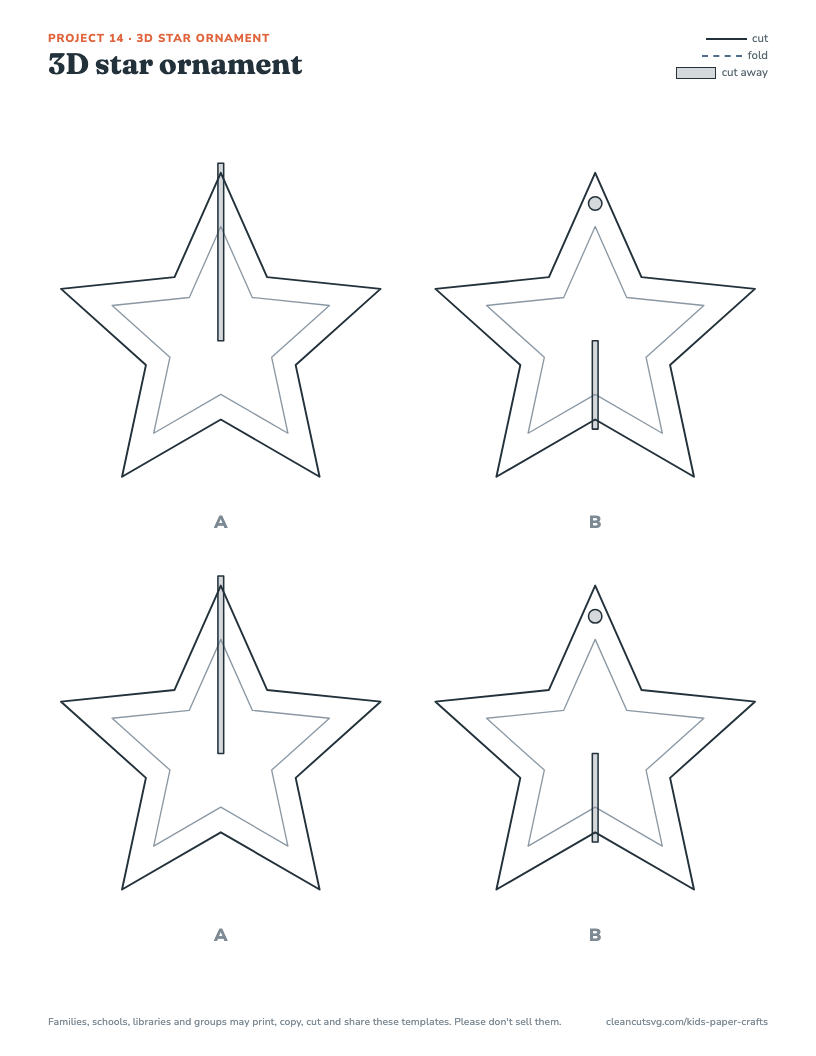
3D star ornament printable template
14. Holidays and seasons

3D star ornament

Ages 7-12 · 15 min · Mess: low

projects

Everyday crafts

Projects for any week of the year, with no special supplies.

Pattern paper chain template, letter size
Project 1 · Everyday crafts

Pattern paper chain

Ages 5-920-30 minMess: LowCopy paper or colored paper

You need

  • Printed strips
  • Crayons or markers
  • Scissors
  • Glue stick or tape
Lesson linkSpot, extend and invent repeating patterns (AB, ABC, AAB).
Grades: K-2 · Ties to: Math: patterns. Art: color and rhythm.

Steps

  1. Color each strip. Keep each pattern going to the end, or make up your own on the blank strip.
  2. Cut the strips apart on the black lines.
  3. Curl the first strip into a loop and glue its end onto the gray glue box.
  4. Thread the next strip through the loop and glue it the same way.
  5. Keep adding links. Hang the chain or join it to a friend's.
Tip: Make it a countdown chain: write a number on each link and tear one off each day.
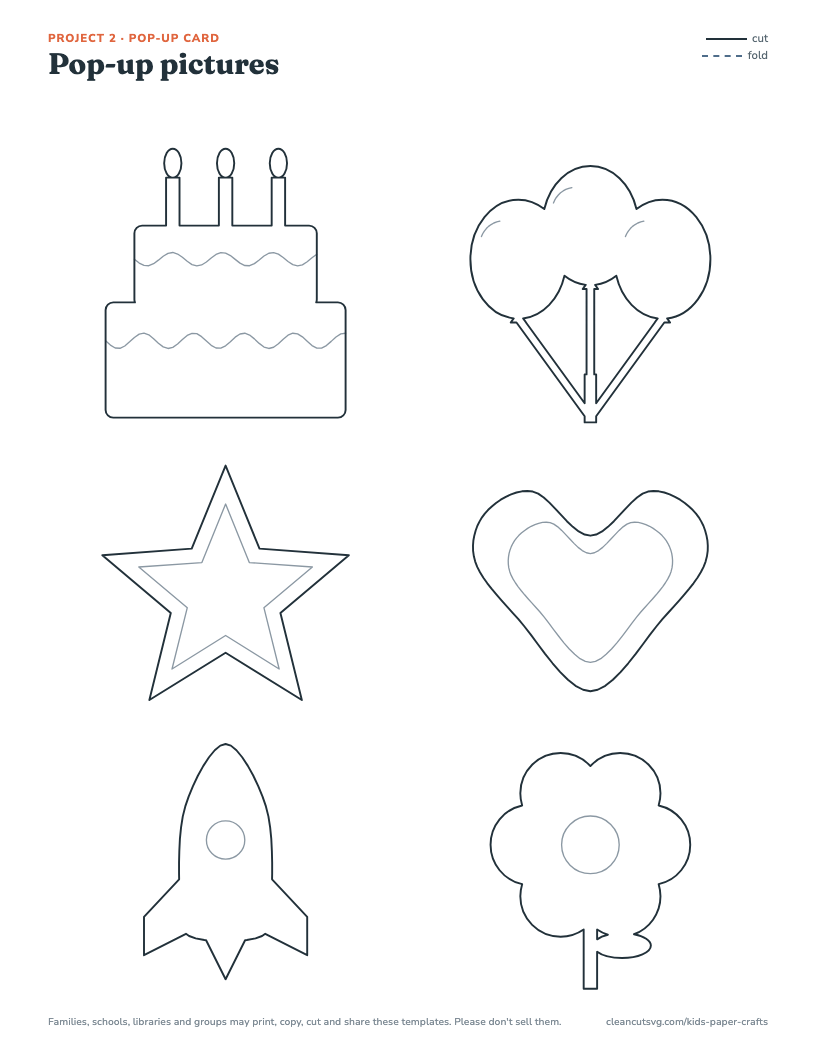
Pop-up card template, letter sizePop-up pictures template, letter size
Project 2 · Everyday crafts

Pop-up card

Ages 7-1230-40 minMess: LowCard: letter cardstock (65-80 lb). Pictures: copy paper

You need

  • Card sheet on cardstock
  • Pictures sheet
  • Scissors
  • Glue stick
  • Markers
Lesson linkSee how two cuts and a fold turn flat paper into a 3D step.
Grades: 2-6 · Ties to: Engineering and design. Writing: a message for a real reader.

Steps

  1. Fold the card in half on the long dashed line, printed side inside.
  2. Keep it folded and cut the four short black lines, starting at the fold.
  3. Fold each little flap forward and back on its dashed line to crease it well.
  4. Open the card halfway and push each flap inside so it pops out as a step. Close the card and press.
  5. Color a picture, cut it out and glue it to the front of a step. Keep it inside the card's edges.
  6. Decorate the outside and write your message.
Tip: Test the pictures before gluing: close the card and make sure nothing sticks out.
Owl and fox masks template, letter size
Project 3 · Everyday crafts

Owl and fox masks

Ages 4-1020-30 minMess: LowCardstock

You need

  • Printed masks on cardstock
  • Crayons or markers
  • Scissors
  • Hole punch
  • Elastic cord or yarn (or a craft stick and tape)
Lesson linkAct out a story as an owl or a fox.
Grades: PreK-3 · Ties to: Literacy: retelling and drama. Science: animals that are active at night.

Steps

  1. Color the mask.
  2. Cut around the outside line.
  3. An adult starts the eye holes: pinch the gray area, snip a small cut, then cut around the oval.
  4. Punch the two side holes and tie on elastic or yarn. For little kids, tape a craft stick to one side instead.
  5. Hold it up to your face and check that you can see well before you play.
Tip: Great with an owl or fox picture book at storytime. Cut the eye holes ahead of time for groups under 6.
Paper bead strips template, letter size
Project 4 · Everyday crafts

Recycled paper beads

Ages 8-1230-45 minMess: Medium (glue)Copy paper, magazine pages or old calendars

You need

  • Bead strips (or magazine pages)
  • Wooden skewer, straw or thin marker
  • Glue stick
  • String or yarn
Lesson linkReuse paper and compare bead shapes: the wide strips make fat beads, the narrow ones thin beads.
Grades: 3-6 · Ties to: Earth Day and recycling. Math: measuring length and width.

Steps

  1. Color the strips, or trace a strip onto a colorful magazine page.
  2. Cut the strips out.
  3. Start at the wide end marked 'start' and roll the strip tightly around a skewer or straw.
  4. Put glue on the last two inches and finish rolling. Hold for a few seconds.
  5. Slide the bead off and let it dry. String your beads.
Tip: Use the template as a tracer for magazine pages: the bead shows bits of color from the page.
projects

Science and nature

Each one comes with something to test, measure or notice.

Paper helicopter template, letter size
Project 5 · Science and nature

Paper helicopter

Ages 6-1215 min, plus testingMess: LowCopy paper

You need

  • Printed sheet (4 helicopters)
  • Scissors
  • Paper clips
Lesson linkRun a fair test: change one thing (rotor length or number of clips) and time the drops.
Grades: 3-5 · Ties to: Science: forces and motion (fits NGSS 3-PS2-1).

Source: NGSS 3-PS2-1

Steps

  1. Cut out a helicopter on its outside line.
  2. Cut down the center line between A and B. Stop at the dashed line.
  3. Cut the two short lines on the sides.
  4. Fold A toward you and B away from you.
  5. Fold the sides in on the dashed lines, then fold the bottom up and hold it with a paper clip.
  6. Drop it from up high and watch it spin.
Tip: Drop from the same height every time, three drops each, and take the middle time.
Thaumatrope spinners template, letter size
Project 6 · Science and nature

Thaumatrope spinner

Ages 6-1220 minMess: LowCardstock

You need

  • Printed circles on cardstock
  • A straw or pencil
  • Tape
  • Glue stick
  • Crayons
Lesson linkYour eyes and brain blend two pictures that swap quickly, the same idea behind animation.
Grades: 2-6 · Ties to: Science: light and sight. History: the English doctor John Paris described this toy in 1825.

Source: Kenyon College, Early Scientific Apparatus

Steps

  1. Color a front and back pair (bird and cage, or fish and bowl), or draw your own on the blank pair.
  2. Cut out both circles of the pair.
  3. Tape a straw or pencil to the back of the FRONT circle, running from the top dot straight down through the middle.
  4. Glue the BACK circle on, picture facing out, with both top dots at the top.
  5. Roll the straw fast between your hands. The bird goes into the cage.
Tip: Ask kids to design a pair where the two halves need each other: a face and a hat, a hive and a bee.
Pinwheel template, letter size
Project 7 · Science and nature

Pinwheel

Ages 6-12 (with help)25 minMess: LowCardstock or two-sided paper

You need

  • Printed square
  • Scissors
  • Hole punch or pushpin (adult)
  • Brad (paper fastener)
  • Straw or pencil with eraser
Lesson linkMoving air pushes the sails, the same push a wind turbine turns into electricity.
Grades: 1-5 · Ties to: Science: wind and energy. Earth Day.

Steps

  1. Color the striped parts. They become the sails.
  2. Cut out the square, then cut each diagonal line from the corner. Stop at the circle.
  3. Make a hole at each of the four circled dots and one in the middle.
  4. Bend each circled point to the middle, one at a time. Don't crease.
  5. Push a brad through all four points and the middle hole, then through a straw. Bend the brad's legs open loosely.
  6. Blow on it or carry it into the wind.
Tip: If it won't spin, loosen the brad a little so the pinwheel turns freely on the straw.
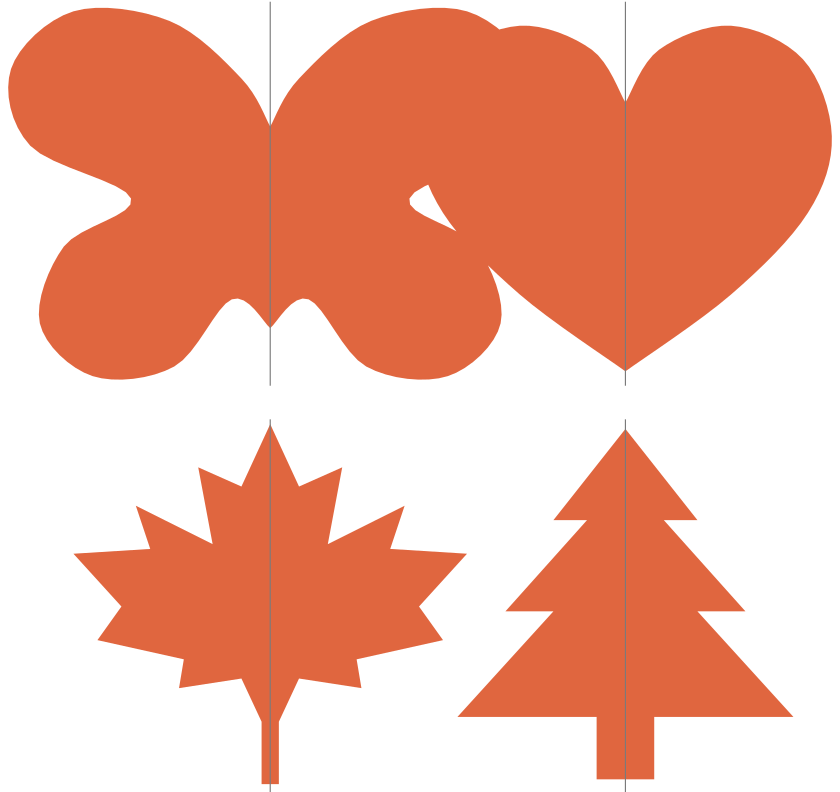
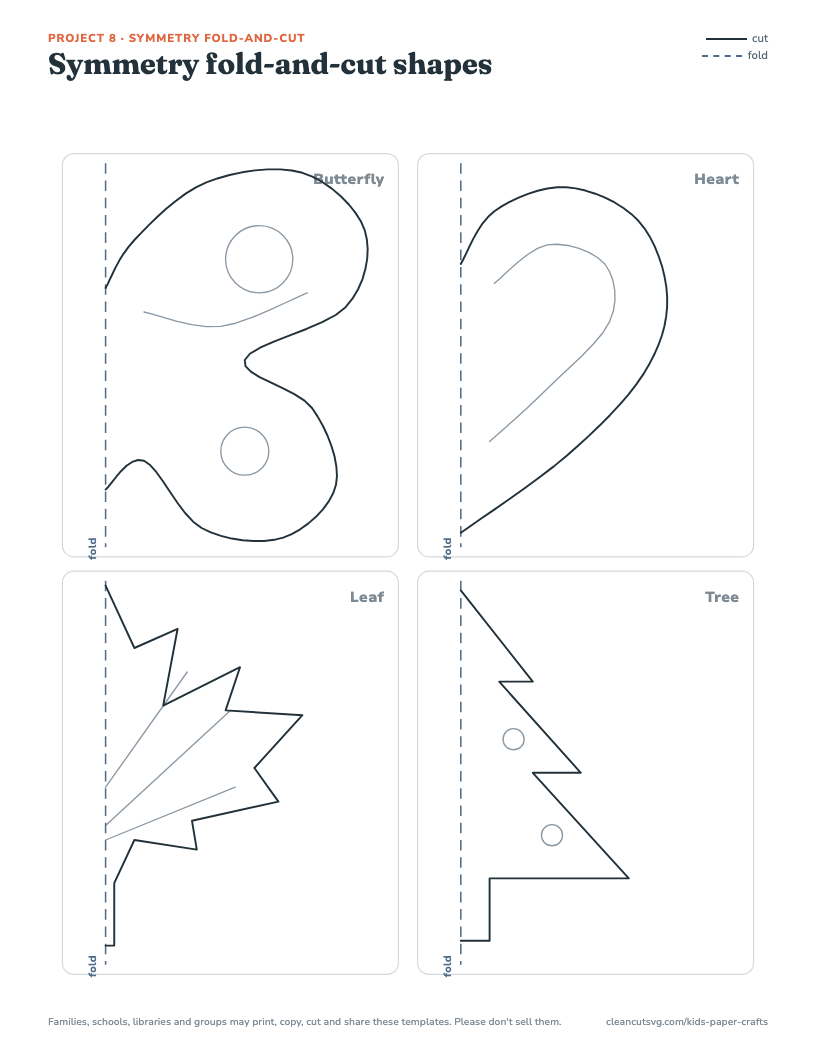
Symmetry fold-and-cut shapes template, letter size
Project 8 · Science and nature

Symmetry fold-and-cut

Ages 6-1020 minMess: LowCopy paper

You need

  • Printed sheet
  • Scissors
  • Crayons or markers
Lesson linkFind the line of symmetry and make both halves match.
Grades: 2-4 · Ties to: Math: line symmetry (fits Common Core 4.G.A.3). Science: symmetry in leaves and insects.

Source: Common Core 4.G.A.3

Steps

  1. Cut the four boxes apart.
  2. Fold each box on its dashed line, printed side out.
  3. Cut along the black line through both layers. Don't cut the fold.
  4. Open it: one shape, two matching halves.
  5. Color the blank half so it matches the printed half, like a mirror.
Tip: Go on a symmetry hunt afterward: leaves, faces, letters (A, H, M, T) and windows.
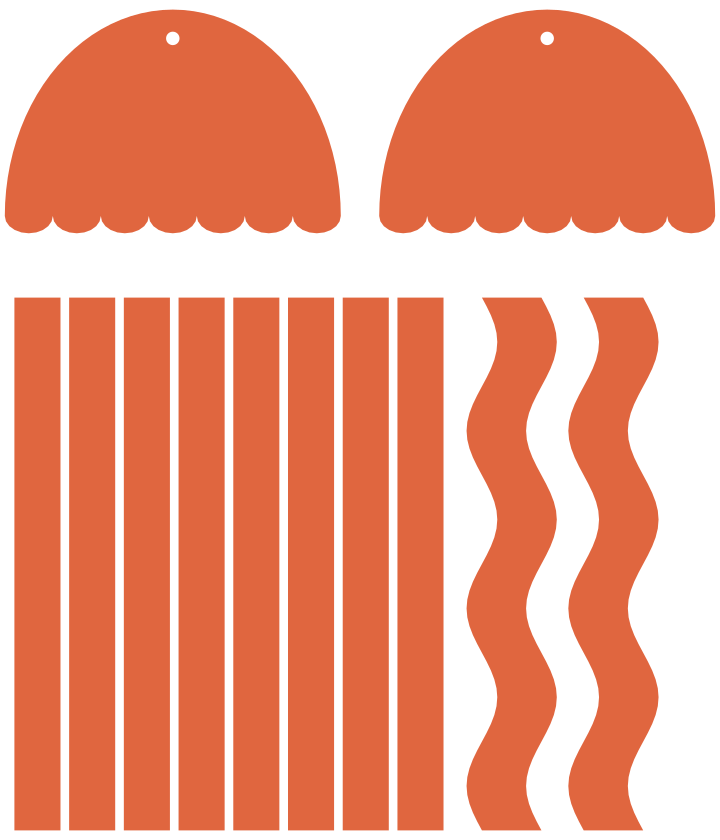
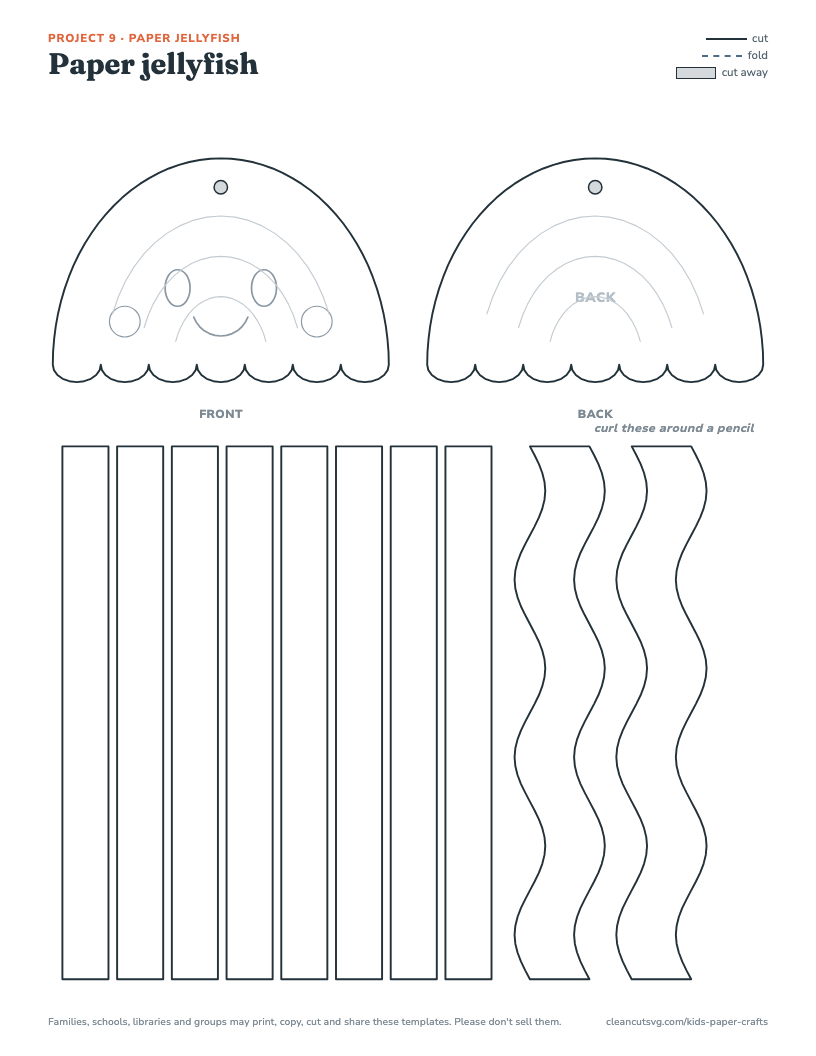
Paper jellyfish template, letter size
Project 9 · Science and nature

Paper jellyfish

Ages 5-1030 minMess: Medium (glue)Copy paper or colored paper

You need

  • Printed sheet
  • Scissors
  • Glue stick
  • Pencil
  • String
Lesson linkLook closely at a real jellyfish: no bones, a soft bell, long trailing arms.
Grades: K-3 · Ties to: Science: ocean animals. Art: texture from curls and waves.

Steps

  1. Color the two bell shapes and the strips.
  2. Cut out the bells and all the strips.
  3. Wrap each straight strip tightly around a pencil, then slide it off so it curls.
  4. Glue the tops of the strips along the bottom edge of the FRONT bell, on the back side. Put the wavy arms in the middle.
  5. Glue the BACK bell on top to hide the ends. Tie a string through the top hole and hang it.
Tip: Hang a whole bloom of jellyfish from the ceiling for an ocean-themed storytime.
projects

Around the world

Three crafts from traditions kids may celebrate at home or learn about at school, each with a short note and a source.

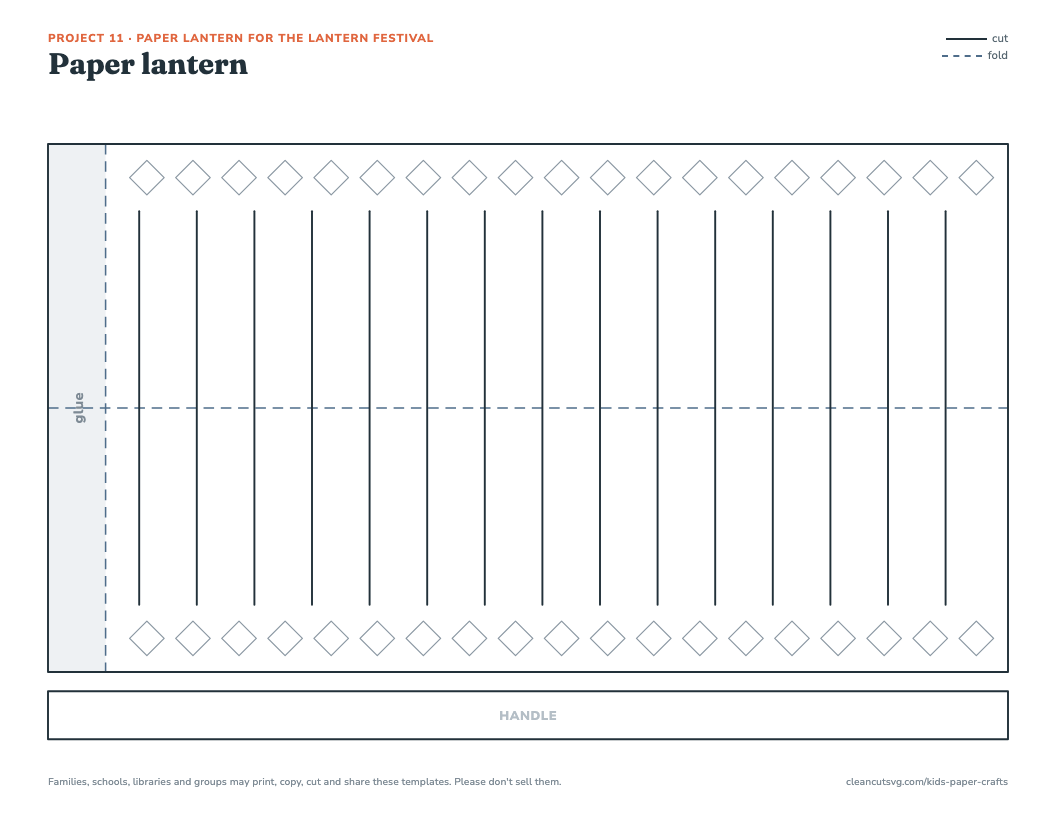
Paper lantern template, letter size
Project 11 · Around the world

Paper lantern for the Lantern Festival

Ages 6-1225 minMess: LowRed or yellow paper, printed landscape

You need

  • Printed sheet
  • Scissors
  • Glue stick or tape
  • Markers
Lesson linkThe Lantern Festival falls on the 15th day of the first lunar month and ends the Lunar New Year celebrations.
Grades: 1-6 · Ties to: Social studies: holidays and traditions. Math: equal spacing.

Source: USC U.S.-China Institute

Steps

  1. Color the patterned bands at the top and bottom.
  2. Cut out the big rectangle and the handle strip.
  3. Fold the rectangle in half the long way on the dashed line, printing outside.
  4. Starting at the fold, cut along each black line. Stop when you reach the patterned band.
  5. Unfold, roll it into a tube and glue the gray strip under the other end.
  6. Press down gently so the middle puffs out. Glue the handle inside the top.
Tip: Some families write riddles on paper strips and hang them on lanterns. Try tying riddles to yours.
Papel picado banner template, letter size
Project 12 · Around the world

Papel picado banner

Ages 8-1225 minMess: LowCopy paper, or tissue paper clipped over the printed template

You need

  • Printed template
  • Small sharp scissors
  • String
  • Glue stick or tape
Lesson linkPapel picado ('punched paper') is a Mexican folk art. Artisans stack dozens of sheets of tissue paper and punch designs with a chisel, for Día de los Muertos and other celebrations.
Grades: 3-6 · Ties to: Social studies: Mexican folk art and Día de los Muertos. Math: symmetry.

Source: Mexic-Arte Museum lesson, Arte Para Todos

Steps

  1. Cut around the outside line, including the zigzag bottom.
  2. Fold the top band back on its dashed line.
  3. Fold the sheet in half on the center dashed line, printed side out.
  4. Cut out the gray shapes through both layers. For shapes on the fold, cut half a shape from the folded edge. For the others, pinch the middle and snip to start.
  5. Open it up. Make a few, then fold each top band over a string and glue it down.
Tip: Tissue paper is closest to the real thing. Fold it in half, clip it over the template, and cut through both.
Koinobori carp streamer template, letter size
Project 13 · Around the world

Koinobori carp streamer

Ages 6-1230 minMess: Medium (glue)Copy paper, printed landscape

You need

  • Printed sheet
  • Scissors
  • Glue stick
  • Hole punch
  • String
Lesson linkOn Children's Day in Japan (May 5), families fly koinobori, carp streamers made of cloth. The carp stands for strength.
Grades: 1-5 · Ties to: Social studies: holidays around the world.

Source: MIT Japan Program (JPNET)

Steps

  1. Color the scales, eyes and tail. The top half is one side of the fish and the bottom half is the other.
  2. Cut out the body, the mouth ring and the fins.
  3. Roll the body into a tube, printing outside, and glue the top edge onto the gray glue tab.
  4. Curl the mouth ring into a circle and glue it inside the mouth to keep it round.
  5. Glue on the fins if you like. Punch two holes near the mouth, tie on a string and let it catch the breeze.
Tip: Make a family of carp in different colors and hang them one above the other on a stick.
projects

Holidays and seasons

Winter and holiday decorations that work with plain paper.

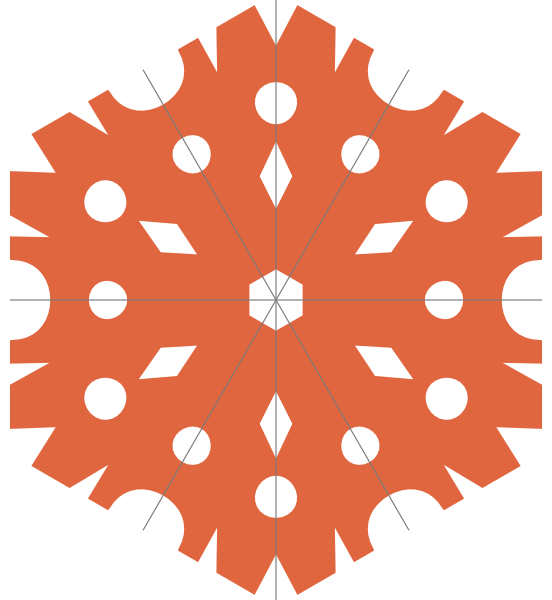
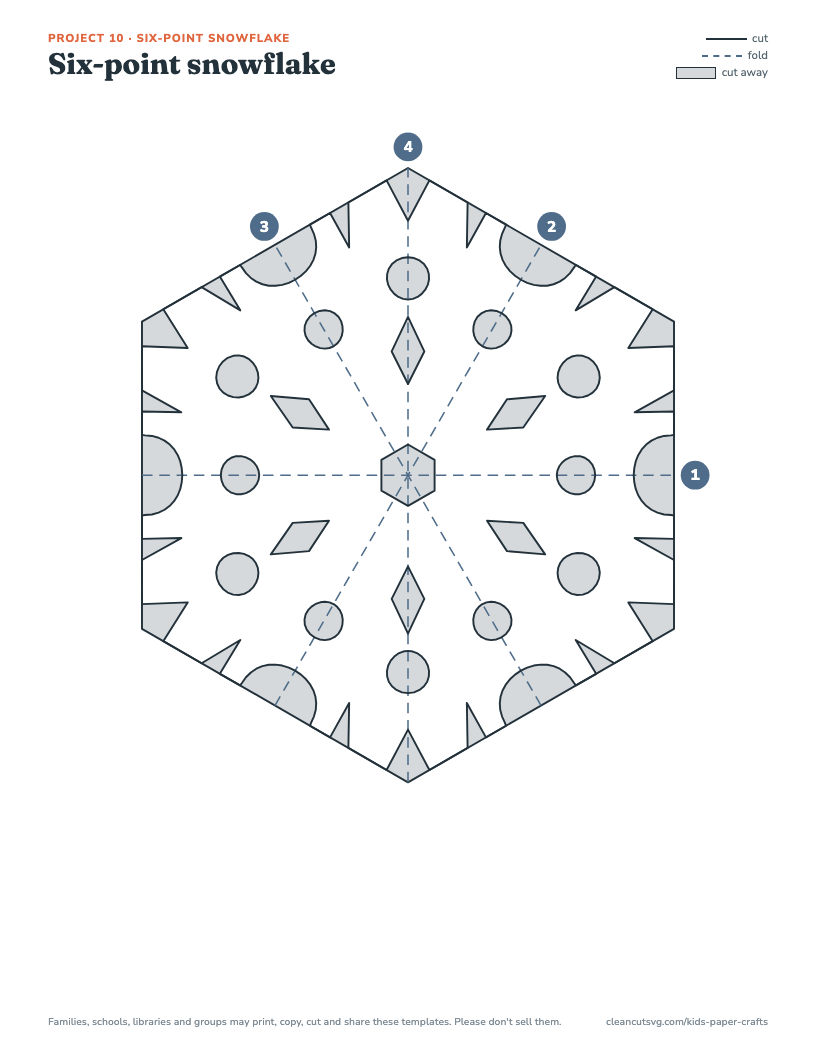
Six-point snowflake template, letter size
Project 10 · Holidays and seasons

Six-point snowflake

Ages 8-1220 minMess: LowThin copy paper

You need

  • Printed hexagon on copy paper
  • Sharp scissors
Lesson linkReal snow crystals have six-fold symmetry, which is why this flake has six points and not eight.
Grades: 3-6 · Ties to: Science: water and ice crystals. Math: angles (6 x 60 degrees = 360).

Source: SnowCrystals.com (Caltech physicist Kenneth Libbrecht)

Steps

  1. Cut out the hexagon on its outside line.
  2. Fold on line 1 with the printed side out. Keep the printing on the outside for every fold.
  3. Fold on lines 2 and 3 into thirds, like a fan: one third forward, one third back.
  4. Fold in half on line 4. You now have a thin wedge.
  5. Cut away the gray parts you can see, through all the layers.
  6. Unfold slowly and press it flat under a book.
Tip: Twelve layers is a lot of paper: thin copy paper works much better than construction paper.
3D star ornament template, letter size
Project 14 · Holidays and seasons

3D star ornament

Ages 7-1215 minMess: LowCardstock

You need

  • Printed stars on cardstock
  • Scissors
  • String or ribbon
  • Markers
Lesson linkTwo flat shapes make one solid shape: look at it from above and find the right angles.
Grades: 2-5 · Ties to: Math: 2D and 3D shapes, right angles.

Steps

  1. Color both sides of each star if you like.
  2. Cut out star A and star B.
  3. Cut out the thin gray slot in each star.
  4. Slide A's slot down over B's slot until the centers line up. The stars sit at right angles.
  5. Thread string through the hole at the top of B and hang it.
Tip: On copy paper a single cut works for the slot; on cardstock cut a thin sliver so the stars slide together.
for teachers and librarians

Running a group craft program

Most of these projects were picked because one sheet of paper per child is enough and the only tools are scissors, glue and crayons. For a group of about 20:

  • Make a sample first. Kids follow a finished example faster than spoken steps, and you’ll find the tricky step before they do.
  • Demo one step at a time, then wait. The numbered steps on each instruction page are written to be read aloud.
  • Pre-cut for the youngest. Eye holes, small slots and the snowflake hexagon are the parts most kids under 7 need help with.
  • Have a second project ready. Paper helicopters and symmetry shapes take 15 minutes and make good early-finisher activities.
ProjectPaper per kidPrep for a groupStaff prep for 20
Pattern paper chain1 sheet copy paperNone10 min
Pop-up card1 cardstock + 1 copy paperPre-fold cards for under-8s15 min
Owl and fox masks1 cardstock (2 masks)Cut eye holes for under-6s; cut elastic lengths30 min
Recycled paper beads1 sheet (6 beads) or magazine pagesSet out skewers or straws10 min
Paper helicopter1 sheet makes 4Count paper clips (2 per kid)5 min
Thaumatrope spinner1 cardstock makes 3 spinnersCut straws in half10 min
Pinwheel1 cardstockPunch the holes ahead for under-8s20 min
Symmetry fold-and-cut1 sheet makes 4None5 min
Paper jellyfish1 sheetPre-cut strips for under-6s15 min
Six-point snowflake1 sheet thin copy paperPre-cut hexagons for younger kids10 min
Paper lantern for the Lantern Festival1 sheet (red or yellow)None5 min
Papel picado banner1 sheet per flag; tissue optionalHang a string across the room10 min
Koinobori carp streamer1 sheetCut string lengths10 min
3D star ornament1 cardstock makes 2 starsCut ribbon lengths10 min

Paper counts are per child. Prep times are rough estimates for one adult preparing for 20 kids, based on the steps above.

Printable program planner

A one-page sheet for planning a session: supplies multiplied out for your headcount, a day-before checklist and a simple session plan.

Plan it once, run it again

Craft program planner

Templates and steps:
cleancutsvg.com/kids-paper-crafts
Program:Date and time:Ages:Expected kids:Project 1:Project 2 (early finishers):
SupplyPer kid× kids+ 10% spareHave it?

The day before

  • Print templates at 100% (actual size)
  • Make one sample of each project
  • Pre-cut anything the youngest can’t
  • Sort supplies into one tray per table

Session plan

  • 5 min: show the finished sample
  • Demo one step at a time
  • Early finishers: second project or coloring
  • 5 min: clean up, names on projects

Notes for next time: ____________________________________________________________

Families, schools, libraries and groups may print, copy, cut and share these templates. Please don't sell them. From cleancutsvg.com.

⬇ Planner PDF
one click

Download everything

Papel picado banner template

All templates in one PDF: 15 template pages plus 14 instruction pages, 0.7 MB. Print only the pages you need.

⬇ All templates (PDF)

Everything in one ZIP: one PDF per project, plus SVG and DXF files for cutting machines and a README with the license. 2.7 MB.

⬇ Download the ZIP

The machine files passed the same software check as every file on this site, for pieces too thin or too small to cut (how we check files). The paper templates were drawn to be cut with scissors.

plain terms

License for families, schools and libraries

Families, schools, libraries and groups may print, copy, cut and share these templates. Please don't sell them.

  • Copy them for a whole class, a library program, a camp or a scout meeting.
  • Put the PDFs on a shared drive, a class page or a LibGuide.
  • Kids can take their templates and finished crafts home.
  • Please don’t sell the templates or put them in a paid product.

This license covers this set only: the templates, instruction pages and planner on this page. Everything else on cleancutsvg.com stays under our regular file license.

for educators and librarians

Cite or link this page

No ads, no sign-up, nothing to buy. You’re welcome to link to this page from a library guide, a class page or a newsletter.

APA: Clean Cut SVG. (2026, October 6). Free kids’ paper crafts with printable templates. https://cleancutsvg.com/kids-paper-crafts/

MLA: “Free Kids’ Paper Crafts with Printable Templates.” Clean Cut SVG, 6 Oct. 2026, cleancutsvg.com/kids-paper-crafts/.

Found a step that doesn’t work, or want a template for a program you run? Email hello@cleancutsvg.com. Templates drawn and page last checked October 6, 2026. The photo at the top is an illustration, not a photo of these exact templates.

More free printables for schools and libraries

The classroom clip-art set has 120 free images for school projects. Library makerspaces with a Cricut can use the library makerspace pack and the Cricut makerspace guide.