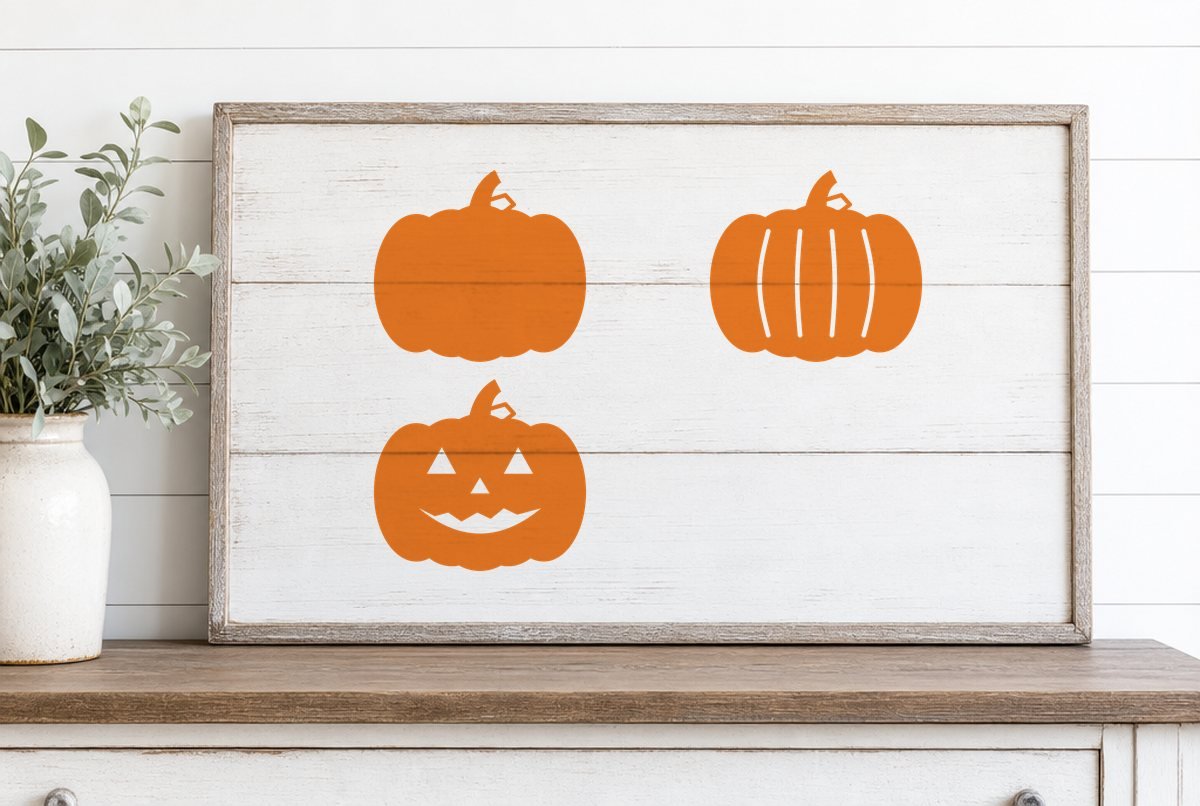
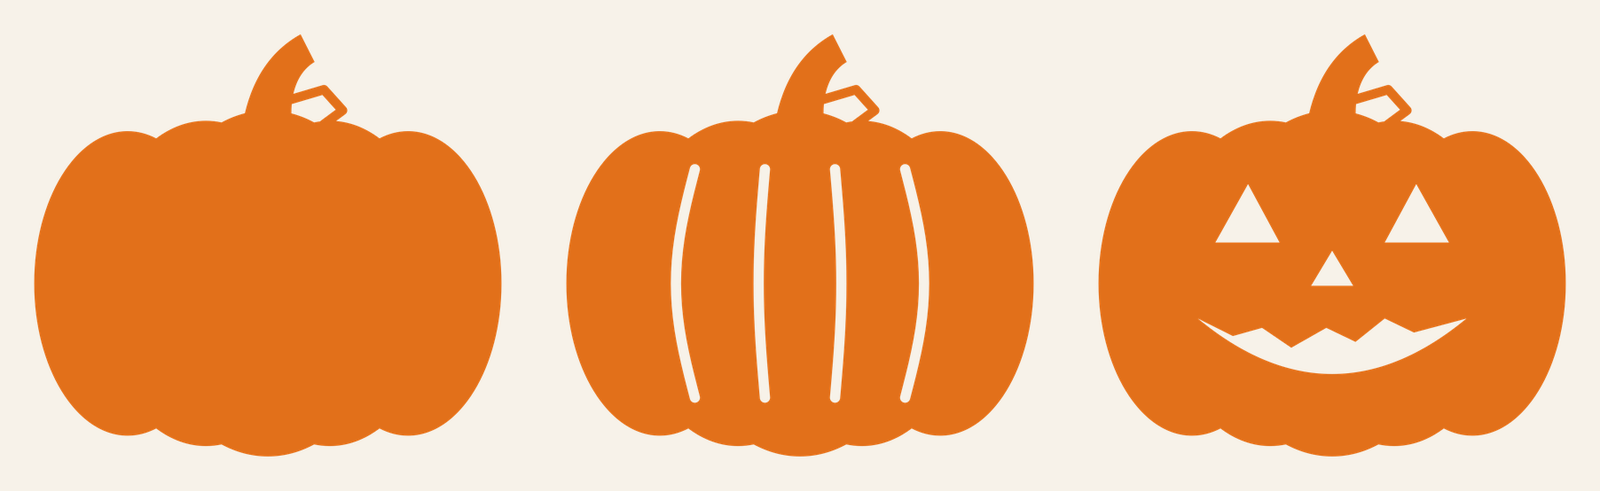
Three pumpkins, one download: a plain silhouette, a ribbed pumpkin with four carved-in grooves, and a jack-o’-lantern with triangle eyes, a triangle nose and a jagged grin. All three share the same lumpy outline and the same curled stem with an open leaf, so they look like a set when you line them up on a porch board or a stack of treat bags.
Each file opens at 5.1 x 4.61 in and was built for adhesive vinyl. That’s a good size for treat bags, tumblers and small wood rounds. Making shirts? Size them up for iron-on; the table further down has the numbers.
| File | Size | Material | Layers | Check |
|---|---|---|---|---|
| Plain pumpkin | 5.12 × 4.62 in | Vinyl | 1 layer | ✓ Cut-checked |
| Ribbed pumpkin | 5.12 × 4.62 in | Vinyl | 1 layer | ✓ Cut-checked |
| Jack-o'-lantern | 5.12 × 4.62 in | Vinyl | 1 layer | ✓ Cut-checked |
How the three pumpkins are built
Each pumpkin is a single welded shape. The lobes, stem and leaf are merged into one outline, so the blade follows every edge once and nothing double-cuts where parts used to overlap.
- Plain pumpkin. The easiest weed in the pack. The only cut inside the shape is the open center of the leaf.
- Ribbed pumpkin. Four slim, curved grooves run from the top of the body to the bottom. They’re knocked out of the shape, so you’ll weed four narrow slots plus the leaf.
- Jack-o’-lantern. Five knockouts: two eyes, a nose, the mouth and the leaf. The grin is one piece with a zigzag top edge rather than separate teeth, so there are no loose islands to chase across the mat.
Our checker rendered all three at 5.1 in wide for adhesive vinyl and looked for strokes too thin to cut, bits too small to weed and gaps too narrow to pick out. All three passed. If you ever shrink them, the parts that would get into trouble first are the ribbed grooves and the thin outline of the leaf.
What you need
- A cutting machine (Cricut, Silhouette or similar)
- Adhesive vinyl in orange: permanent for tumblers and outdoor signs, removable for walls and windows
- Iron-on (HTV) instead, if you’re making a shirt or tote
- Standard grip mat
- Weeding hook
- Transfer tape (standard grip for smooth vinyl) and a scraper
How to cut a pumpkin
- Unzip and upload. Open the ZIP, then upload the SVG you want. In Design Space that’s Upload on the left panel, then Upload Image. Our step-by-step upload guide covers desktop, iPhone and Android. Silhouette Studio Basic Edition users can open the DXF.
- Check the size. The pumpkin should arrive at 5.1 in wide. If you resize, keep the lock icon closed so the width and height stay in proportion, and don’t go smaller than 5.1 in for vinyl or 6 in for iron-on.
- Pick your material. Click Make, then choose the exact vinyl you’re cutting on the material screen. For iron-on, Design Space turns on Mirror automatically when you select an iron-on material; glance at the Mirror toggle anyway before you cut.
- Weed. Peel away the background first, then lift out the knockouts. On the ribbed pumpkin, start each groove at one end and pull along its length. How to weed vinyl has more on keeping small parts in place.
- Apply. For adhesive vinyl, cover the pumpkin with transfer tape, burnish, peel the backing and press it onto a clean, dry surface from the center out (see how to use transfer tape). For iron-on, use the time and temperature from the Cricut Heat Guide or your HTV maker’s instructions.
What size to use
The listed size, 5.1 in wide, is the smallest we checked for adhesive vinyl. Iron-on needs slightly bolder lines than adhesive vinyl, so for HTV start at 6 in. Going smaller than those can push the grooves and leaf outline below what a blade and a weeding hook can handle.
| Project | Width | Material |
|---|---|---|
| Treat bag or small gift bag | 5.1 to 6 in | Adhesive vinyl |
| Tumbler or large water bottle | 5.1 in (measure the flat area first) | Permanent vinyl |
| 8 to 10 in wood round | 5.5 to 7 in | Permanent or removable vinyl |
| Youth shirt | 7 to 8 in | Iron-on |
| Adult shirt or tote | 9 to 11 in | Iron-on |
| Window or wall decal | 6 to 12 in | Removable vinyl |
| Porch board | 10 in and up | Outdoor-rated permanent vinyl |
Anything wider than about 11.5 in won’t fit a 12 x 12 in mat, so larger porch pumpkins need a 12 x 24 in mat.
Ways to use the set
A pumpkin patch porch board. Cut all three at different widths (say 7, 9 and 11 in) and stagger them down a tall board. Because they share an outline, the mismatched sizes still read as one group.
A glowing jack-o’-lantern. Stick a scrap of yellow vinyl where the face will go, then lay the orange jack-o’-lantern over it so the yellow shows through the eyes, nose and grin. The yellow patch only needs to cover the face, not the whole pumpkin. On fabric, the same idea works with two colors of iron-on; press the yellow patch first, then the orange pumpkin, following your HTV maker’s instructions for layering.
For a baby’s first Halloween, our Little Pumpkin SVG is sized for a onesie.
If a ribbed groove tears or lifts while you weed, the blade probably didn’t cut cleanly through the vinyl along that narrow slot. Run a small test cut on the same material and check Cricut not cutting all the way through before recutting the whole pumpkin.
Questions
Can I put these pumpkins on a shirt?
Yes. Cut them from iron-on at 6 in wide or larger, mirror the design before cutting, and press with the settings from your HTV maker or the Cricut Heat Guide.
Do these pumpkin files work with Silhouette?
The SVG opens in Silhouette Studio Designer Edition and above. The ZIP also includes a DXF for the free Basic Edition, which opens as cut lines you can fill yourself.
Can I sell things I make with these pumpkin SVGs?
Yes, up to 500 handmade physical items per design. You can’t resell or share the digital files themselves. The full terms are on our license page.