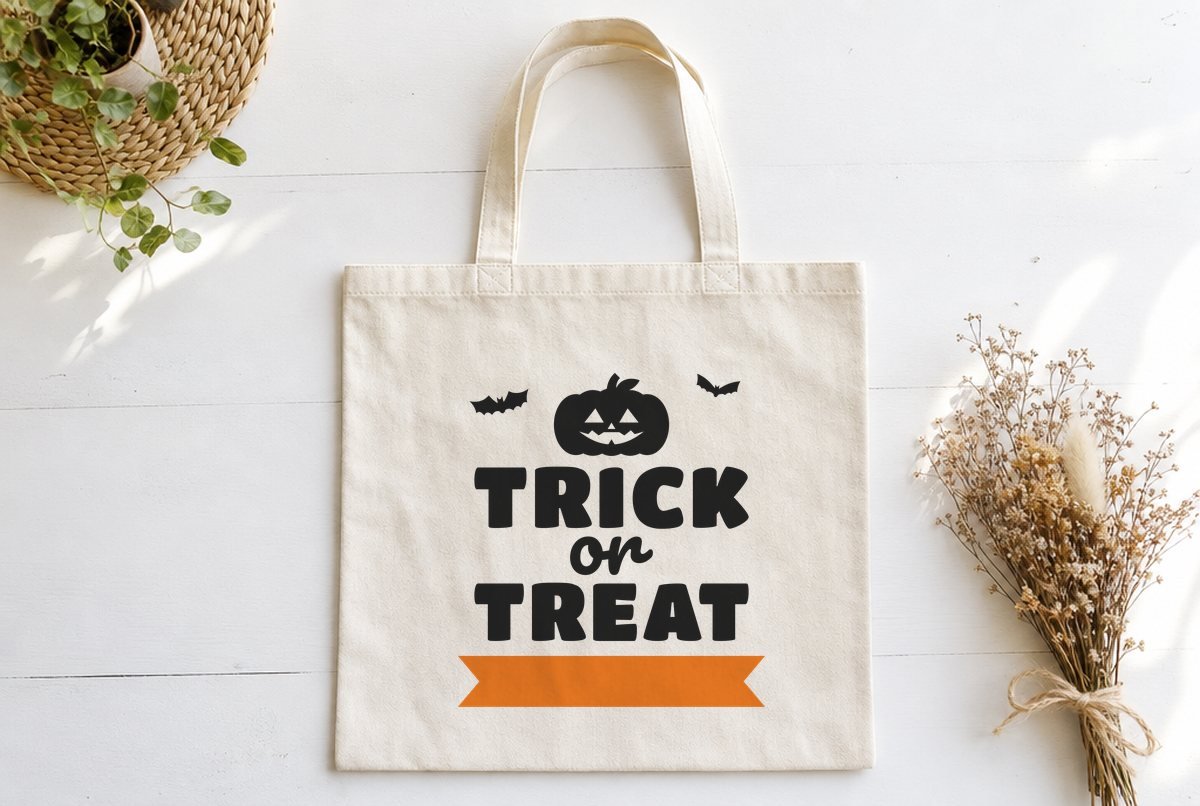
Twelve kids at the curb, twelve orange plastic pumpkins. A name on the bag fixes the mix-ups and makes it feel like theirs. This Trick or Treat bag SVG puts a grinning jack-o’-lantern and two bats over bold TRICK or TREAT lettering, with an empty ribbon banner at the bottom for the name.
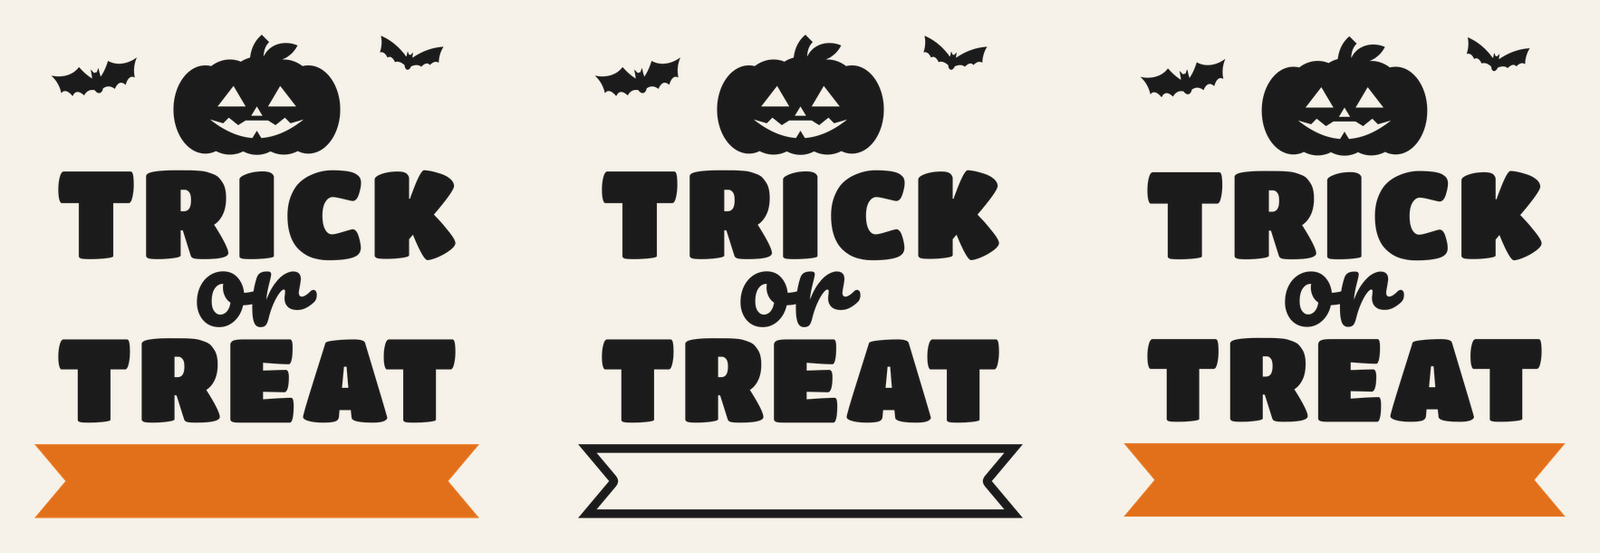
It’s built for iron-on on a canvas tote or treat bag. There are three files: a two-color version with a solid orange banner at 10.12 x 11 in, the same size in one color with an outline banner, and a small-bag version of the two-color design at 7.12 x 7.75 in.
| File | Size | Material | Layers | Check |
|---|---|---|---|---|
| Trick or Treat bag, 2 color with name banner (10 in) | 10.12 × 11 in | HTV (iron-on) | 2 layers | ✓ Cut-checked |
| Trick or Treat bag, 1 color, outline name banner (10 in) | 10.12 × 11 in | HTV (iron-on) | 1 layer | ✓ Cut-checked |
| Trick or Treat bag, 2 color with name banner (small bag, 7 in) | 7.12 × 7.75 in | HTV (iron-on) | 2 layers | ✓ Cut-checked |
What’s in the design
TRICK and TREAT are set in Titan One, a round-cornered heavy font, with a small script “or” in Pacifico between them. The pumpkin sits on top with its face cut out: triangle eyes, a triangle nose and a toothy grin. The face holes are what you weed, so the bag color shows through as the face. The two bats on either side are separate little pieces, one tilted each way.
The banner is the part you finish yourself. In the two-color files it’s a solid orange ribbon on its own layer, about 10 x 1.66 in on the big file and 7 x 1.16 in on the small one. In the one-color file it’s a black outline with the middle open, so the name goes inside the frame in the same color as everything else.
Every layer was checked against our iron-on minimums at the listed size and passed. That includes the pumpkin’s teeth and the little bats, which are the smallest parts. The name isn’t part of that check, since you type it in, so the sizing advice below matters.
What you need
- Iron-on (HTV) in black, plus orange for the two-color files
- A canvas tote or fabric treat bag
- Standard grip mat
- Weeding hook
- Heat press or household iron, and a pressing cloth
- The free fonts Pacifico or Luckiest Guy installed on your computer (optional, for the name)
Adding the name
Design Space can use fonts installed on your computer; in its font picker they show up as system fonts. Pacifico and Luckiest Guy are both free Google Fonts, and they match the lettering already in the design. Any bold font works, though. Thin script fonts are the ones to avoid, because iron-on needs thicker strokes than adhesive vinyl.
- Upload the bag file. In Design Space, click Upload, Upload Image, then Browse. The upload guide covers it in detail. Leave it at 10.12 in or 7.12 in wide.
- Type the name. Click Text in the design panel, type the name and choose your font. Set the height to about 70% of the banner’s: roughly 1.15 in on the big banner, 0.8 in on the small one. Center it on the banner.
- Check the joins. A script name should cut as one connected piece. Cricut’s text help says kerned fonts weld automatically where letters touch. If your name still shows overlapping cut lines, select it and use Weld from the Combine menu at the bottom of the Layers panel.
- Keep it in place. Color the name black so it cuts with the lettering. For the one-color file, select the name and the design and click Attach in the Layers panel so the name stays inside its frame on the mat. Our guide on weld vs attach vs group explains the difference.
- Mirror and cut. Click Make. Picking an iron-on material turns Mirror on for you, but check each mat. Cut shiny side down.
- Weed. Start with the pumpkin face and the bats, then the name. Long names in script have small loops worth checking twice.
A long name needs more width. If it runs past the flat middle of the banner, drop the font size a little or use Luckiest Guy in capitals, which is narrower per letter than a script. Keep it large enough for iron-on; how small vinyl text can go covers the limits by material.
Pressing onto a bag
For the two-color bag, the black name sits on top of the orange banner, so the banner goes down first. Cricut’s layering instructions say to tack lower layers with a short press, peel the carrier once cool and give the top layer the full press. Press the orange banner briefly, then lay down all the black pieces together and press.
Canvas is thicker and stiffer than a T-shirt, so look up your bag’s material in Cricut’s Heat Guide rather than reusing shirt settings. Put something flat and heat-safe inside the bag so you’re pressing one layer of fabric, and keep the seams out from under the press. Applying HTV with a household iron covers the iron method if you don’t have a press.
Many cheap party-store treat bags are coated or partly synthetic and can melt or scorch under heat. Check the bag’s label or ask the seller what it’s made of, and do a test press in a hidden spot before you press the design on.
Which file for which bag
| Bag | File | Width |
|---|---|---|
| Standard canvas tote, about 15 in wide | 10 in, 1 or 2 color | 10.12 in |
| Large tote or pillowcase bag | 10 in, scaled up | 10.12 to 12 in |
| Small kids’ bag or drawstring bag | 7 in, 2 color | 7.12 in |
The 7 in file is the smallest size we checked. Going smaller shrinks the bats and the pumpkin’s teeth past what cuts cleanly in iron-on.
Other ideas
Try orange lettering on a black bag with the banner in purple or lime green. Glow-in-the-dark iron-on for the name helps with a kid who’ll be out after dark, but follow its own maker’s instructions, since specialty iron-ons can press differently. The same file cuts in adhesive vinyl for a treat bucket or a candy bowl; don’t mirror it for that.
For a door that matches the bag, the round Trick or Treat door sign SVG uses the same phrase.
Questions
How do I add a name to the trick or treat bag SVG?
Use the Text tool in Design Space, pick a bold font like Pacifico or Luckiest Guy, and size it to about 70% of the banner height. Script letters should weld into one piece; use Weld if they don’t.
What size should the design be on a tote bag?
Use the 10.12 in file on a standard tote and the 7.12 in file on a small kids’ bag. Both were checked for iron-on at those sizes.
Can I use HTV on a canvas treat bag?
Yes, on cotton or canvas. Look up the bag’s material in Cricut’s Heat Guide and test first on coated or synthetic bags, which may not take heat.